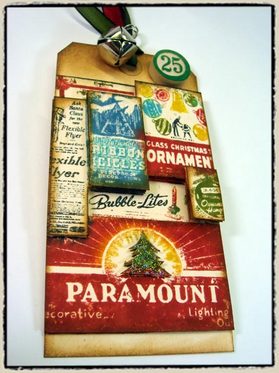
 "Christmas memories" – tim holtz 2007
supplies:
craft sheet (ranger)
archival ink pad (ranger)
distress re-inkers: fired brick, mustard seed, faded jeans, peeled paint, black soot (ranger)
distress ink: brushed corduroy (ranger)
ink blending tool & foam (ranger)
cut n’ dry FELT (ranger)
stickles (ranger)
stamp set (stampers anonymous)
scissors (tonic studios)
double stick foam tape or glue dots
tags and embellishments
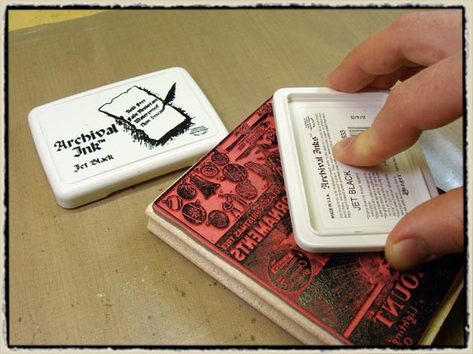
step 1: ink stamp completely with archival ink (*tip: any other permanent and waterproof ink will work for this step)
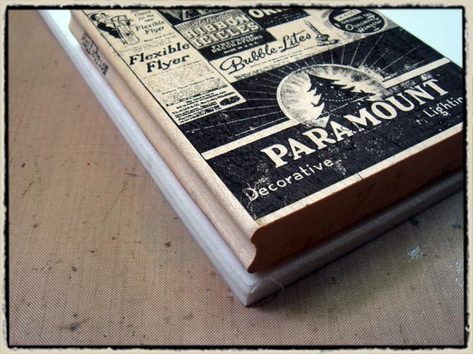
step 2: square the BLOCK of the stamp on to a corner of your cut n’ dry felt pad with the felt/fabric side facing up and stamp image (*tip: be sure to use pressure to do this as the cut n’ dry is squishy)
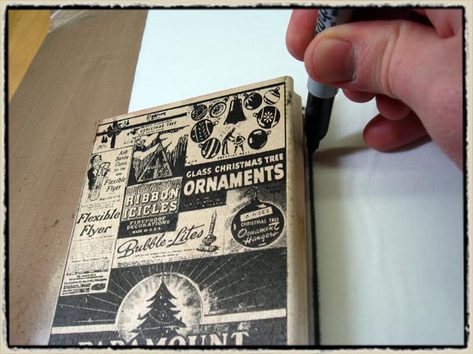
step 3: while stamp is STILL on the felt, trace around the block with a marker. lift off stamp and wipe clean. cut out with scissors. (*tip: this will make sense later, promise)
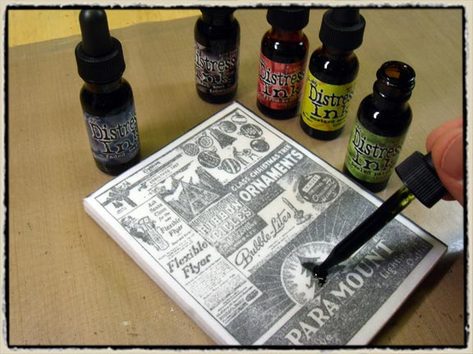
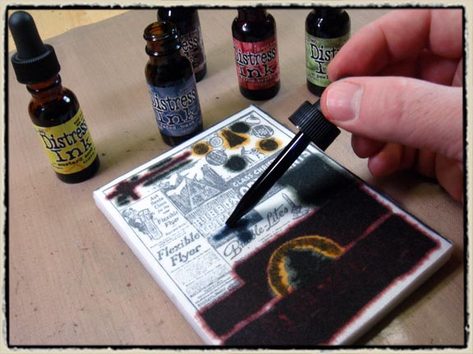
step 4: using distress re-inkers begin coloring your stamped image whatever color you want each area to be – here’s how: when inking your image be sure to ink ON the stamped lines and not inside the lines (fight those grade school urges to "color inside the lines"!). keep in mind that we creating a stamp pad so the ink will start to spread as soon as you apply it to the pad so you need to work quickly (*tip: i like to use distress or adirondack reinkers for this technique as they both have detailed applicators. just make sure you are using water based dye reinkers for this technique).
step 5: continue inking your pad coloring the stamped image.
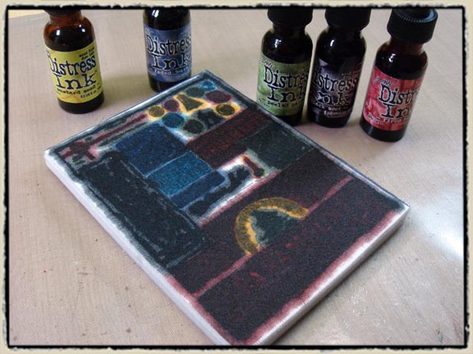
step 6: ink until your entire stamped image is finished, do not be concerned about inside the lines of your image – ink will spread there anyways and it doesn’t matter. the best part about cut n’ dry felt is that when 2 colors of inks meet up they WILL NOT cross over each other! weird i know, but the cut n’ dry felt suspends the inks and they won’t contaminate. that’s why it’s so important to work quickly so each color can "stake it’s claim" on the pad so to speak. also remember that if you want an area of your stamp to be black, you need to ink it black (*tip: if you happen to get a color where you don’t want it, you can always re-ink over that area as long as your using a darker color ink)
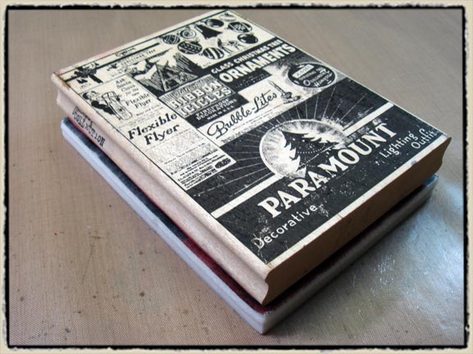
step 7: once the image on your cut n’ dry is all inked it’s time to try it out – are you ready? okay so this is where that whole draw with a marker and cut out come into play because your "custom" ink pad should be the same size as your stamp block – right? so all you have to do for lining up your image is to stack your stamp block on top of your cut n’ dry pad and it’s lined up. (*tip: if you are using a clear stamp or ez-mount stamp on a clear block, make sure you position your stamp on the block the same way each time so it lines up)
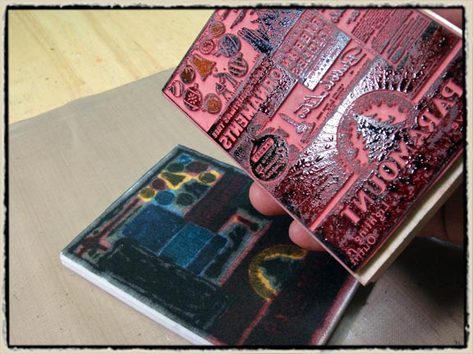
step 8: tap the stamp on the custom pad several times to ink up the stamp – look at the stamp to make sure everything is inked up and ready to go (*tip: i don’t like to press down hard as this is a freshly inked stamp pad and it could get messy, so just tap it)
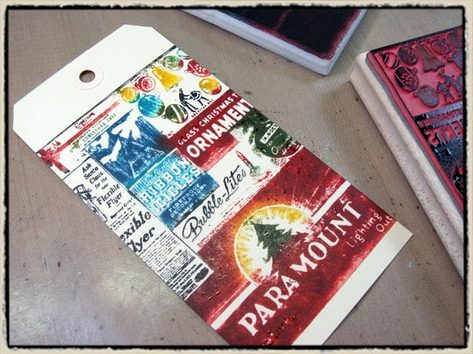
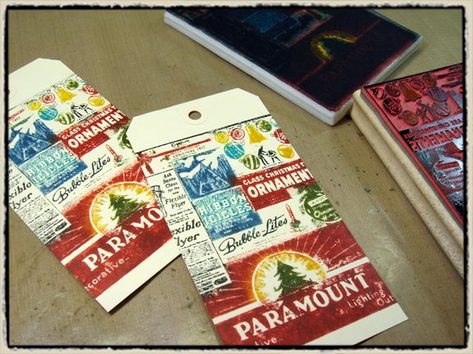
step 9: stamp your image on to the tag. WOW-check it out! everything is colored already – woohoo! no more endless coloring with markers and huffing and puffing on your stamp!
step 10: re-ink your stamp again by tapping it back on your pad – remember to keep track of which is the top and bottom of the pad so everything lines up and stamp the image again on another tag. (*tip: i like to make a mark on the top side edge of my custom pad with a sharpie as the inks will bleed out to all the edges and sometimes it’s difficult to figure out)
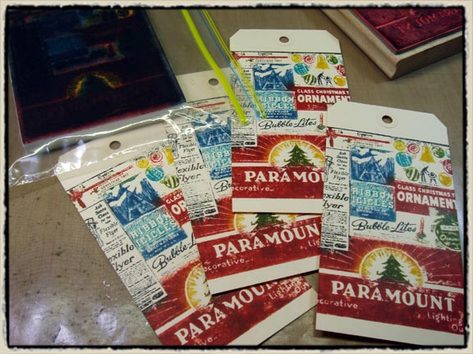
step 11: repeat above steps one more time so you have 4 tags stamped. if you were creating single layer cards or tags you could just keep inking and stamping, inking and stamping – i’ve gotten over 100 stampings from one inking of the pad…. (*tip: for storage of your custom ink pad, place in zip-lock bag or something air-tight. i also like to stamp the image once more and stick it to the outside of the bag to remember which stamp the pad if for. over time the pad will look very inky, but not to worry it will work great next time you go to use it! as for re-inking the pad, when the pad dries up re-ink it using the same inks as you did initially. you may also want to write which colors of ink you used on the back of the stamped sample – just a thought!)
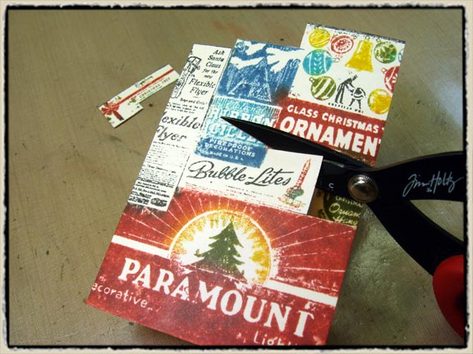
step 12: now that our images are stamped and already colored, we are ready to layer them for a dimensional tag. set aside one tag for our background. on the second tag, cut out the "bubble lights", and "Christmas tree" sections – this is LAYER #1. (*tip: having a good pair of scissors is a good thing, having a GREAT pair of scissors is the best which is why i love my scissors from tonic. they are self-sharpening (that’s right), non-stick, and they cut with detail and comfort! – a shameless plug i know, but if you’ve ever used these you know exactly what i’m saying…)
step 13: on the third tag, cut out the "flexible flyer", "ribbon icicles", "ornaments", and "ornament hangers" sections – this is LAYER #2.
step 14: on the fourth tag, cut out the "ribbon icicles" and "ornament hangers" sections only – this is LAYER #3.
step 15: using your scraps from other tags, cut out the "tree" from the paramount lighting section.
step 16: ink the edges of all cut layers and background tag with brown distress ink using the ink blending foam and tool. simply tap the tool on to the distress ink pad and lightly rub along edges (*tip: we are only trying to create a slight shadow on the edges, do not over ink!)
step 17: begin layering the tag by adhering the largest cut layer (LAYER #1) to your background tag using foam tape lining up the images with the background ones (*tip: i like using black foam tape or glue dots for layering to create a deeper shadow – and because i don’t like white tape showing – yuck!)
step 18: adhere the next layer (LAYER #2) over the last layer lining everything up.
step 19: adhere the last layer (LAYER #3) over the "ribbon icicles" lining it up, and finally adhere the "tree" over the same tree on paramount lighting box. pretty neat huh? adding just that little bit of distress ink really casts a nice shadow on the layer, and having each layer custom colored couldn’t be easier!
step 20: accent your layers with stickles glitter glue and add any other embellishments – you’re done!
