 "march technique challenge" – tim holtz(c) 2008
supplies needed: craft sheet, distress reinker: walnut stain, spiced marmalade, fired brick, perfect pearls: heirloom gold, perfect copper, forever red, adirondack paint dabber: white, archival ink: jet black, mini misters, heat tool (ranger); the block (soc’s blocks); stamps (stampers anonymous); #8 tag (american tag); embellishments
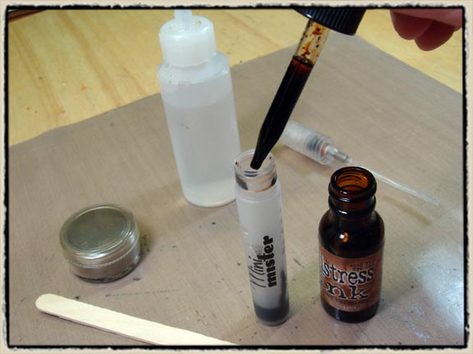
step 1: we are going to make our "pearlized-distress" mist solution first. here’s how: add 1 DROPPER full (not drop) of distress re-inker into an empty mini mister. (*tip: i use distress re-inkers for this because they are a concentrated dye, color stable, so you don’t have to use much ink to get vibrant colors.)
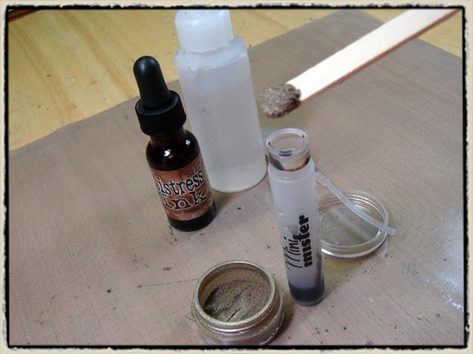
step 2: add a small scoop of perfect pearls to the ink in the mister. (*tip: i like to use the end of a craft stick for this – it fits the mouth of the mister perfectly!)
step 3: fill the mini mister about 3/4 of the way with water, replace the sprayer, and shake the solution up to mix it very well. it’s important the the ink and perfect pearls emulsify. (*tip: you need to leave room in the mini mister to help everything mix together. by emulsifying everything/like salad dressing, it keeps the perfect pearls from separating and NO, it won’t clog these misters – amazing huh?)
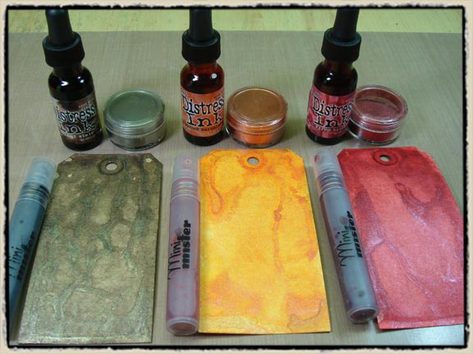
step 4: mix all of your colors: i used walnut stain/heirloom gold, spiced marmalade/perfect copper, fired brick/forever red. (*tip: you can mix up so many of these – the color possibilities are endless)
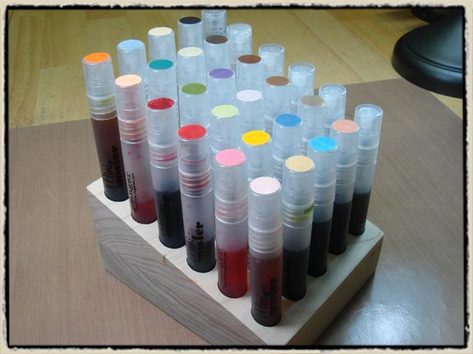
step 5: okay so before we start spraying i just had to show you this COOL holder my friend kim made for the mini misters. it holds 30 misters (that’s all 24 distress colors plus a few extra spaces for water or pearlized mixtures!). it’s also designed so they are on levels like stadium seating so they are easy to get in and out. i’ve labeled mine by stamping the matching color of distress ink and punching it out and gluing it to the top of the mister. so if you plan on making more than one of the these mixtures (and i have a funny feeling you will), get yourself one of these so you can start building your collection. here’s the information to buy one for yourself – it’s called "the block".
step 6: apply white paint dabber to accent stamp by dabbing paint to to stamp covering it completely (*tip: be sure to dab enough paint on the the stamp)
step 7: lightly swipe dabber across stamp to knock down the "peaks" of paint creating from dabbing it on (*tip: always remember to lightly blend the paint on a stamp before you stamp it to avoid blurry stamped images)
step 8: press stamp onto tag and lift off. let dry or dry with heat tool and clean paint off of stamp (*tip: by stamping with paint, the images will appear matte and opaque which provide a great contrast to the background and the paint also works as a subtle resist against distress inks)
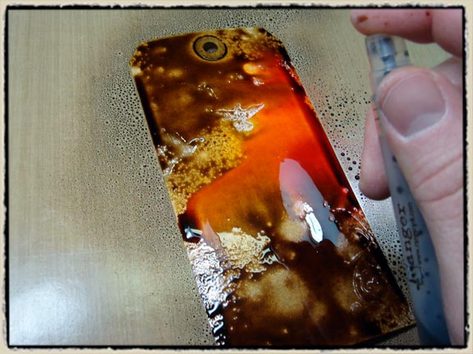
step 9: begin by spraying the pearlized distress mixtures on to the tag. i work with all 3 colors at once to allow them to blend. (*tip: be sure to shake the mini mister each time before you use it to mix everything up)
step 10: dry the tag using a heat tool – this will allow you to move the ink around to create very cool drips and effects, or just let it air dry – see your stamped images reappear???
step 11: stamp accent image using jet black archival ink for contrast. let dry. (*tip: by stamping with ink, the image will take on a pearlized finish from the background)
step 12: embellish the tag.
i hope you enjoy this month’s challenge. the photos on this one really doesn’t do it justice. you’ll see for yourself when you try it out (hint-hint). enjoy your weekend…t!m
