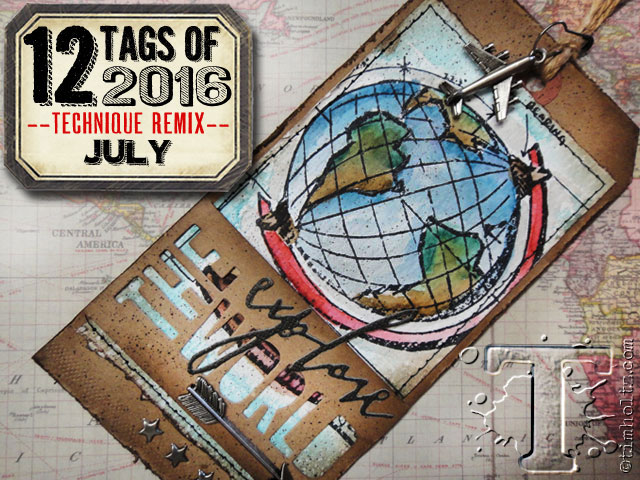
 happy summer! i hope you’re enjoying the sunshine, long days, and warm nights. summertime also means taking time to escape on an adventurous vacation. this tag would be perfect to use in your travel journal, art journal, or scrapbook pages as you document the memoirs of your journey. even if you’re not traveling this summer, take your own artful expedition into your creative imagination and enjoy this month’s technique remix…
supplies:
- surfaces: #8 kraft tag, distress watercolor cardstock, black cardstock
- inks: distress markers, distress ink/walnut stain, distress mixed-media palette archival ink
- mediums: distress micro glaze, mini collage glue stick, distress collage medium/matte, xyron
- embellishments: adornments/arrows/souvenir, star fasteners, loop pin, jute string
- stamps: CMS230 schoolhouse blueprints
- dies: thinlit adventure words: block, thinlits handwritten journey, vagabond
- tools: design ruler, craft knife, craft pick, scissors, paper distresser, waterbrush/detailer/flat, distress marker spritzer, mini ink blending tool, craft sheet, heat tool
- misc: sewing machine

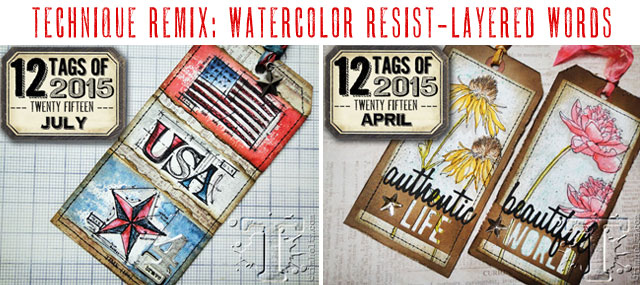
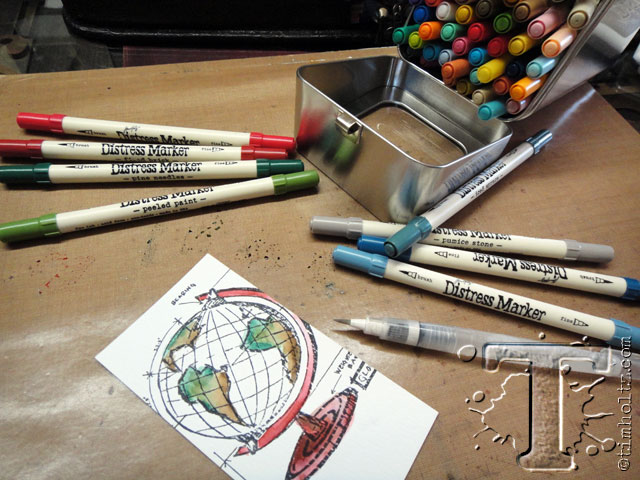 – cut the distress watercolor cardstock approx. 2 7/8″ x 5 1/2″, stamp the image with waterproof ink, and watercolor following the steps from the july tag linked above.
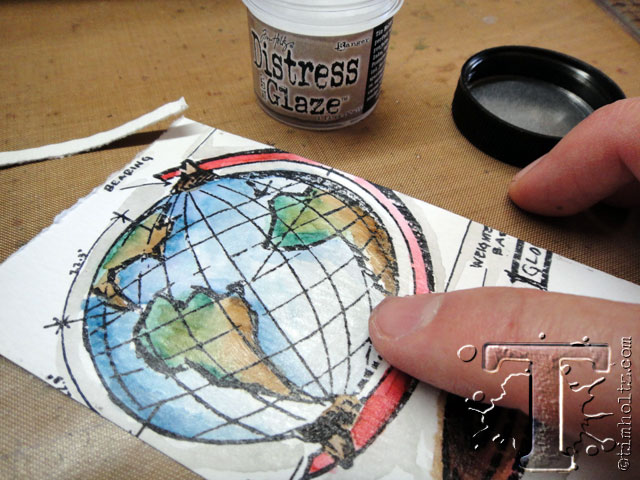 – when applying distress micro glaze be sure to rub it into the surface with your finger, and only apply it to the areas you want to seal and create a resist.
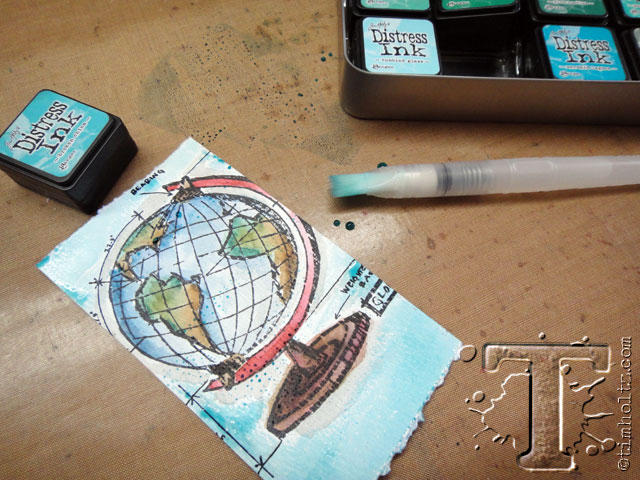 – wash over the entire surface with a wash of ink either using distress ink and a waterbrush, or spray inks. the more fluid the top layer of ink is, the more it will pool up around the micro glazed areas.
 – once the background is dry with a heat tool, distress micro glaze will take additional layers of inks and mediums. lightly spritz dark speckles using the distress marker spritzer for a vintage effect, and ink the edges with distress ink and a mini blending tool.

 – a tip when placing the word dies on the tag is adhere them with a this tape like washi or tissue tape. this will keep them from moving around when you die cut them and allows for easy removal.
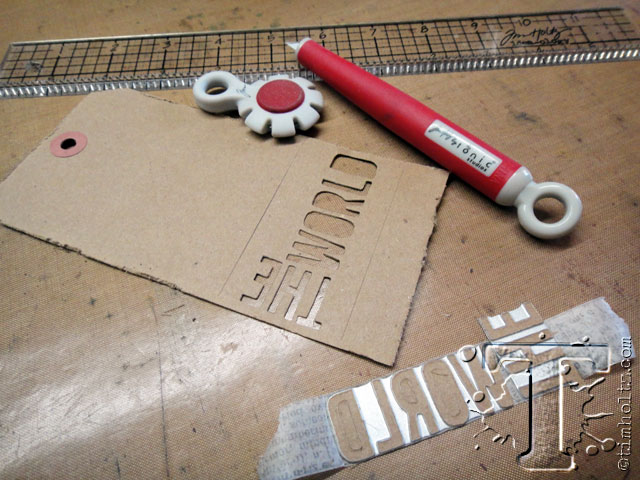 – be sure to work on a cutting mat, use a sharp blade, and leave enough area of solid tag from your die cut letters to avoid tearing when sliding the background through later.
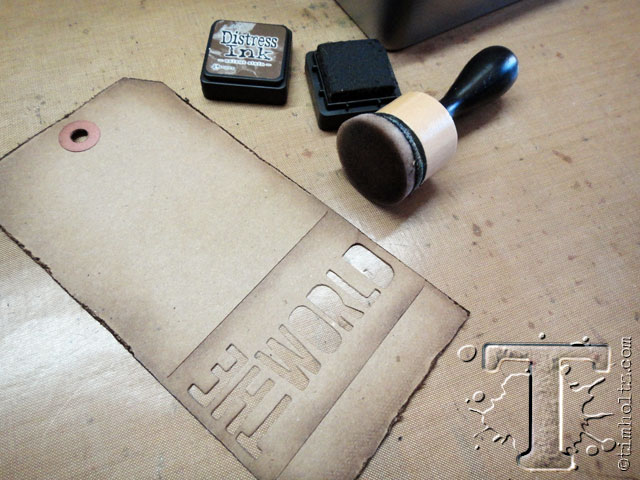 – ink the edges with distress ink using a mini blending tool. also be sure to ink the cut slits since they will become edges as well.
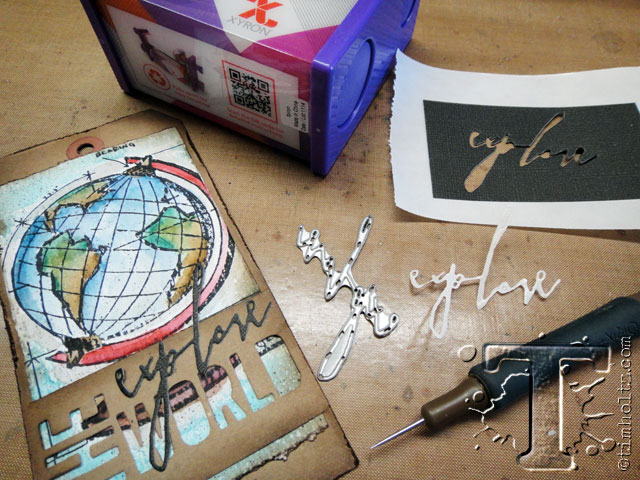 – carefully slide the watercolor background through the tag and adhere to the base tag with a glue stick. when die cutting detailed pieces like the handwritten word, run the cardstock through a xyron to apply adhesive to it before die cutting. this makes adhering the detailed element much easier and mess-free.
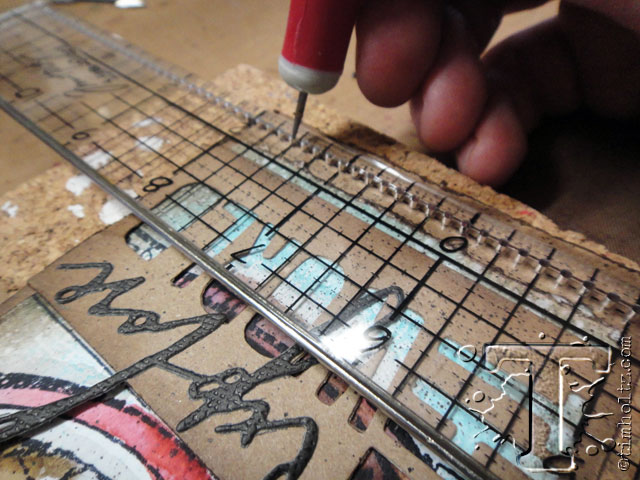 – if you like to use multiple fasteners on a project to embellish and spacing them evenly is important, try using a design ruler and tonic craft pick which allows you to pierce through the ruler. click here to check out a quick video about the many features of the design ruler.
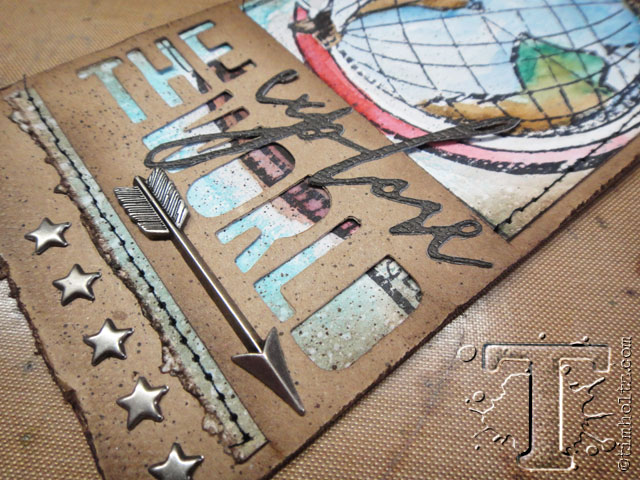 – the details of this tag are really cool with the watercolor background appearing through the die cut words and layered with the written die cut word in black cardstock. i’m also a fan of adding a sewn edge to various areas (it’s easier than you might think), and then of course finishing with some metal accents. who knew combining two simple techniques could create such a dimensional masterpiece..t!m
congrats to the winners from the june 12 tags of 2016. if you see your name (and it links to your tag), please email [email protected] to claim your prize…
1. Stefania
2. Discover the Silver Lining
3. Sunnylee
4. Rita Wright
5. Sarascloset
6. Ellie Knol
7. SewPaperPaint
8. Gitte
9. Suzz’s Stamping Spot
10. Curly Moon Crafts
11. Lisa A Mares
12. Tzong Rong
*be sure to check your local stores for these supplies, or click on the links below to purchase online from Simon Says Stamp with a discount of 10% off your purchase – use code: 10JULYTH7


