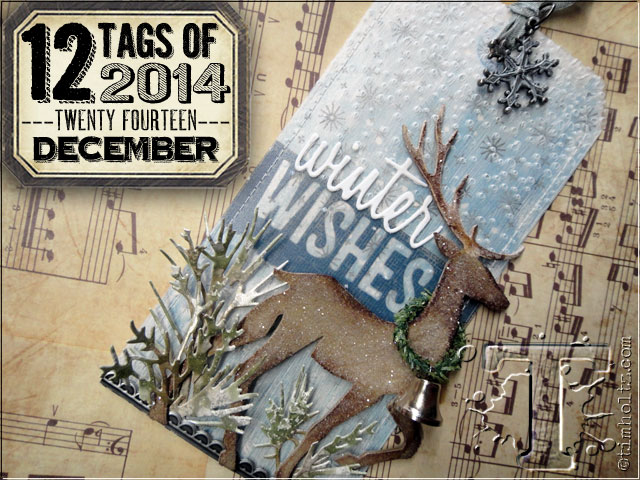
happy holidays! it’s hard to believe that this is the last month of 2014 already? 12 months and 12 tags – how did you do this year? did you take time to create each and every month? these tags are one of the best creative outlets for me since i try to just play and make whatever comes to mind. of course this particular month caught me off guard with the whole 30 days in november thing, but i cranked up the christmas tunes and got to work. i really love how this tag turned out and if you scroll to the bottom of the post, you’ll see that i ended up making two using different palettes. just goes to show that creativity is all about perspective not only with what you look at, but how you see it. i know it’s a busy time of year for everyone, but don’t forget the importance of adding a little festive creativity to your to-do list, you’ll be glad you did…t!m
supplies:
- surfaces: #8 manila tag, grungeboard, frosted, kraft core cardstock, distress specialty stamping paper
- distress ink: walnut stain
- distress spray stain: iced spruce, faded jeans, brushed pewter, bundled sage
- distress paint: frayed burlap, picket fence
- distress glitter: rock candy
- archival ink: watering can
- embellishments: pine twine, snowflake adornment, crinkle ribbon, jump ring, industrious stickers/frames & trims, bell
- adhesives: glue n’ seal, glossy accents, collage glue stick
- tools: craft sheet, mister, heat tool, scissors, mini blending tool, sanding grip, vagabond, sewing machine
- stamps: CMS207 christmas nostalgia
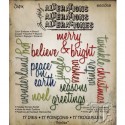
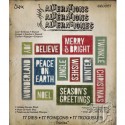
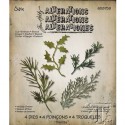
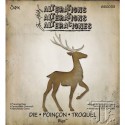
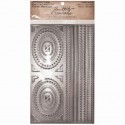
- dies: holiday words: block, holiday words: script, holiday greens, prancing deer, tag & bookplate
- texture fade: snowfall
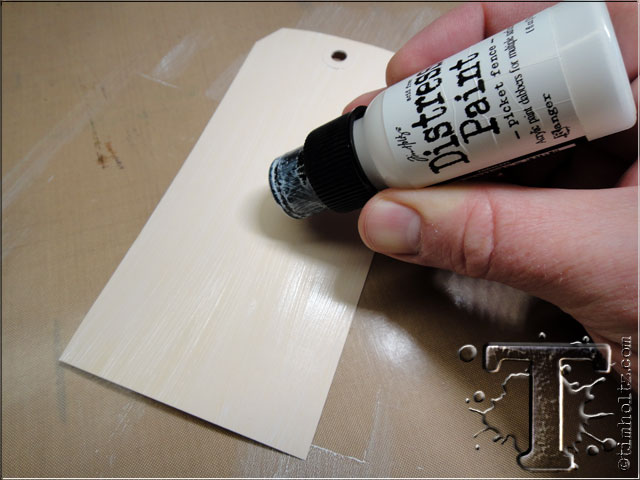
step 1: paint a manila tag with picket fence distress paint and let it dry. this will prime the tag and make our next technique work.

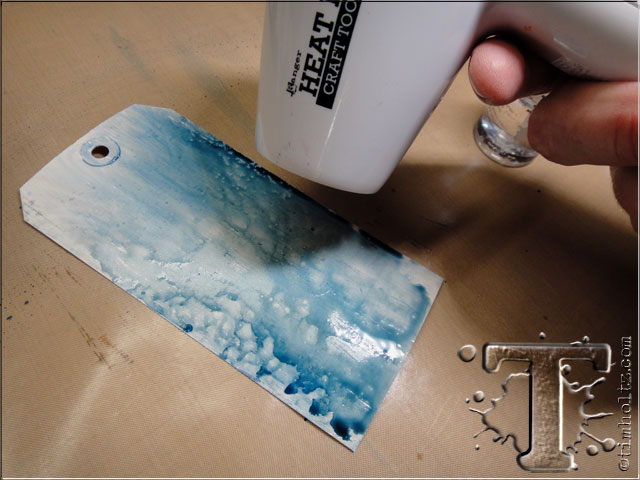
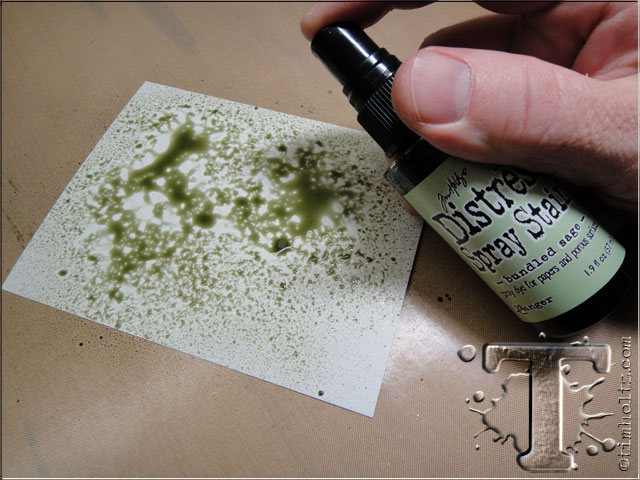
step 2: spray the tag with only a few sprays of distress spray stain.
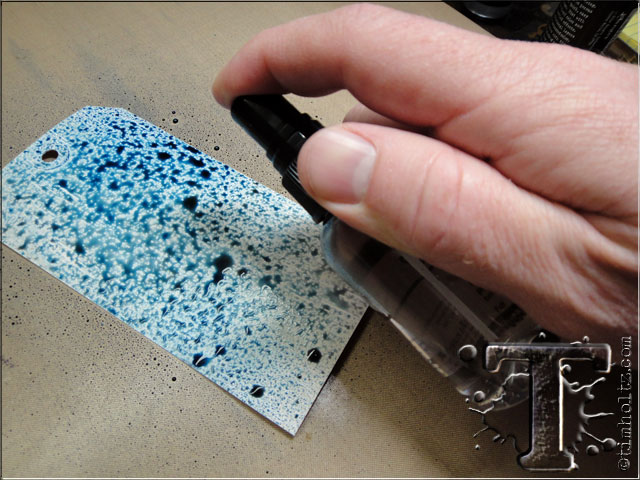
step 3: spray over that with metallic distress spray stain and mist with water to blend.
step 4: hold the tag upright allowing the colors to fade down the tag.
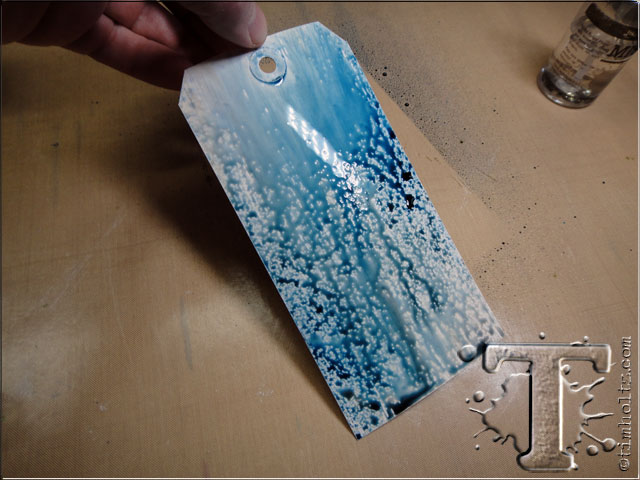
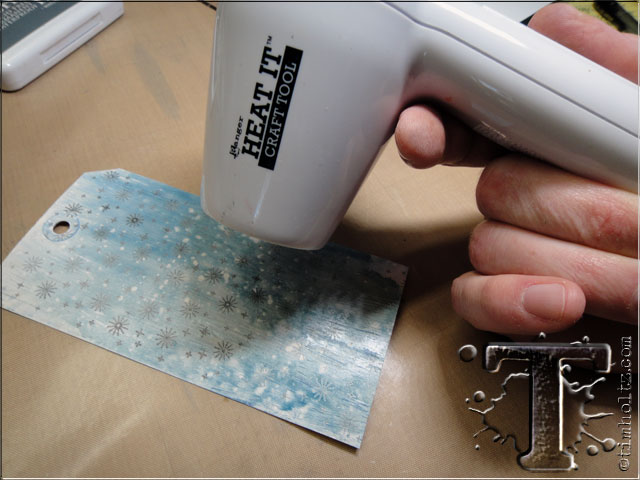
step 5: begin drying the stains with a heat tool.
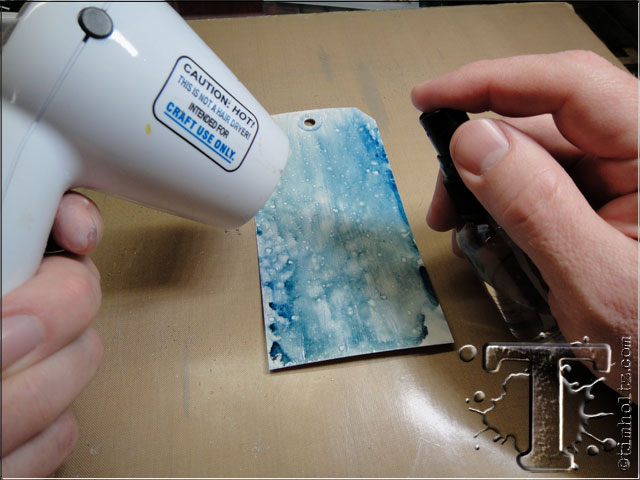
step 6: while you’re drying the inks, tiny “bubbles” will start to open up in the inks revealing the white base coat of paint. *note: to add more of this effect spritz little water droplets and continue to dry.
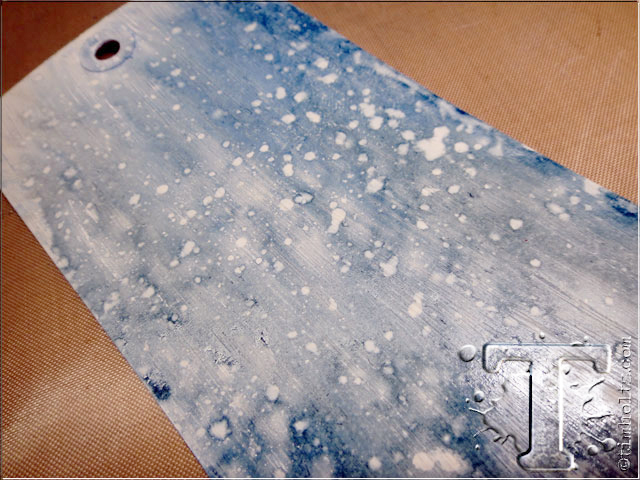
once your tag is dry, this is the cool wintery effect we’ve achieved with distress paint and distress spray stains – neat huh?
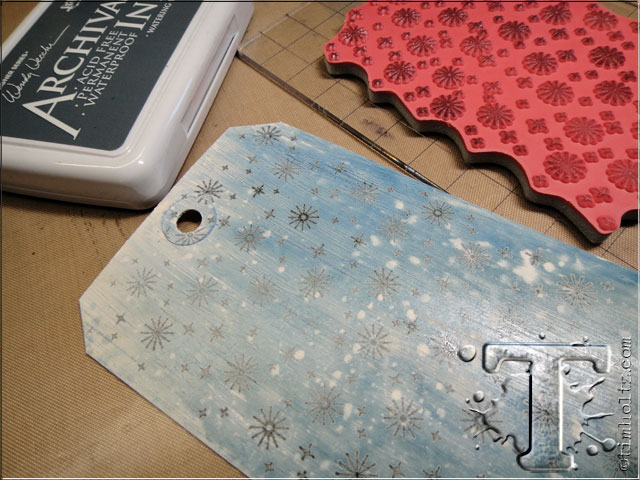
step 7: stamp the sparkles background with archival ink on the background.
step 8: dry the stamped image with a heat tool to avoid the ink smudging.

step 9: die cut the prancing deer from a piece of grungeboard. a tip i have is if you’re cutting a cool silhouette shape from a die, cut your base piece to size so you’ll end up with a usable frame. *note: for this particular tag i think grungeboard is important due to it’s flexibility.
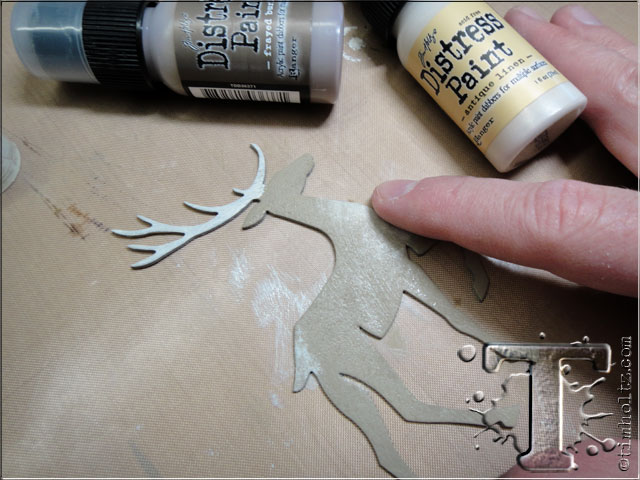
step 10: paint the grungeboard with distress paint, blend colors with your fingers and let dry.
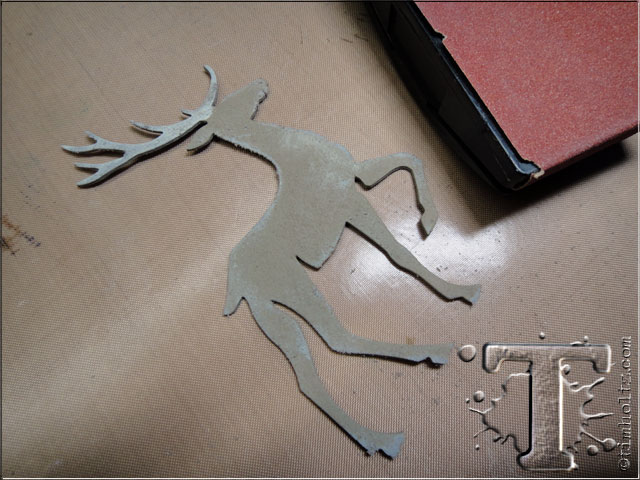
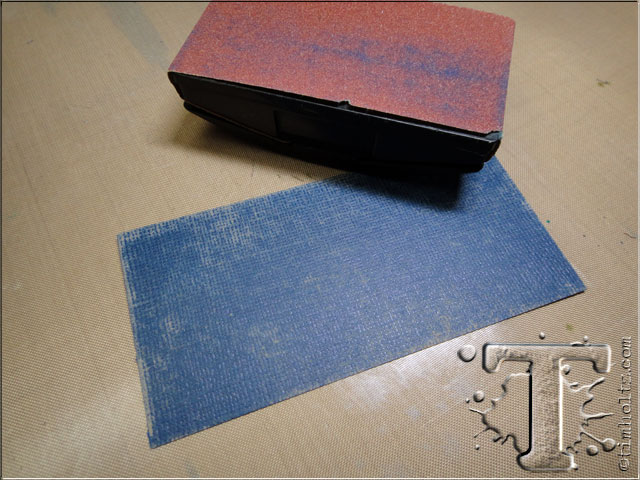
step 11: sand and scuff the edges with a sanding grip to expose the grunge.
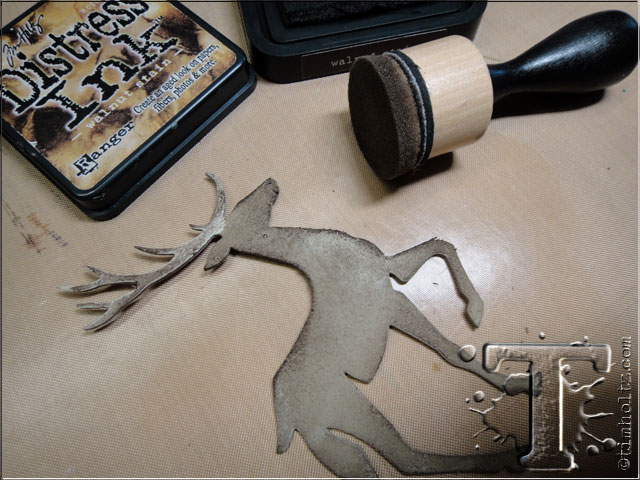
step 12: ink the entire piece with distress ink using a mini ink blending tool. the paint resists most of the distress ink, but the sanded areas are more porous and appear much darker.
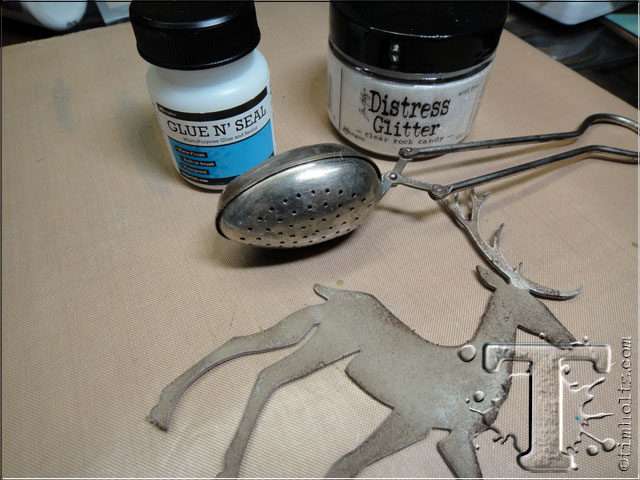
if you like the effects of glitter, but heavy handed like i am, you’re gonna love this next gadget idea i’m sharing with you. gather up the following supplies: glue n’ seal, rock candy distress glitter, and a tea infuser. if you don’t know what a tea infuser is, it’s that cool little spoon with a spring loaded handle, holes in the spoon, and used for making tea. you can buy them at pier one, or find a vintage one like i have on eBay or etsy. wait until to see how it works!!! *note for the purpose of this tutorial i’m just calling it a spoon.
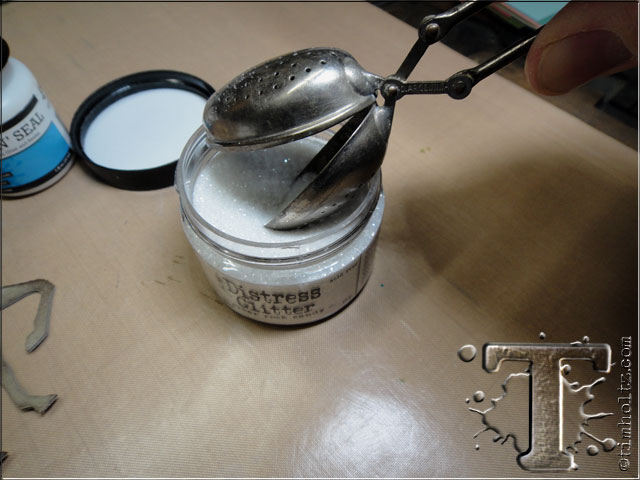
step 13: squeeze the handles together on the spoon to open it and scoop up some glitter. note: when you buy one of these, make sure you get the one with small holes and not the large ones.
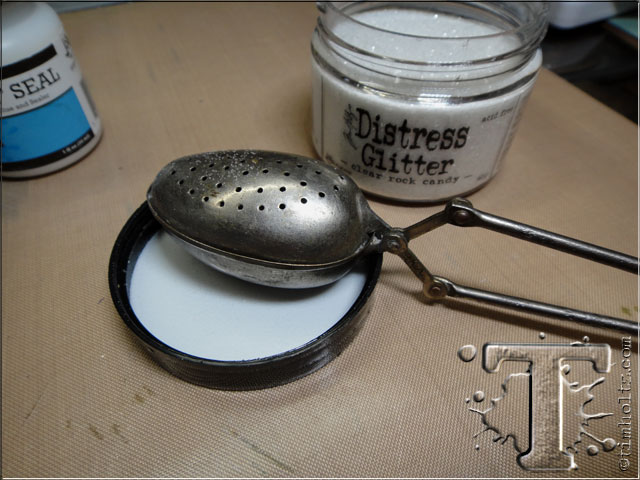
step 14: release the handle and the spoon closes with the glitter inside. you would think the glitter would just pour out, but it doesn’t at all. now set your spoon on the lid of the glitter.
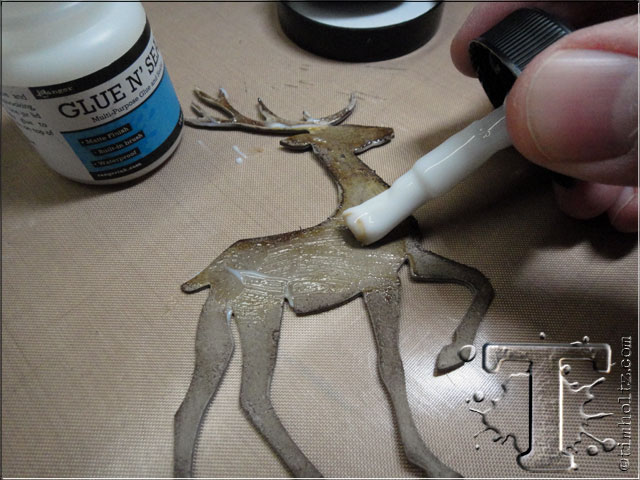
step 15: paint a light layer of glue n’ seal or you can use any other wet adhesive for this, but work quickly and cover everything while the adhesive is still wet.
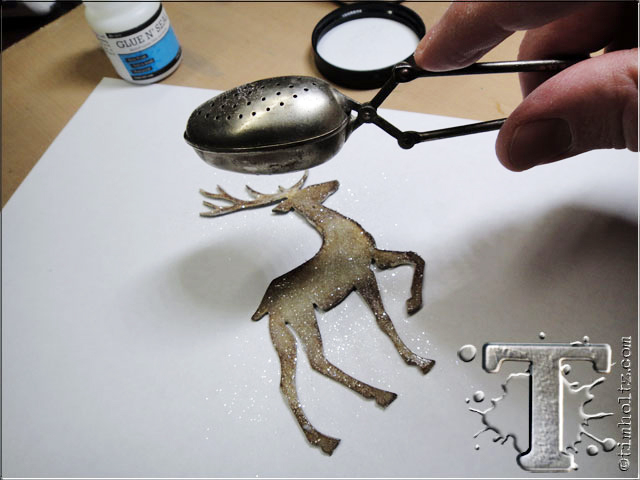
step 16: place the piece on some scrap paper, pick up your glitter spoon and just “tap” the top of the handle with your finger to lightly sprinkle glitter and allow it to fall on your project. so easy to control just a light dusting of sparkle.
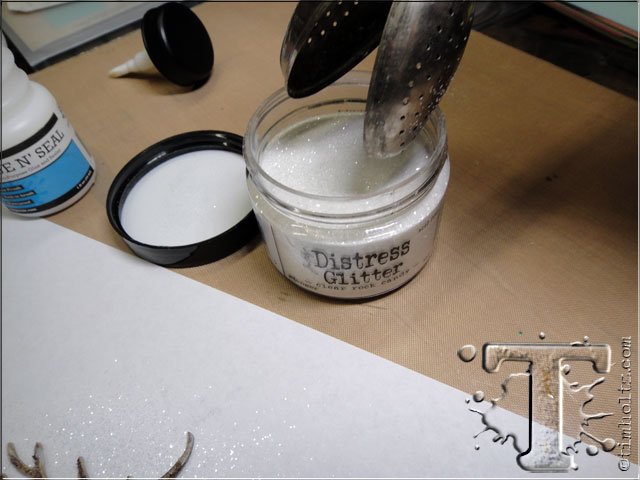
step 17: now place the spoon back over the open jar of glitter, squeeze the handles together again to dump the remaining glitter back into the jar. (have you noticed i’ve not touched the glitter with my hands at all – brilliant huh?)
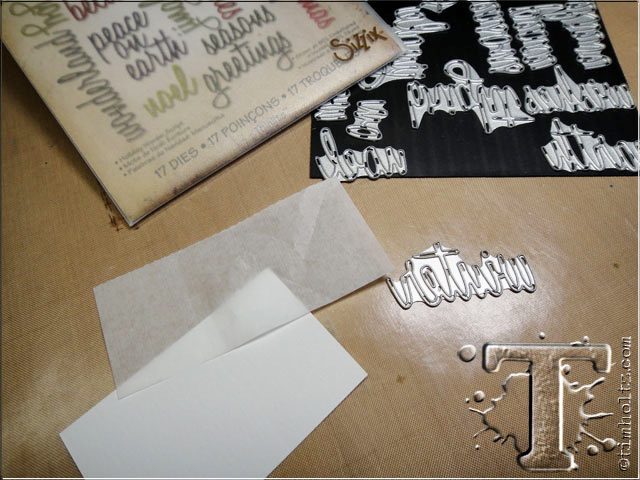
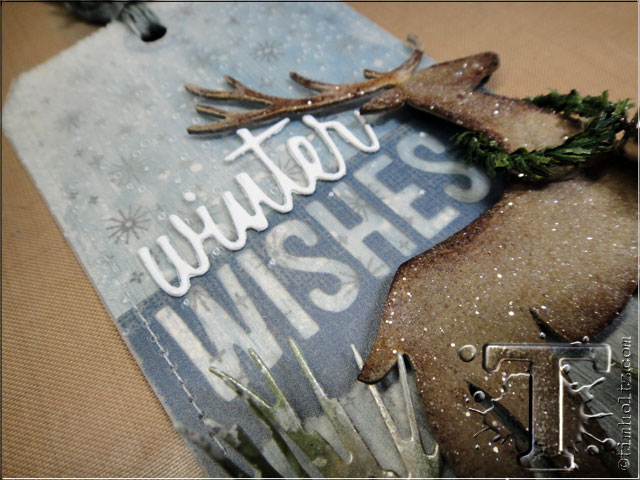
step 18: die cut the word “winter” with one of the thinlit holiday words: script in white cardstock. tip: when using detailed thinlits place a piece of waxed paper between your die and the cardstock so the paper releases from the die much easier.
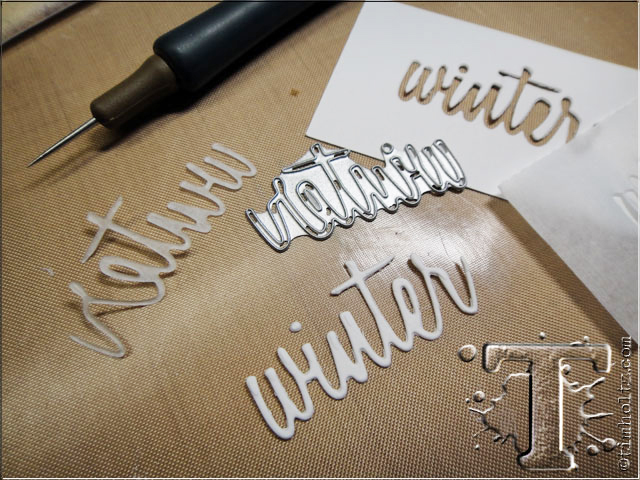
step 19: once you die cut the word, set it aside for later, i just throw away the waxed paper part.
step 20: cut a piece of kraft core cardstock slightly wider than the tag and sand it using a sanding grip to expose some of the kraft.

step 21: die cut the word “wishes” with one of the thinlit holiday words: block in kraft core cardstock. a cool thing about these new thinlits is they come in both block and script with the same word assortment so you can mix and match your words in either fonts.
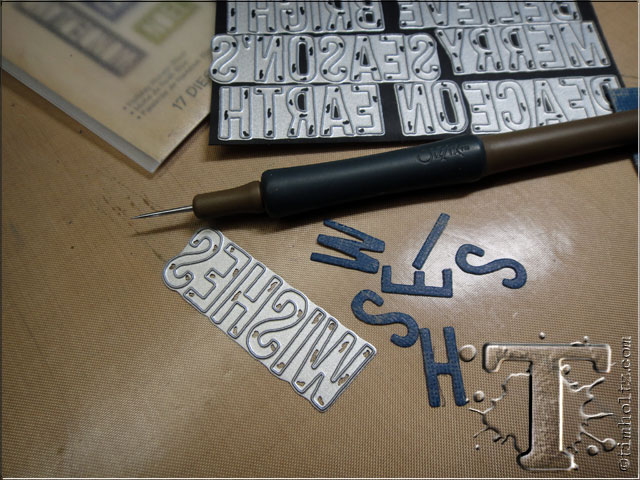
step 22: another thing i like about the block font is you can use the positive and negative. for this tag, i’m using the negative cutout, but i still save the die cut letters for a future project. note: if you want a cool organizing tip for your thin dies like i’m using, check out paula cheney’s post on her blog here…it’s genius.
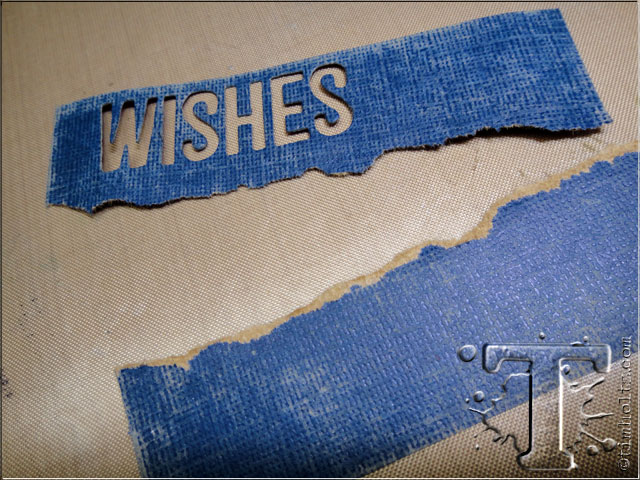
step 23: tear off the bottom edge of cardstock as shown.
step 24: place the strip of cardstock across the tag and place the deer on top for placement and positioning of the word. note: you can see i’ve not glittered the deer at this point (hey, i just figure it out as i go, i told you i don’t have it all planned).

step 25: remove the deer and adhere the paper strip to the tag, trim off the excess cardstock from each edge.
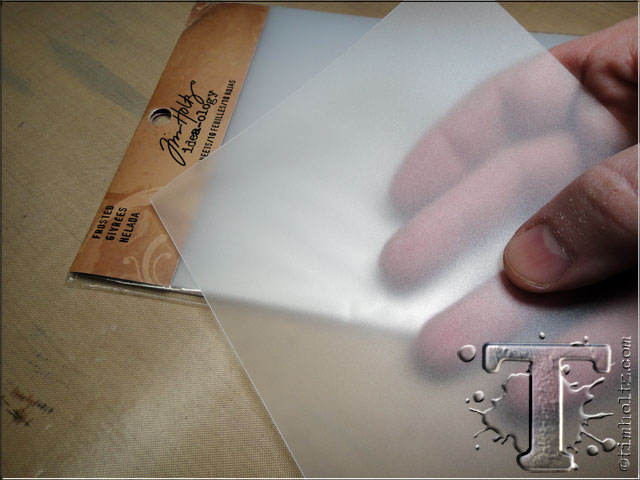
next we’re going to use a new product called “frosted” which are plastic sheets with a frost finish (not to be confused with frosted film which was adhesive backed). these sheets are thicker than the film, perfect for a cool frosted effect, but not adhesive backed.
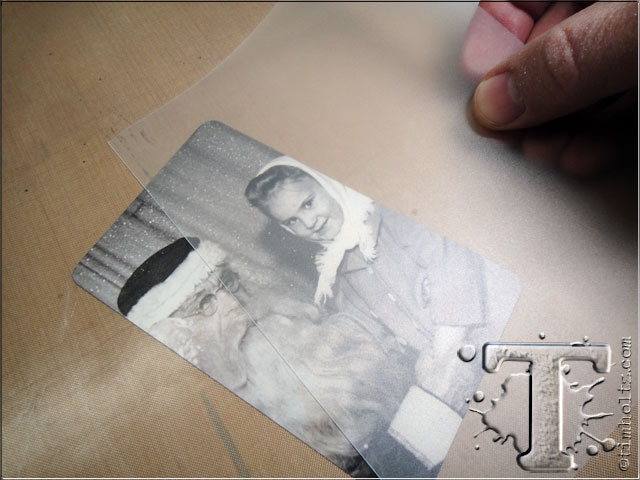
they work great over photos, patterned paper, and backgrounds for a soft diffused look.

step 26: since we’re layering this over the tag, cut the frosted into a tag shape using the tag & bookplate die, or just cut it with your scissors to the size of your base tag, and punch a hole through the top.
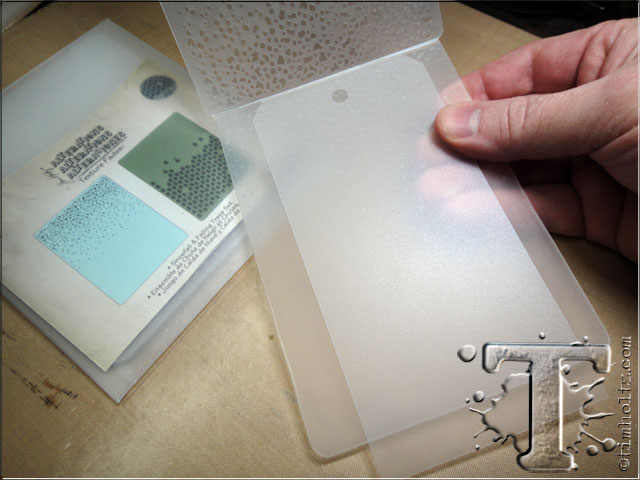
step 27: place the frosted tag into the snowfall texture fade and emboss it.
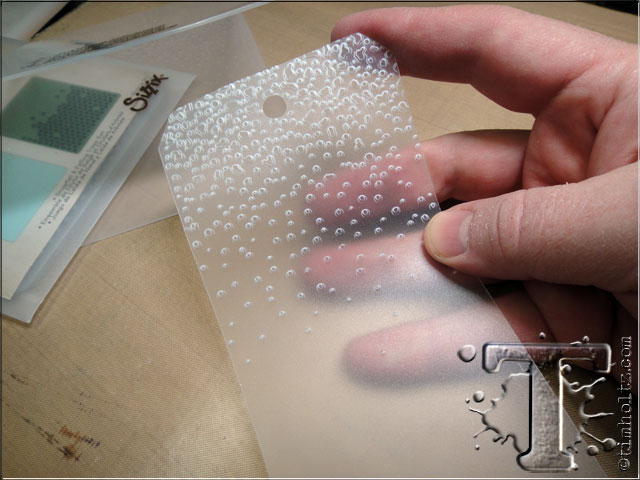
check out what happens to frosted when it’s embossed – it gets even “frostier”!
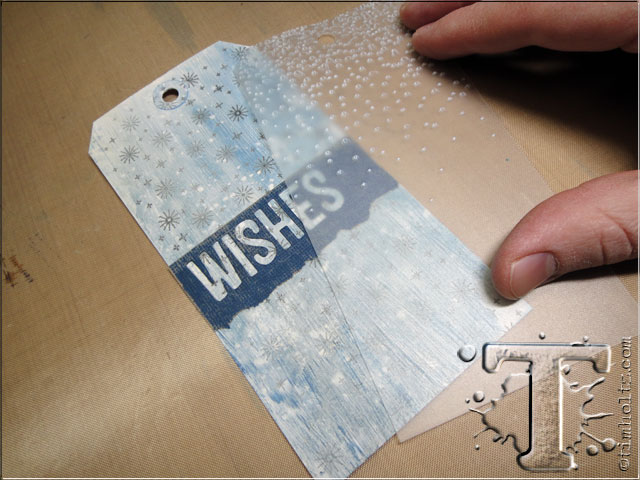
step 28: place the frosted tag over your background tag making sure the bumps are raised on the frosted.
step 29: there are a few ways to attach frosted like thin double-stick tape, or possibly using a tiny attacher, but for this i decided to sew it all around the tag. it’s much easier than you think and looks very neat.
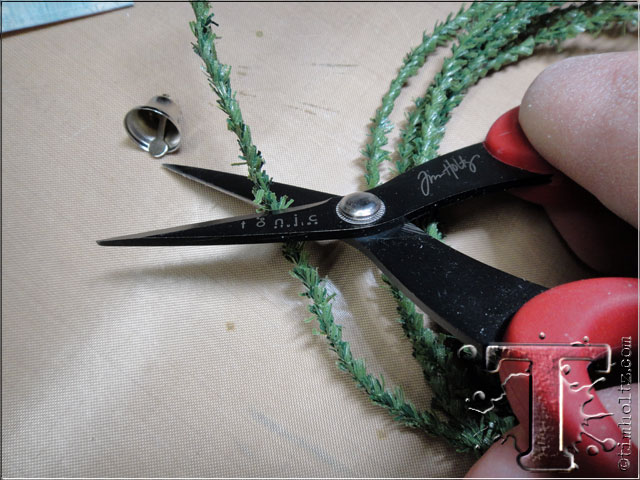
step 30: cut a small piece of pine twine with your tonic scissors.
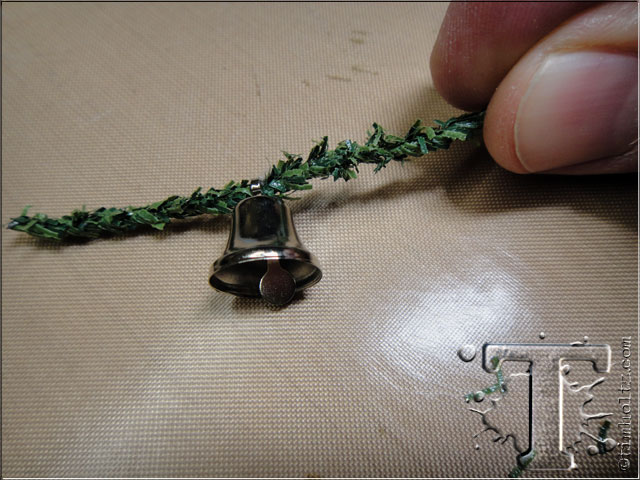
step 31: slide a little bell on it that you can get from any craft store.
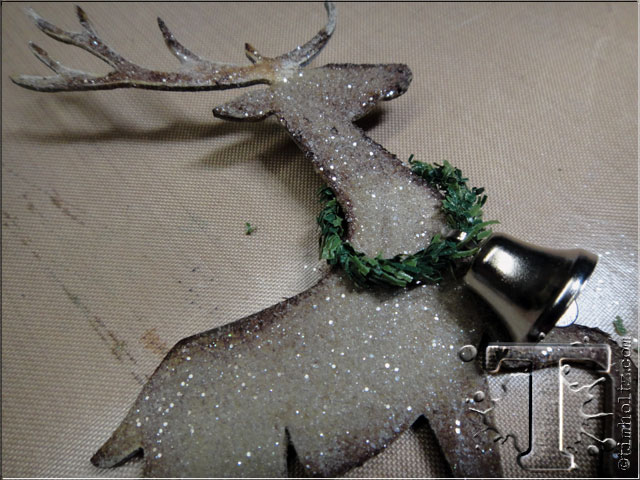
step 32: since pine twine is actually wire, just form it into a wreath to wrap around the neck of the deer – so simple.
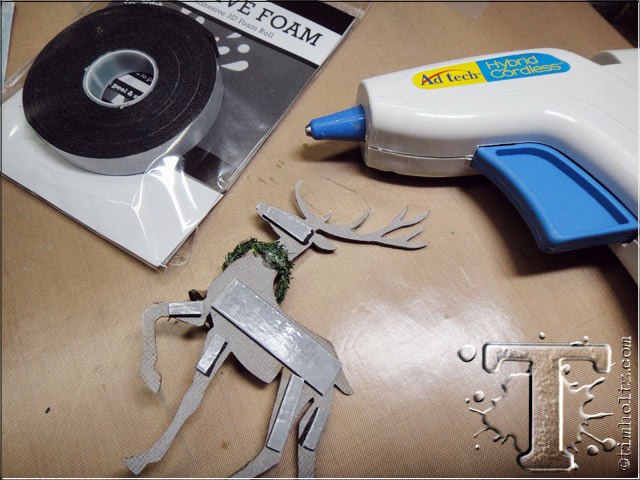
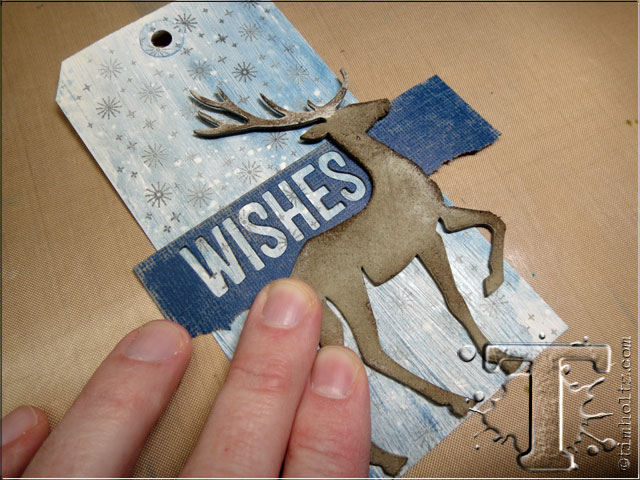
step 33: secure the back of the pine twine with a dab of hot glue and apply foam tape to the back of the deer making sure not to tape the very bottom of the legs (you’ll see why later).
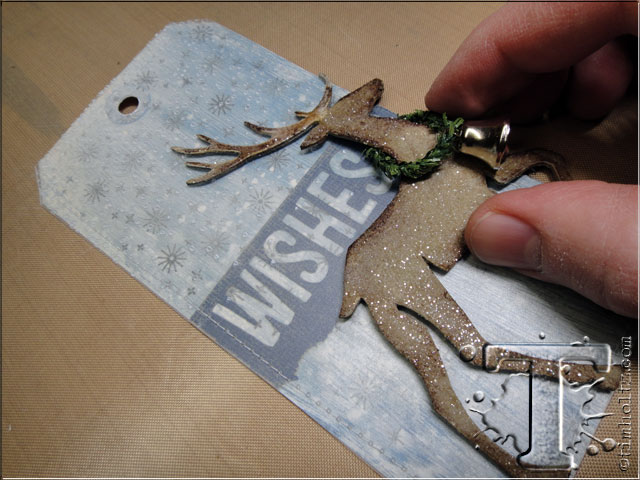
step 34: position the deer on the tag, remove the backing of the tape, and secure into position.
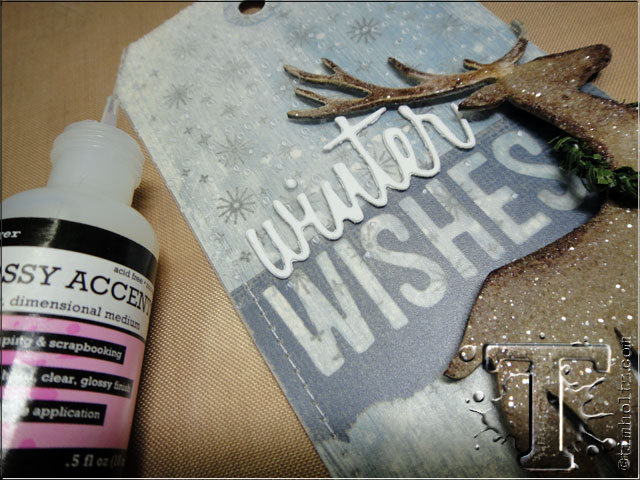
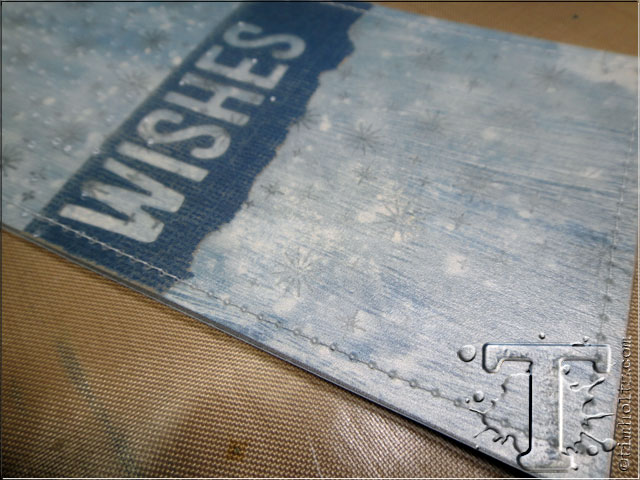
step 35: apply a small amount of glossy accents to the back of the word “winter” and adhere it over the word “wishes”. i love the contrast of the word on top and beneath the frosted.
step 36: spray a piece of distress specialty stamping paper with green distress spray stain.
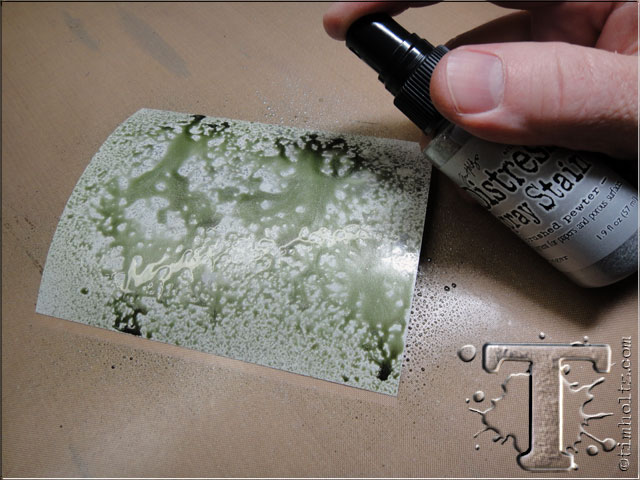
step 37: while the ink is still wet, mist over with metallic distress spray stain.
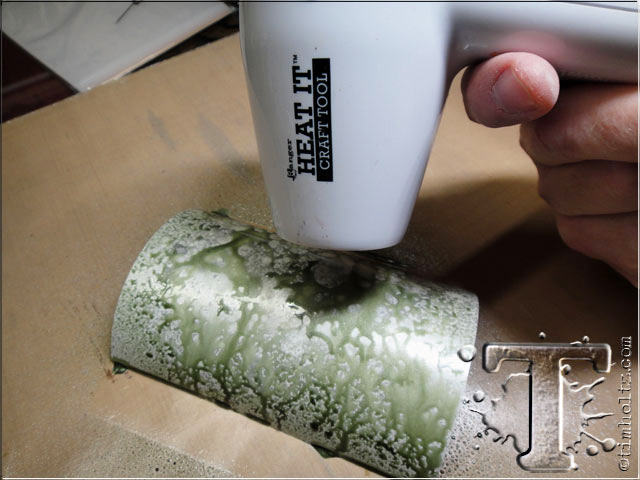
step 38: dry the cardstock with a heat tool.
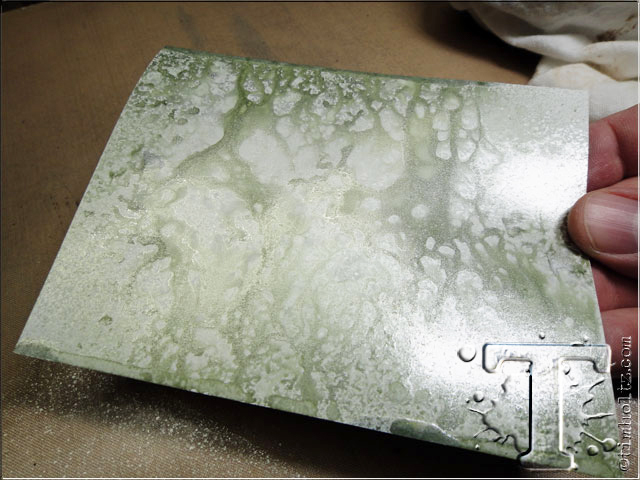
the coating of the specialty stamping paper is unique and creates this cool blending effect without the use of any water.
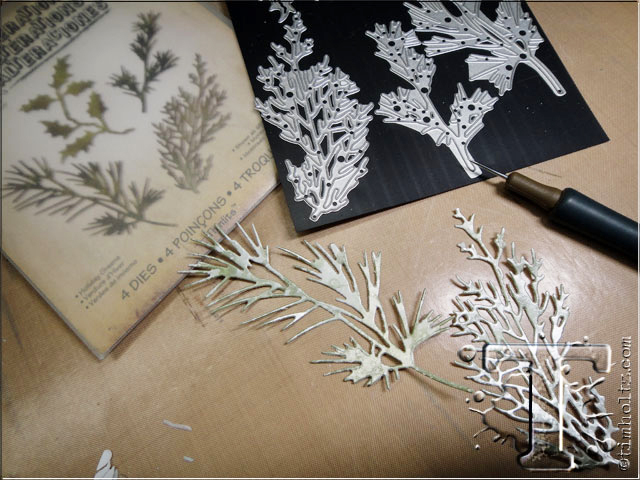
step 39: die cut the paper with a couple of the holiday greens thinlits dies.
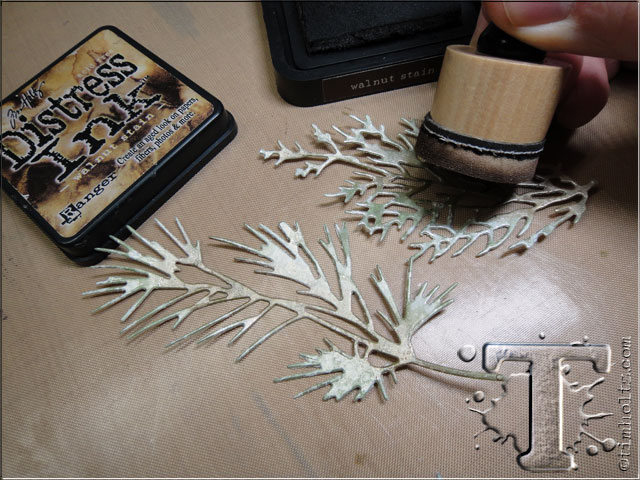
step 40: tap over the cut pieces with brown distress ink using an ink blending tool to provide shading.

step 41: cut the pieces into smaller pieces with your scissors – you can be random with this.

step 42: start adhering the cut pieces to the base of the tag behind the deer hooves (this is why we didn’t tape them in place).
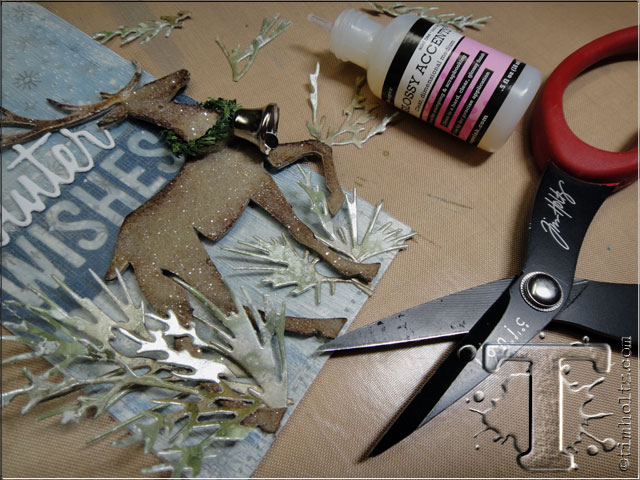
step 43: continue gluing pieces until you’re happy with the look.

step 44: now to cover the cut paper ends, we’re using a strip of industrious stickers.
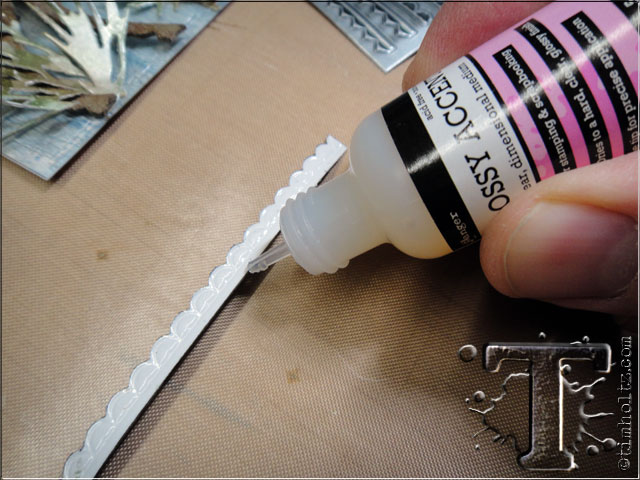
step 45: apply glossy accents along the back of the sticker since we’re not adhering it to a flat surface, the glue is needed.
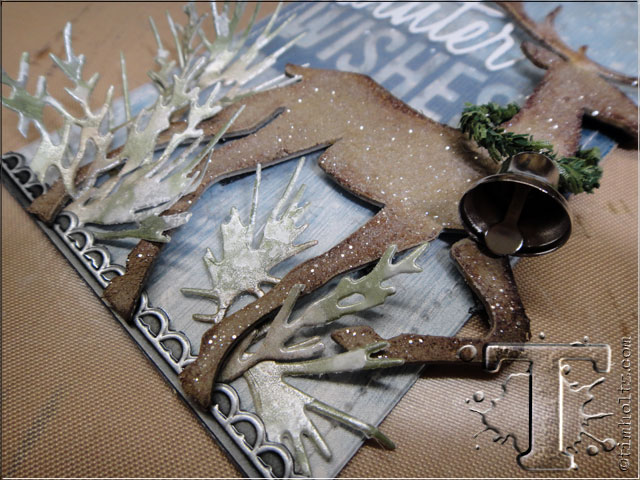
step 46: adhere the trim also sliding it behind the deer, and hold in place for a minute or so to dry.
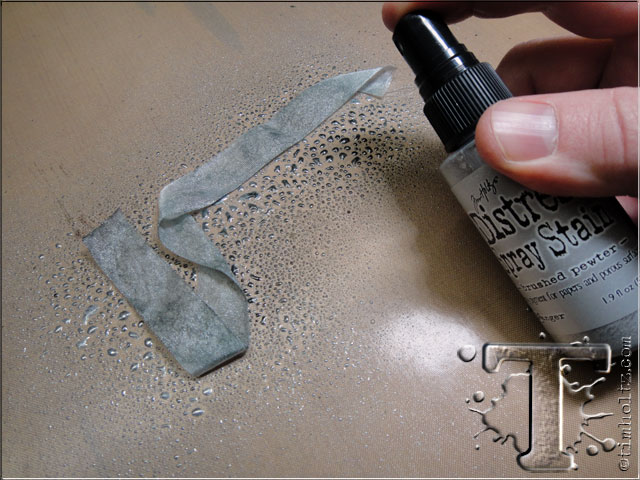
step 47: mist a piece of crinkle ribbon with any color distress stain, and metallic distress stain.
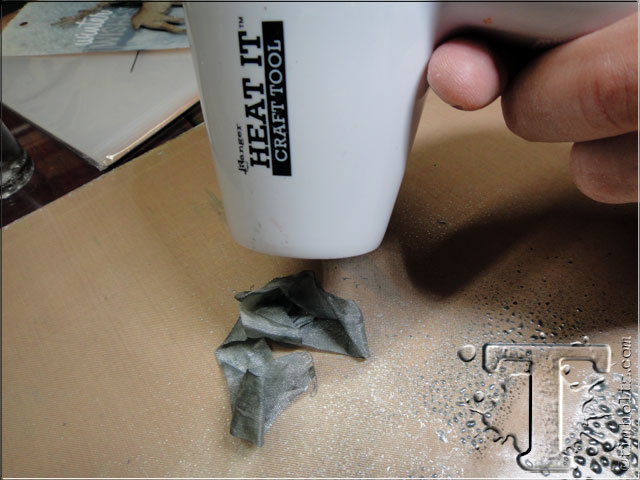
step 48: crinkle the ribbon into a ball and dry with a heat tool to create a metallic ribbon – so easy.
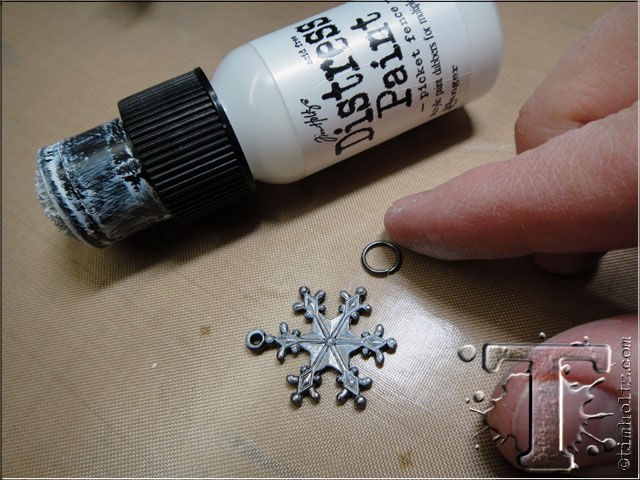
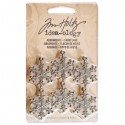
step 49: apply picket fence distress paint to snowflake adornment and jump ring using your fingers.
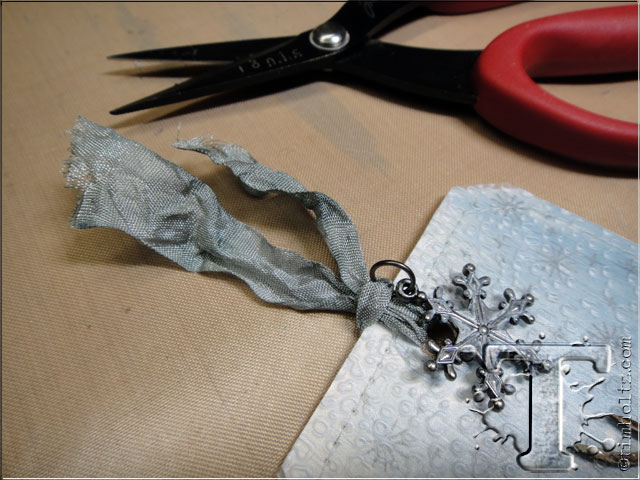
step 50: attach the ribbon through the top of the tag and secure the charm with the jump ring…that’s it!
the details: i love the winter effect of the greenery cut from the specialty paper and inked with the distress spray stains. i also think the shimmery glittered deer adds the perfect touch to this tag.
the details: i can’t wait for you to use frosted and see how cool and subtle the effect is for yourself. it really adds depth to this background.
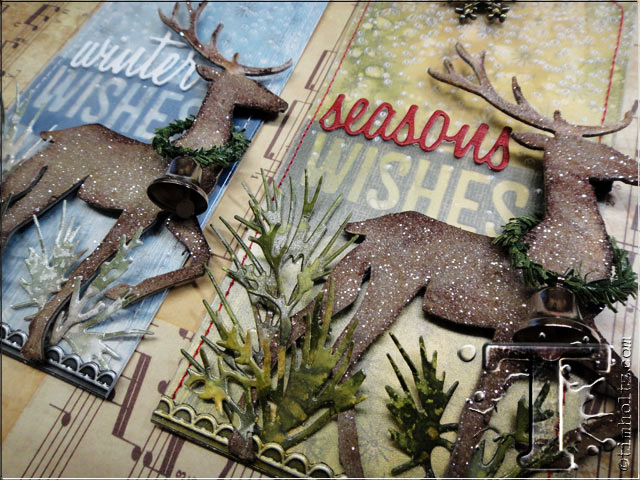
the details: i mentioned i liked this tag so much, i made a second one using a different color palette (and “seasons” instead of “winter”). it’s cool to see how altering the colors turn this wintery tag into a woodlands tag – endless creative possibilities…
*be sure to check your local stores for these supplies or you can
click the links below to purchase online…
(SSS=simon says stamp / IE=inspiration emporium)
GREAT NEWS! both of these online stores are offering a discount of 10% off your purchase – use the following codes with your order:
(SSS code: DEC2014TH / IE code: timtime)
                             |


