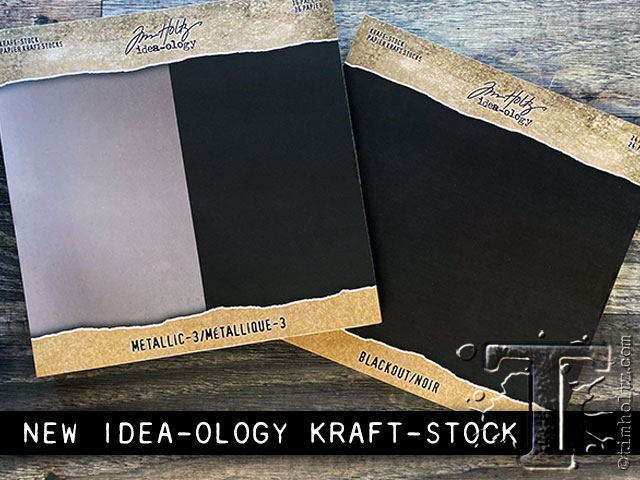
 when it comes to paper i admit i’m a bit obsessed with having the right surface to work with. overall quality, weight, texture, design and color are all important factors when it comes to selecting paper for the task at hand. my go-to for colored cardstock is idea-ology kraft-stock because of it’s printed kraft core, amazing colors, textured matte or luminous metallic finishes. idea-ology kraft-stock is now available in classic matte, new blackout matte, metallic confections, metallic jewels, metallic 1, metallic 2 and new metallic 3 – available at local and online retailers…t!m
*a special thanks to my friend zoe hillman for her persistent reminder that “we can never have too much of a good thing and need a pad of just black kraft-stock.” – click here to check out her facebook group “tim holtz addicts”.
check out the Facebook LIVE replay to learn more about it…
looking for a simple halloween make? gather up your favorite papers, inks + dies to create this blackout halloween garland!
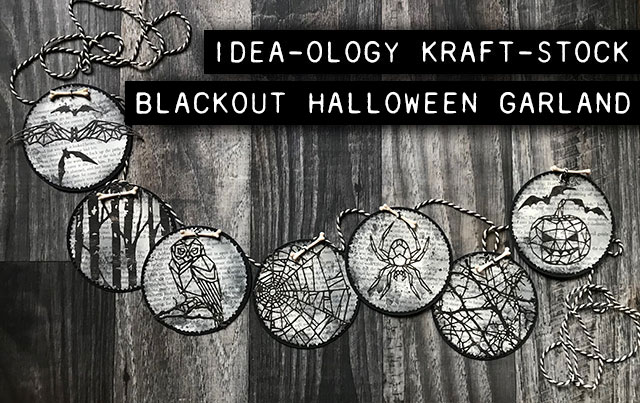
supplies: (idea-ology) kraft-stock blackout, boneyard; (ranger)distress ink/black soot, distress spray stain/antique linen, distress oxide spray/antique linen, distress collage medium/matte, distress sprayer, ink blending tool, alcohol ink cardstock/black; (sizzix) thinlits geo halloween, thinlits bat crazy, thinlits tangled twigs, thinlits cobweb, thinlits branched birch, thinlits stitched circles; (tonic studios) media mat;(misc) book paper, sandpaper, twine
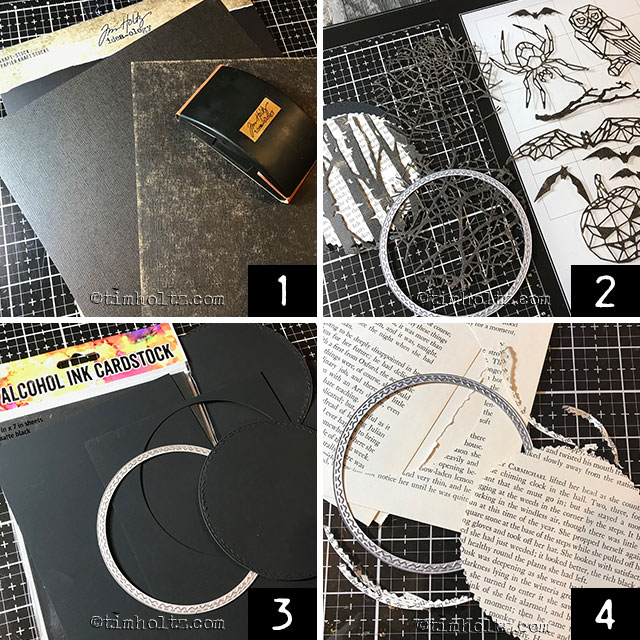
1. sand blackout kraft-stock with medium grit sandpaper and wipe with dry cloth.
2. die cut various shapes from cardstock (note: for backgrounds, cut design first then cut again with largest circle die).
3. die cut several largest circles from black alcohol ink cardstock.
4. die cut several largest circles from old book paper. (note: pull off pinked edges around circles using your fingers – this should tear easily due to the thin book paper).
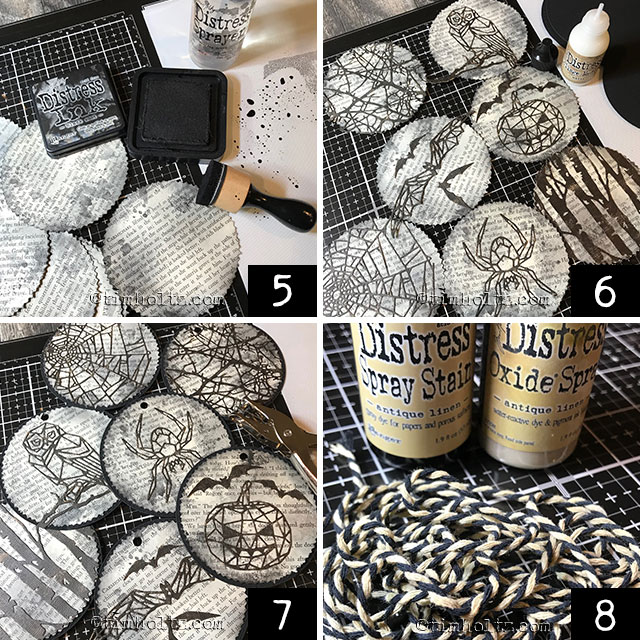
5. blend the book page circles with distress ink using ink blending tool. smoosh ink onto craft mat, spritz with water, rub fingers through to create droplets of ink and dip blended circles into droplets – dry with heat tool.
6. adhere shapes and circles together with distress collage medium – let dry.
7. punch a hole at the top of each circle with a 1/4” hand punch.
8. cut a piece of black+white bakers twine to desired length, spritz with water, then spritz with distress stain and oxide sprays – dry with heat tool.
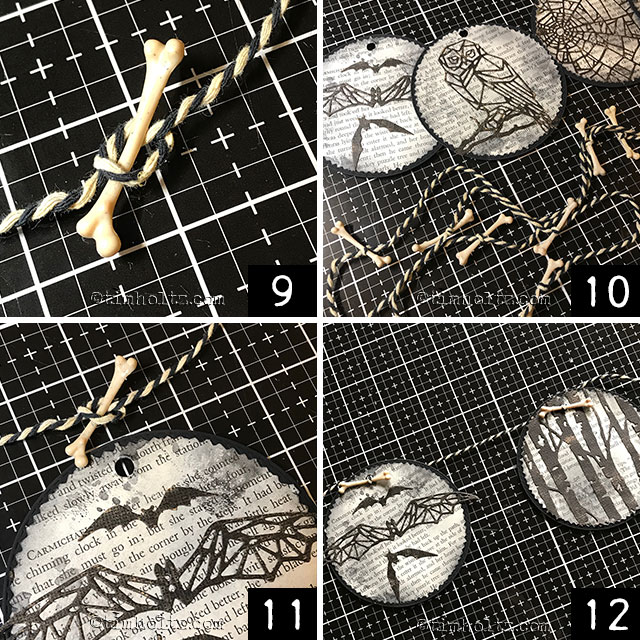
9. tie medium sized idea-ology boneyard bones onto the bakers twine approximately 5 1/2” apart (note: use the squares on the media mat for reference).
10. repeat above step for number of circles for your garland.
11. insert the bones through the punched holes.
12. repeat above step for all circles and you’re ready to hang your garland!
*check your local store or click on the icon below each product image to purchase online from simon says stamp or scrapbook.com: