 "february technique challenge" – tim holtz(c) 2008
supplies needed: craft sheet, distress crackle paint: fired brick, old paper, distress ink: fired brick, worn lipstick, aged mahogany, brushed corduroy, ink blending tool, metallic paint dabber: gold (ranger); grungeboard: elements (idea-ology); craft pick, scissors (tonic studios); stamps (stampers anonymous); 24ga. wire (artistic wire); glue dots (glue dots); #8 tags (american tag); glue stick; scrap paper; embellishments
step 1: remove selected pieces of grungeboard from elements set *i used heart/dots, wings/plain, crown/swirls, flourish/plain
step 2: attach all grungeboard pieces to the craft sheet using mini glue dots *tip: this will keep the grungeboard or chipboard in place so it can be painted. i also use this if i’m inking small pieces. it’s easily removable – i love glue dots too!
step 3: paint grungeboard heart and wings with distress crackle paint and let dry to crackle *tip: i like to use a medium to heavy coat of paint to provide the best crackle finish – the paint will self level so slap it on!
step 4: paint grungeboard crown with metallic paint dabber – let dry
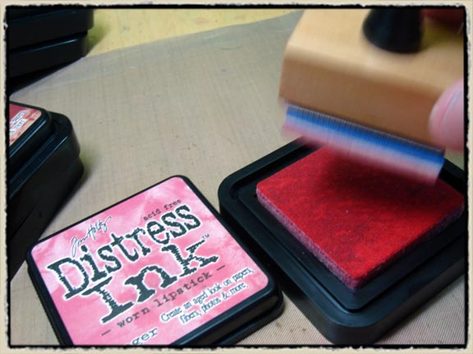
step 5: while painted pieces are drying, ink up the ink blending tool by tapping it on to distress ink pad
step 6: place tool on to craft sheet and begin inking tag in a circular motion with the tool moving the ink from the craft sheet on to the tag *tip: this will blend the colors to create a background on the tag
step 7: once background is inked, stamp images on to tag using various colors of distress ink *tip: work with darker colors than your background for the most contrast
step 8: ink flourish grungeboard piece with distress ink using ink blending tool
step 9: once painted grungeboard pieces have crackled, ink over with distress ink using ink blending tool *tip: i like to use the matching ink color to highlight the cracks
* if crackle paint is not completely crackled, you can finish by heating with your heat tool
step 10: tear a strip of scrapbook paper and ink edges using ink blending tool
step 11: adhere to tag with glue stick
step 12: adhere grungeboard pieces with a glue stick placing wings slightly under the heart, and the crown slightly over the heart *tip: cut the wings apart to place on both sides of the heart – remember the wings can hang off the tag because grungeboard is flexible!
step 13: place tag over a piece of craft foam or cork and pierce holes through heart,wings, and crown with a needle tool *tip: you need to pierce 2 holes through each piece along each overlapping edge totaling 4 holes for each "x" you want to stitch (this is where a picture really comes in handy)
step 14: stitch pieces together through pierced holes in grungeboard and tag with 24ga. wire creating "x"’s with wire *tip: you can get as creative as you want with the stitching – use a separate piece of wire for each piece, it’s like a needle and thread in one
step 15: trim all pieces of wire in back of tag *tip: just bend the wire to secure
step 16: embellish tag


