 "april technique challenge" – tim holtz(c) 2008
supplies needed: craft sheet, distress ink/vintage photo, ink blending tool, adirondack paint dabber/espresso, clear embossing ink, clear embossing powder, mini mister, crackle accents, cut n’ dry foam, heat tool (ranger); WANTED 12×12 paper/strip tease, WANTED chipboard pieces (cosmo cricket); scissors, paper distresser, trimmer (tonic studios); sanding grip or sandpaper, embellishments (idea-ology); distressed harlequin stamp (stampers anonymous); #8 manila tag, #2 manila tag (american tag); glue dots (glue dots); glue stick, hole punch, dymo label maker, embellishments
step 1: i chose the "strip tease" paper because it has snippets of all of the designs from the entire WANTED collection all on one sheet, and get this, it’s double sided which means even more options. i cut a section 3 1/8"x6 1/4" to cover one side of the #8 tag (i liked the section with the cowboys and stripes – giddyup!).
step 2: glue this to the #8 tag using a glue stick or your favorite adhesive and trim top corners.
step 3: ink the harlequin stamp with clear embossing ink and stamp the image lining up with the top of the tag. *the stamp is not long enough to cover the whole tag, but don’t worry about that.
step 4: cover the stamped area with clear embossing powder.
step 5: heat emboss the image using a heat tool until powder is completely melted and shiny. let cool.
step 6: paint over the entire tag with espresso paint dabber.
step 7: while paint is wet, pounce over it with a piece of cut n’ dry foam to blend the paint. *you can also use the ink blending foam for this. let paint dry.
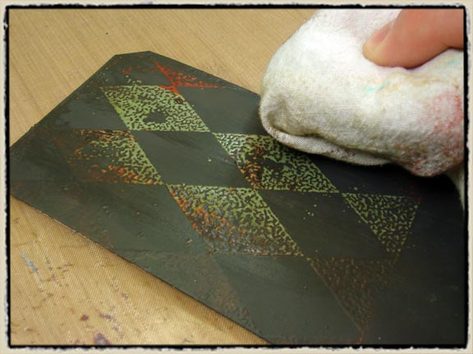
step 8: mist a cloth with water using mini mister.
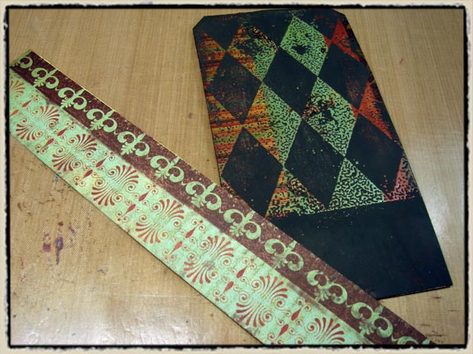
step 9: lightly swipe over painted stamped image with damp cloth to begin removing the paint from the embossing powders. pretty cool huh? this is the same "shabby chic" technique from the 12 tags of christmas, but using a printed background paper – unlimited possibilities!
step 10: cut a 1 1/2"x3 1/8" strip of paper from the WANTED sheet. (i found that cutting of the last 2 design sections was the perfect fit).
step 11: drag the paper distresser along the edges of the paper to create a tattered edge.
step 12: ink edges using the ink blending tool and distress ink to distress the edges of the paper.
step 13: apply glue to the bottom edge and 2 ends of the strip and adhere to the bottom of the tag – talk about a perfect fit, the paper strip fits right where the stamped image ended. this will create a pocket – you can also sew this with a sewing machine, use brads, or staples for this. *see i told you not to worry before!
step 14: cut a strip of paper 3/8" i know this is thin. (i used the skinny solid brown section for this).
step 15: insert this strip into a manual dymo label maker (remember these!). seriously, you can put paper into this.
step 16: start embossing whatever words you want into the paper by advancing the wheel and clicking the handle. because cosmo cricket paper has a white core, when you emboss it, it reveals the core to show the letter – cool huh? i told you it’s all about the cosmo!!!
step 17: using a sanding grip or fine grit sandpaper, lightly sand over your embossed words to finish revealing the white core – do not over sand…
*tip: if you don’t like the white letters, you can ink over them with a color DARKER than your background paper to tint.
step 18: attach a WANTED chipboard buckle to the paper strip and adhere to the side of the tag.
*tip: i used some crackle accents on my chipboard pieces before attaching it to create a cracked glass effect (crackle accents takes 24 hours to crackle so you need to do this step in advance if you want).
step 19: cut 2 pieces of paper 1 5/8"x3 1/4". (i used the section with the various woodgrain colors – nice!)
step 20: glue paper to a #2 tag – one on each side and trim top corners.
step 21: punch holes through both tags using a hole punch.
step 22: distress the edges of both tags using a paper distresser by dragging it along the edges.
step 23: ink edges of tags using ink blending tool and distress ink. *be sure to start on your craft sheet and work in a circular motion.
step 24: cut out 2 flowers from floral section of paper.
step 25: ink edges of flowers with ink blending tool and distress ink.
step 26: adhere flowers to each other by stacking them and bend petal upwards.
step 27: attach to the center of your tag pocket.
step 28: adhere WANTED chipboard brackets to each side of the flower.
step 29: adhere WANTED chipboard arrow to top right of tag pointing towards pocket.
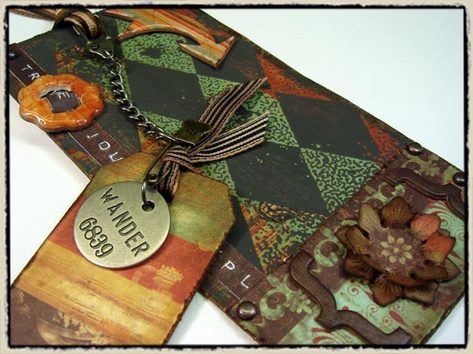
step 30: embellish tags with ribbons and various findings. *note: these are my NEW idea-ology embellishments released at CHA and scheduled to start shipping by the end of this month – check out my on-line catalog here! way cool stuff…


