i believe the more you understand the characteristics of a product, the more creative opportunities await you. media team anna-karin shares a great comparison tutorial today showcasing the different features of various surfaces using different product types. the results will confirm there is never any right or wrong in creativity, simply a different outcome to explore…t!m
Hello! I am happy to be back here with a new tutorial, and this time I am doing something a little different. I love paper, and there is almost nothing with quite as much potential as a white piece of paper. It could be used for writing a story, journaling and notes, and of course for art. You can transform a white piece of paper into almost anything with the help of, for example ink, stamps, paint and dies.
The surfaces we use often impact on techniques and I frequently get questions about which papers to use for which techniques. People might be disappointed because they get a different result than expected from a technique, and the reason may be in the paper they were working on. It can be a good thing too of course, and lead to new discoveries.
Since Halloween is around the corner, I made a whole bunch of Halloween tags, but you can use any type of stamps for this. The focus is on the paper surfaces, particularly in combination with Distress Ink, stamping and alcohol ink. It would be impossible to cover all possible techniques here, so this is just a quick overview.
Supplies:
- Surfaces: Gloss Cardstock, Specialty Stamping Paper, Manila Cardstock, Watercolor Paper
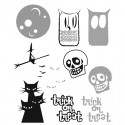
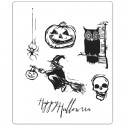
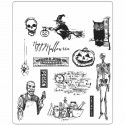
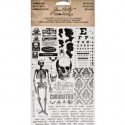
- Stamps: Halftone Halloween, Carved Halloween, Mini Halloween, Mini Halloween 3, Mini Halloween 4
- Dies: Crescent Moon & Stars, Tag & Tie
- Distress Ink: Spiced Marmalade, Ripe Persimmon, Dusty Concord, Pumice Stone, Black Soot
- Ink: Archival Ink: Jet Black, Monarch Orange
- Distress Paint: Black Soot
- Distress Markers: Dusty Concord, Rusty Hinge, Gathered Twigs, Black Soot
- Distress Stain: Spiced Marmalade, Black Soot, Dusty Concord
- Alcohol ink: Adirondack: Sunset Orange, Lake Mist, Silver Mixative, Blending Solution
- Embellishments: Idea-ology: Laboratorie Tissue Tape, Elements Tissue Tape, Frames & Trims Industrious Stickers, Apothecary Remnant Rubs, Crinkle Ribbon, Linen Ribbon
- Tools: Vagabond or Big Shot, Ink Blending Tool, Craft Sheet, Detailer Water Brush, Heat Tool, Mister Bottle, Paper Distresser
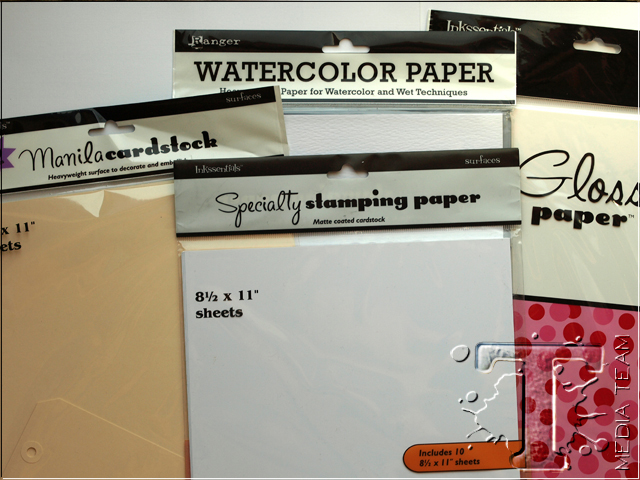
I decided to focus on my favourite white/cream papers by Ranger: Manila cardstock, Specialty stamping paper, Watercolor cardstock and Gloss cardstock. These are all fabulous papers, perfect for stamping and for many different techniques.
Gloss cardstock is clay coated, giving it a great glossy and smooth appearance. Specialty stamping paper is also coated, but has a matte look. Both of these papers are porous, but with some non-porous qualities. I’ve loved gloss cardstock since I started stamping and am particularly fond of the vibrant look of dye ink on glossy. Specialty stamping paper is a newer paper and it is such a fun, versatile and tough paper, perfect for detailed stamping.
Manila cardstock also has a coating, but it is more porous than the previous too. It allows ink to stay on the surface longer than with an uncoated ‘ordinary’ piece of cardstock and can handle quite a bit of water. It has a yellow/cream colour, perfect for vintage projects. It might be the paper I use the most.
I could not manage without watercolor paper, and of all the papers, it might be the one I get the most questions about. ‘Do I really need to use watercolor paper?’ The answer is yes, and you will love it, I think. No other paper handles water techniques as well, and the gorgeous transparent and fluid watercolor look comes out better on this paper than on any other papers. The colours also stay true.
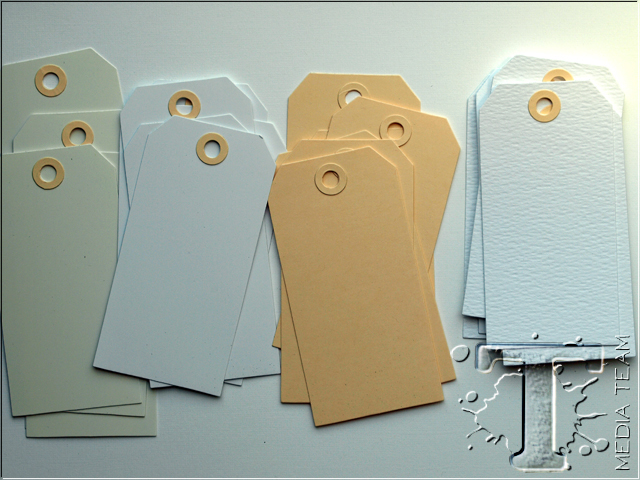
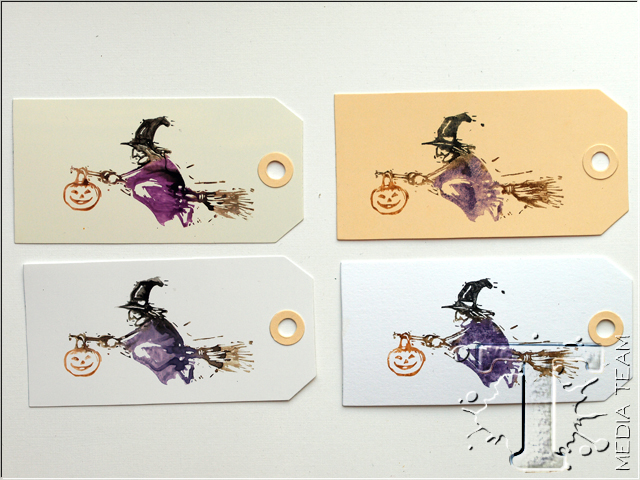
I started by die cutting tags with the Tag & Tie die, from left to right: gloss, specialty, manila and watercolor. I’ll be sticking to the same order in the photos below. You’ll learn a lot about your paper surfaces if you experiment with the same technique on several surfaces.
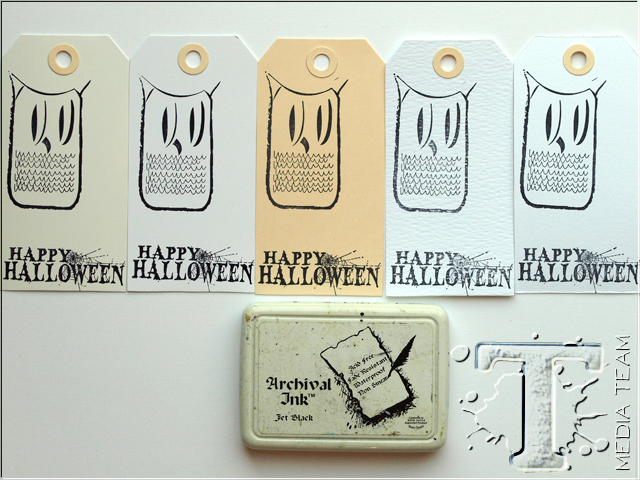
Start by stamping with Archival Jet Black ink. The stamping on the gloss and specialty paper look almost like a print, while a tiny bit of detail has been lost on the manila. The watercolor cardstock has two sides, a more textured one and a smoother one. You can see that the stamped impression on the rough side is less detailed, although you’ll get a better result if you press a little harder.
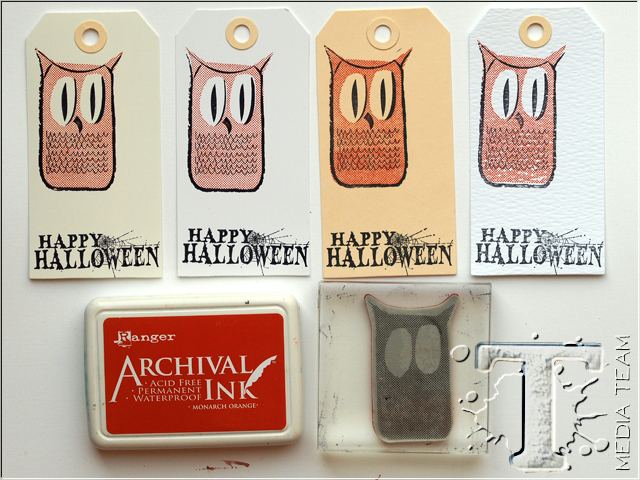
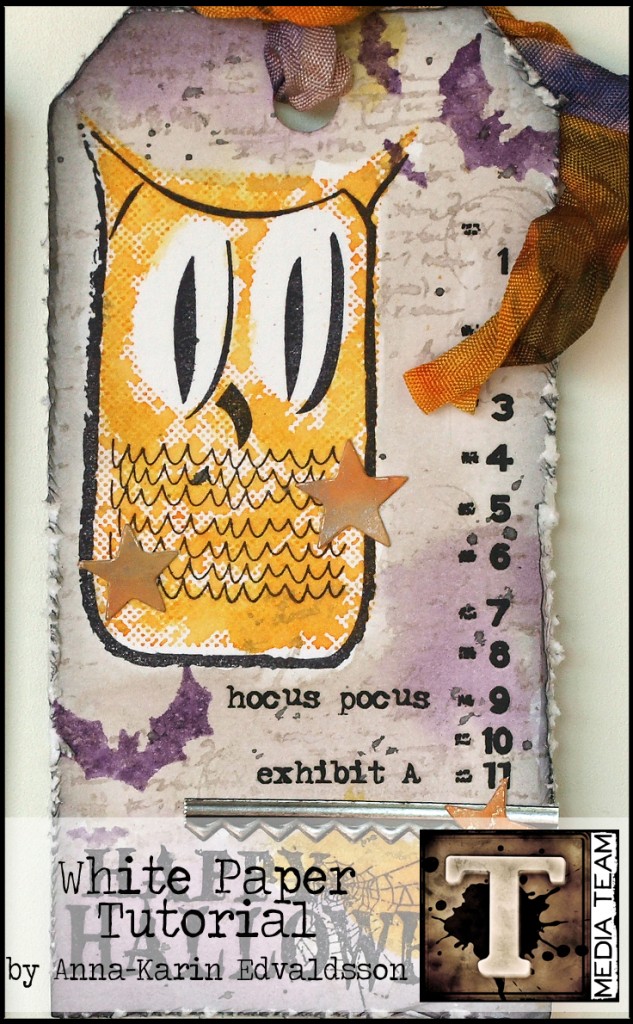
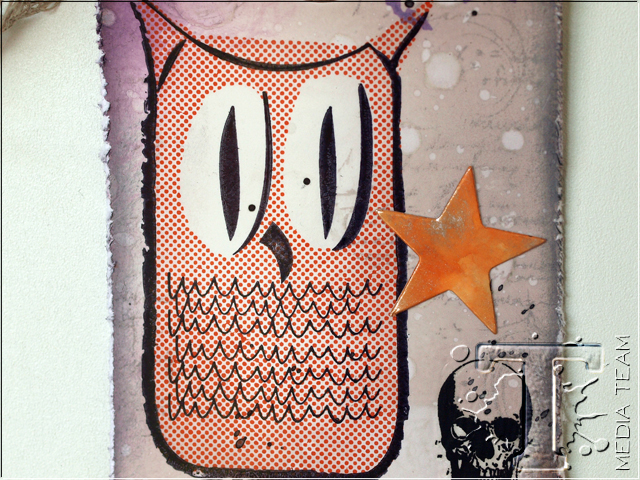
I wanted to use the new Halloween Halftone stamps which are such fun and great for stamp layering. Stamp the inside of the owl with Monarch Orange Archival Ink. Again, you can see that there is more detail on the gloss and specialty papers.

Stamp the tags with bats using Dusty Concord. The ink takes a little longer to dry on the gloss and specialty papers, to speed up, use a heat gun.
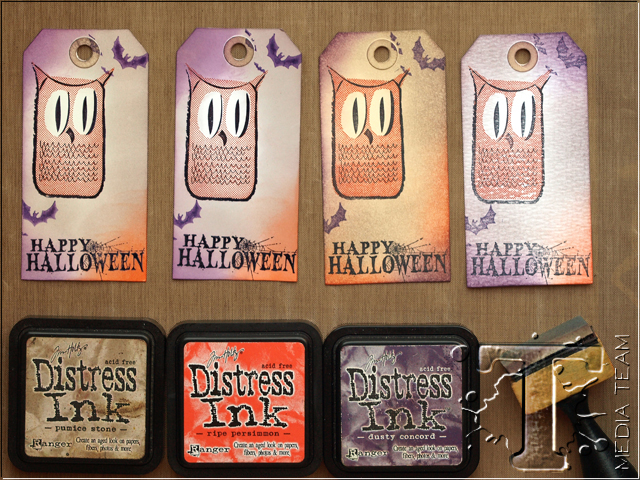
Place one tag at a time on your craft sheet and ink with Distress Inks, using an ink blending tool. You will notice that the papers take the ink differently. The easiest paper to ink might be the manila cardstock, and you can clearly see that the colour of the paper changes the look of the ink to give a warmer and more vintage feeling. Always start inking on the craft sheet and work the ink into the tag. If you start inking in the middle of the tag, you’ll get lines from the tool. The lines show up a little easier on the gloss and specialty paper, so use an extra light hand on those. It is often easiest to start with the lightest shade of ink and gradually build up colour, since the light ink makes it easier to smoothly apply darker inks on top on the coated papers. On the watercolor cardstock (rough side) you can see the texture of the cardstock.
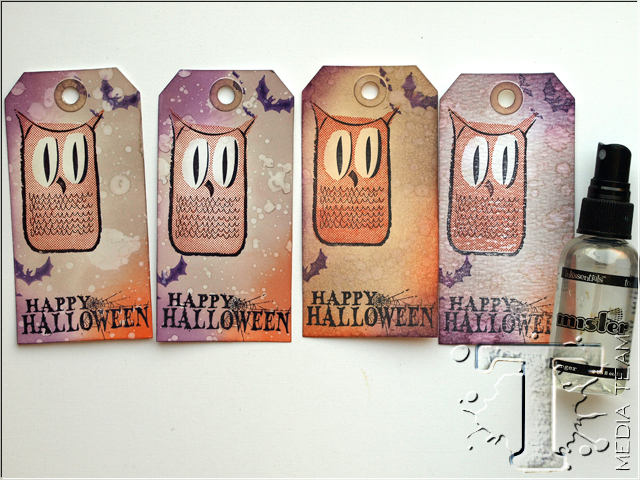
Mist some water into your hand and flick droplets on the tags. Dry with a heat tool. As you can see, this fun technique has a different effect on the different papers. On the gloss and specialty papers the spots look white since more of the ink is removed by the water. On the manila, the effect is more subtle (you see it better if you use darker colours), and on the watercolor paper, the water droplets just dissolve the ink.
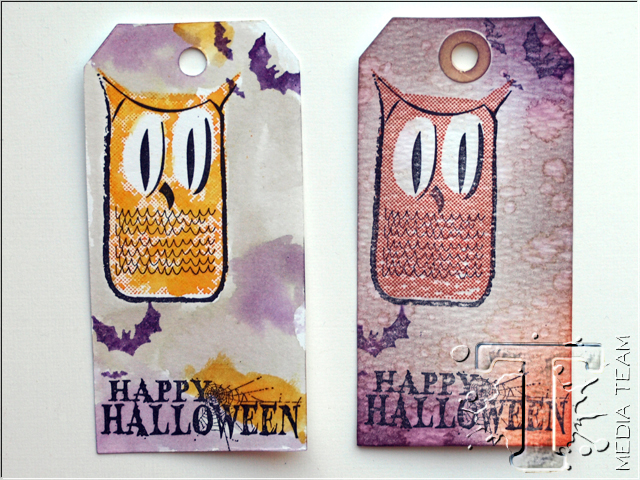
At this stage, I decided that I didn’t like the watercolor tag very much, and instead I used the second one where the owl was stamped on the smooth side. The orange owl was stamped with Spiced Marmalade, misting the stamp about 4-5 times with water after inking. This gives a watercolour look to the stamping. Smear Distress Inks on your craft sheet, mist once with water and pick up with a water brush. Paint the background. When dry, ink the bat stamp with Dusty Concord, mist a few times with water and stamp. The qualities of the watercolor paper come out more clearly in the new tag to the left.
Ink the edges with Black Soot and an ink blending tool. For more texture, stamp the tags with a script stamp. I used Pumice Stone for the first two tags, and Black Soot for the manila one. The Pumice Stone didn’t show up well enough on the manila. The black ink was first stamped once on scrap paper. For the watercolour tag, I misted the inked stamp with water before stamping.
Distress all the edges with a distress tool. You’ll notice that the edges will turn white on all the papers, except for the manila. We are going to get back to this set of tags a little later in the tutorial.
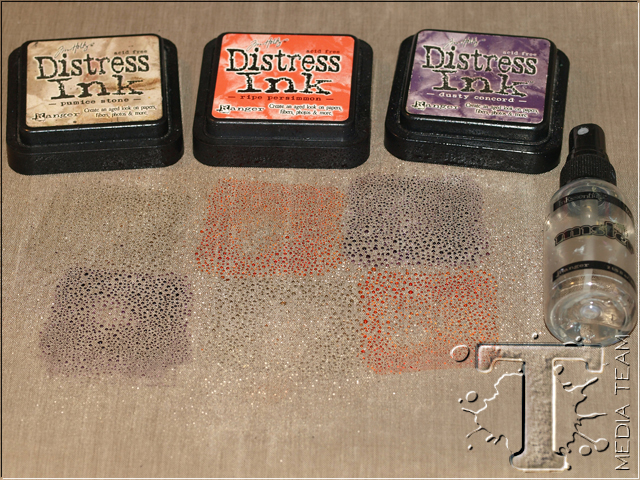
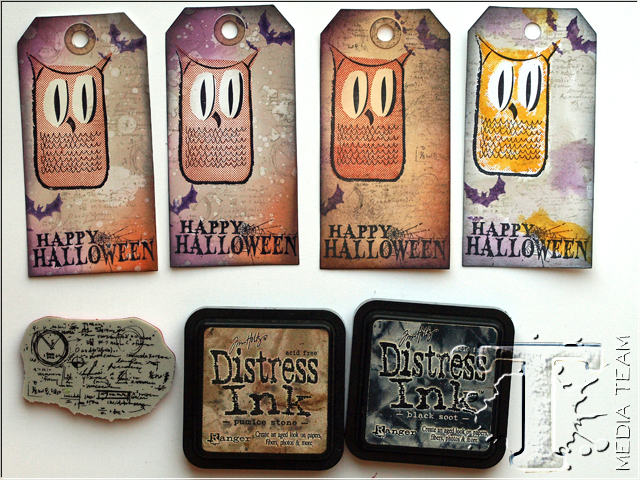
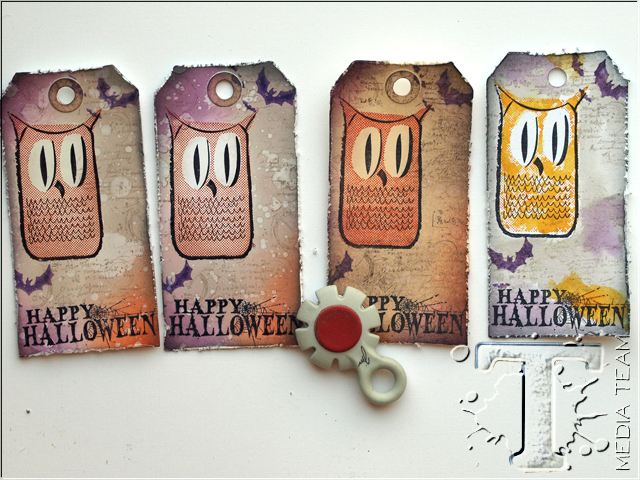
Now onto one of my favourite background techniques. Smear Pumice Stone, Ripe Persimmon and Dusty Concord on your craft sheet and mist with water. Take out four more tags, one from each paper.
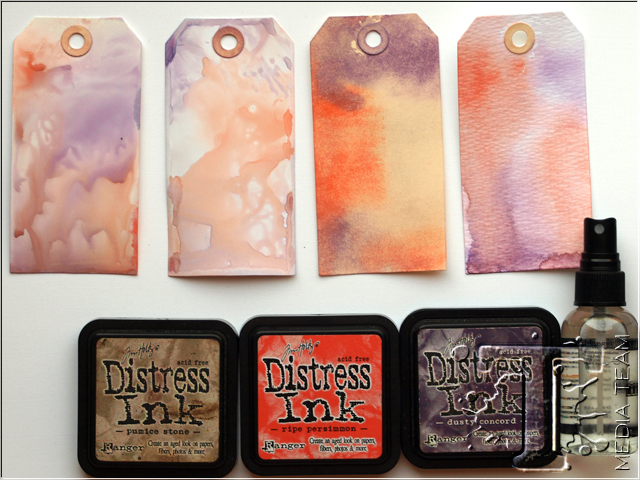
Press a tag into the ink and lift. Dry with a heat tool. If you want to you can press the tag into the ink again, although I didn’t do that. Repeat for all the tags, reinking your craft sheet in between each one. As you can see, the papers reacted pretty differently to this technique. On the first two papers, because of their coating and non-porous qualities, the ink stays more on the surface than to sink into the paper. It gives a fluid, almost dreamy look, but also splotchier and not as smooth as on the second two papers. The ink is absorbed into the manila cardstock and gives a great smooth watercolour look. On the watercolor tag, the inks blend even more and retain their bright colours.
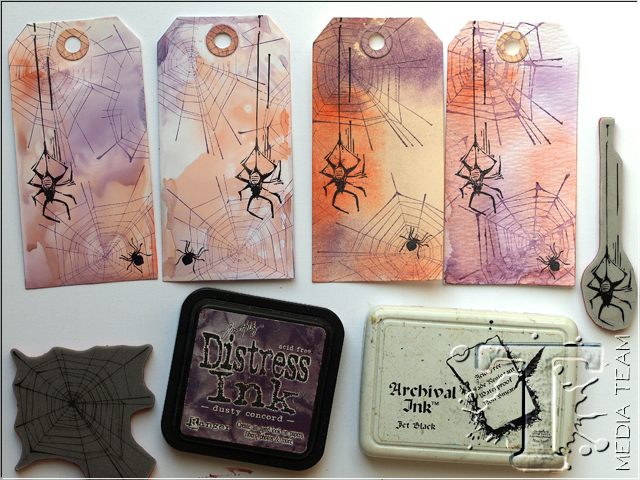
When the ink is dry, stamp the tags with a spider web stamp and Dusty Concord ink. Mist the inked stamp with water before stamping, for the watercolor tag. Again, you can see that there is more detail in the stamping on the first two, compared to the more muted look on the second two.
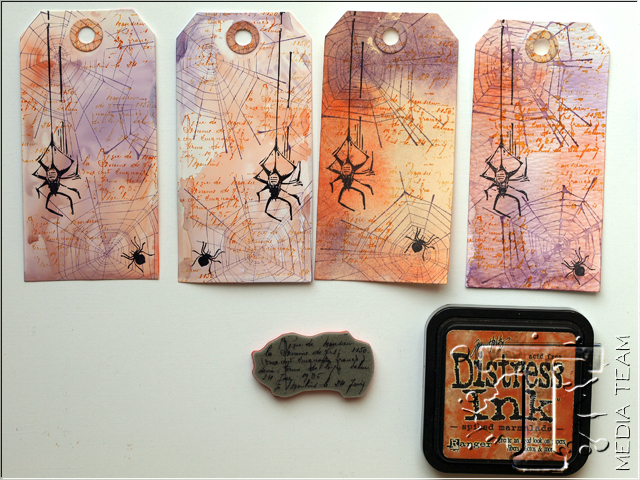
Add texture as on the previous set of tag, with a script stamp and Spiced Marmalade ink. Again, mist the inked stamp with water for the last tag.
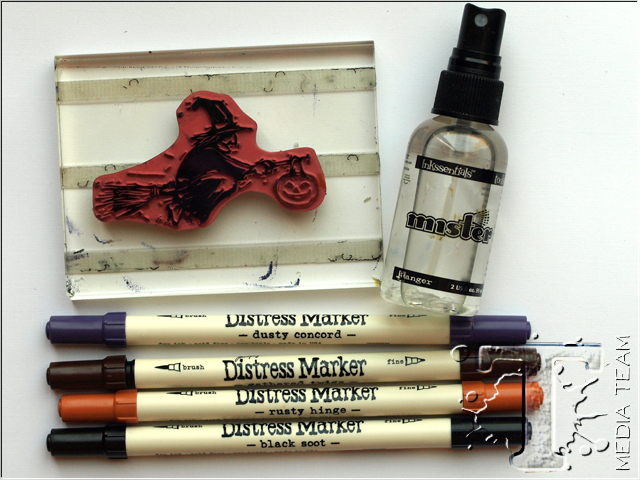
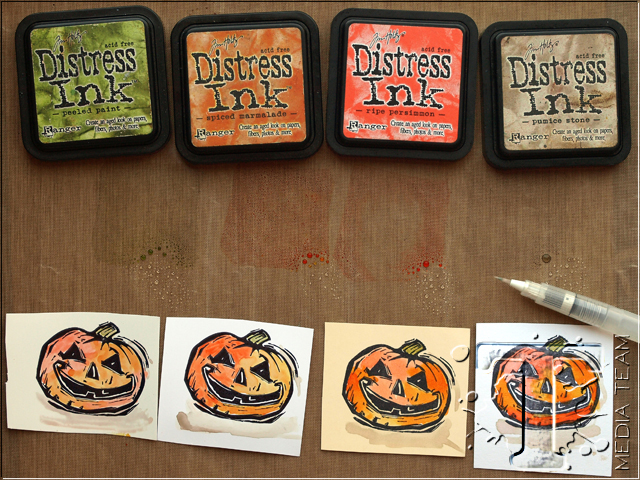
Before we finish the tags, I just wanted to show you a few more techniques. Apply ink with Distress Markers to the rubber of the carved Halloween witch. I usually start with the lightest colour. Make sure that you are using the side of the marker instead of the tip, to protect the tip. Mist with water 4-5 times before stamping.
Stamp and repeat for all the four tags. Again you can see the difference. On the gloss and specialty paper (the first two tags), the ink doesn’t get as absorbed into the tag and dries in a less smooth manner. I liked the shadows created by the ink pooling up. On the manila, you get a more muted look because of the colour of the paper, while the watercolour paper gives the best watercolour effect.
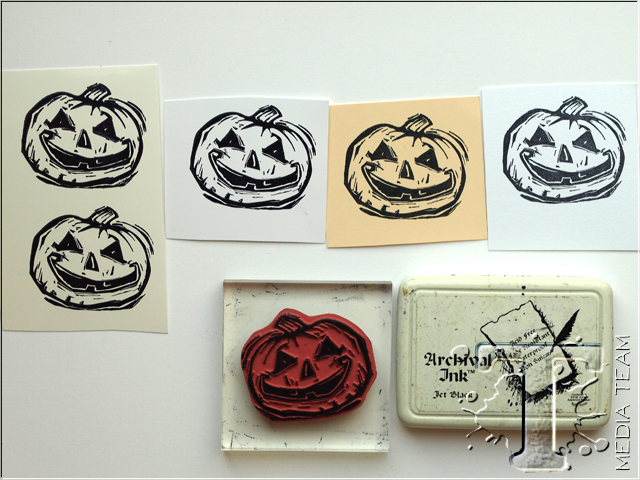
Stamp the carved pumpkin on all four surfaces with Jet Black ink. If you press too hard on the gloss cardstock, you don’t get as good an image. I don’t know if you can see it on the top pumpkin, where I pressed a little too hard. The gloss and specialty cardstock need less pressure in the stamping than the other two.
Smear some ink on your craft sheet, mist with water and apply with a water brush. The ink behaves differently on the different papers. It gives a splotchy look on the first two, while it is easier to blend on the second two.
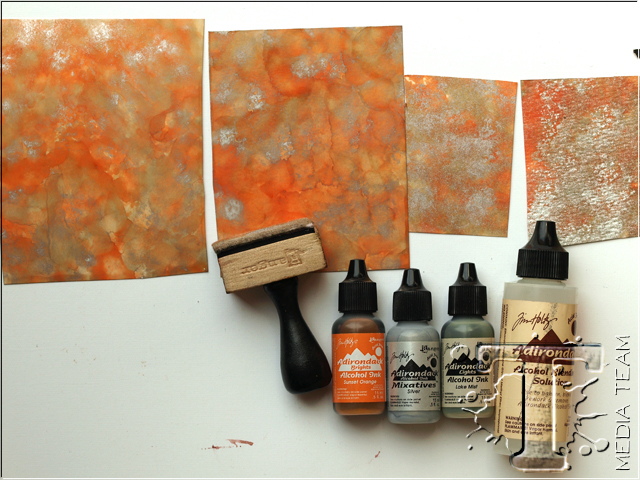
Another ink that acts differently on the various surfaces is Adirondack Alcohol ink. Place a drop of Sunset Orange, Lake Mist, Silver and Blending Solution on a felt blending square. Pounce on the cardstock, leave to dry and add a second layer. It dries real quick. On the gloss and specialty paper you get a similar result, although the latter is matte. I love the look of the glossy alcohol inked paper, it will give a special punch to any project. On the two more porous papers, the ink quickly absorbs into the paper and gives a muddier result, with less bright colours.
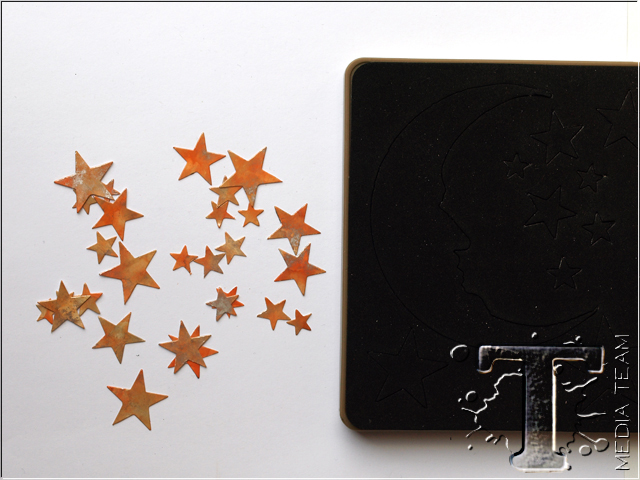
Gloss cardstock is not the same as photo paper since they don’t have the same coating. If you try to use alcohol ink on gloss photo paper instead, you might notice that it gets sticky since the solvents in the ink can react with the emulsion of photo paper. Die cut stars with the Moon & Stars die from the gloss and matte alcohol inked papers.
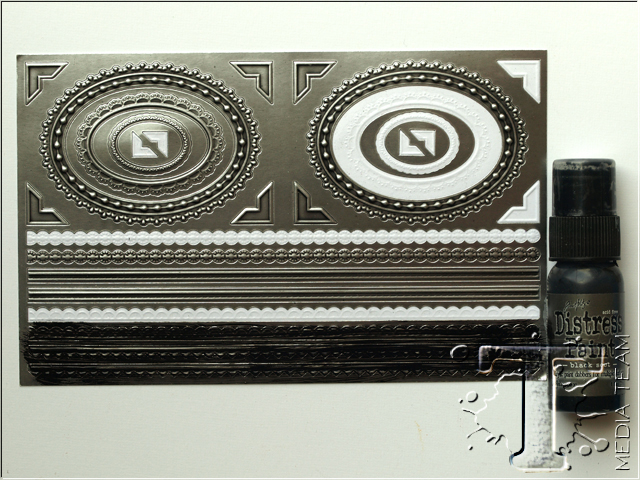
Paint Black Soot on the border pieces on a Frames & Trims Industrious Stickers sheet. Leave to dry for a little while and wipe some of it off with a cloth.
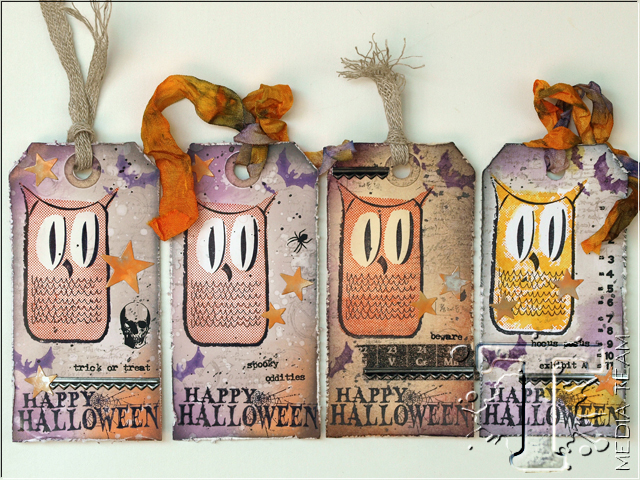
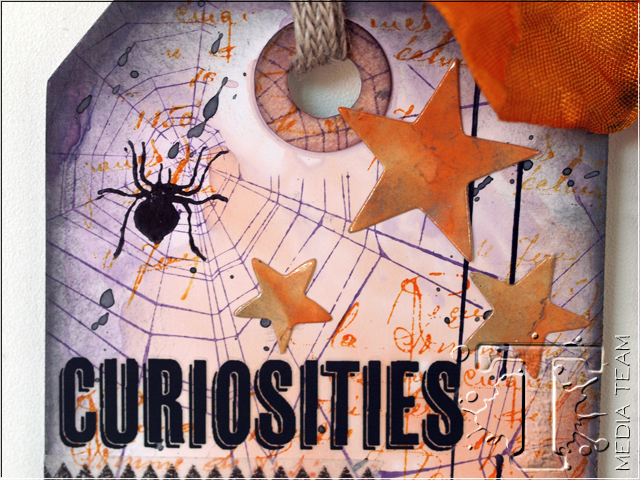
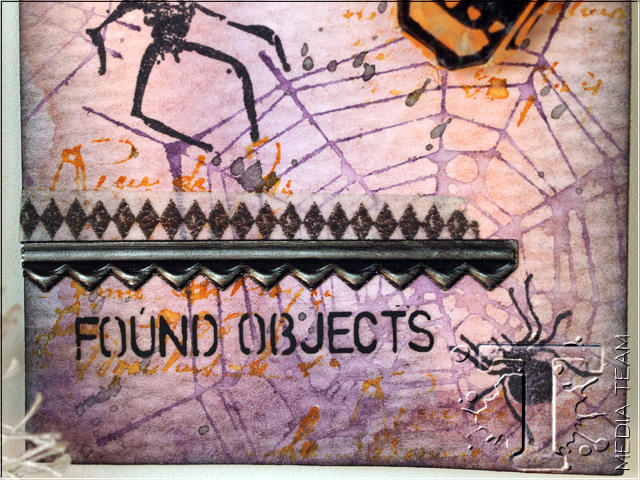
Let’s return to our tags to finish them. You can easily make quite a few of these and use as gift tags. Apply Apothecary rubs to the tags here and there and splatter the tags with a tiny bit of Black Soot paint (mixed with a little water). Add stars, tissue tape and stickers as embellishments. Dye a long piece of crinkle ribbon with Spiced Marmalade, Dusty Concord and Black Soot Distress Stain, scrunch it up into a ball and let dry.
You can see that the glossy and the matte tags are pretty similar, and many techniques will have a similar effect on these two surfaces, with the exception that one will be glossy and one will be matte. Also try various resist techniques on these surfaces for great effects.
The stamped detail on both the glossy and the specialty papers is really fabulous. If you have a very detailed stamp and struggle to get a good impression on textured papers, or even on manila, try it on specialty or gloss paper and you might notice a big difference.
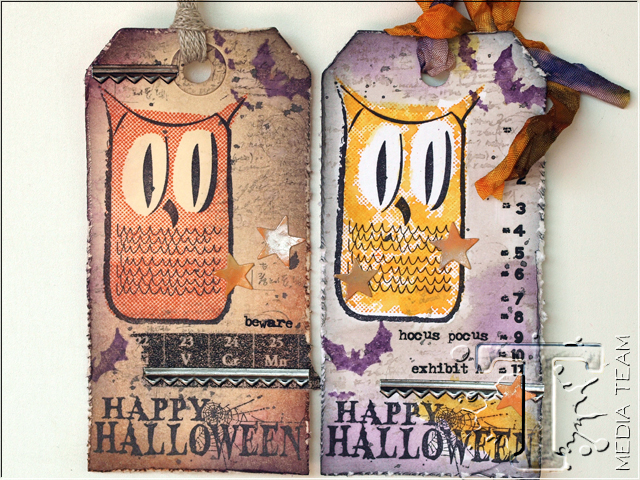
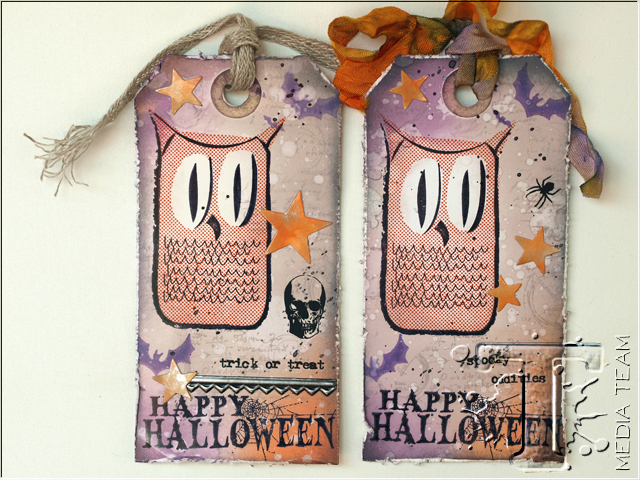
On the manila and the watercolour cardstock, you’ll get pretty different looks. I love the vintage look of the manila tag, with the warmer and more muted colours. Watercolor techniques are a favourite of mine, which is why I often reach for watercolor paper. If you try the same techniques on ordinary cardstock, or something like printer paper, you will not get quite the same effect. This paper can also handle a huge amount of water.
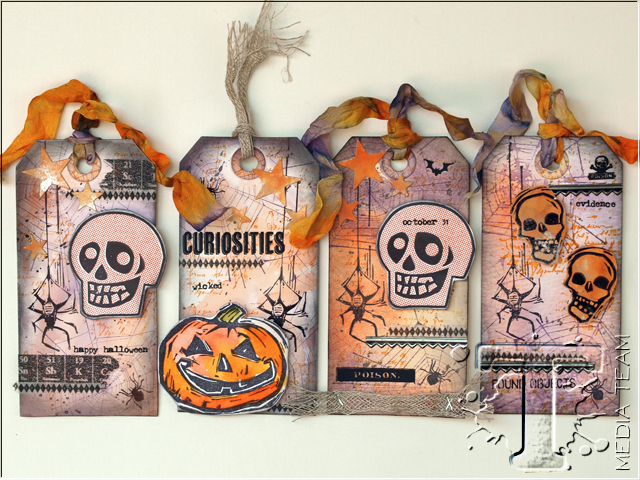
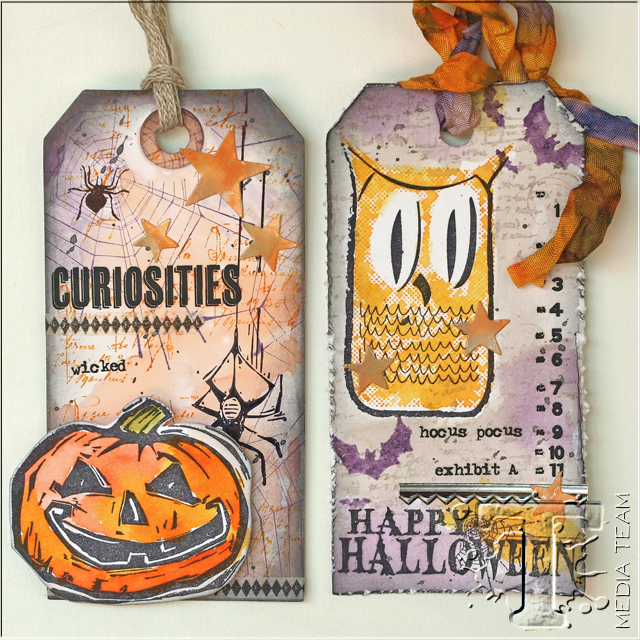
For the other four tags, I stamped two Halftone skulls on Specialty stamping paper, used the watercolour paper pumpkin and stamped two smaller skulls on the alcohol inked glossy paper. The tags were embellished with rubs, die cut stars, tissue tape and Industrious stickers.

Since the Halftone stamps are cling stamps, it is easy to align them. I am also looking forward to using the Christmas Halftone stamps.
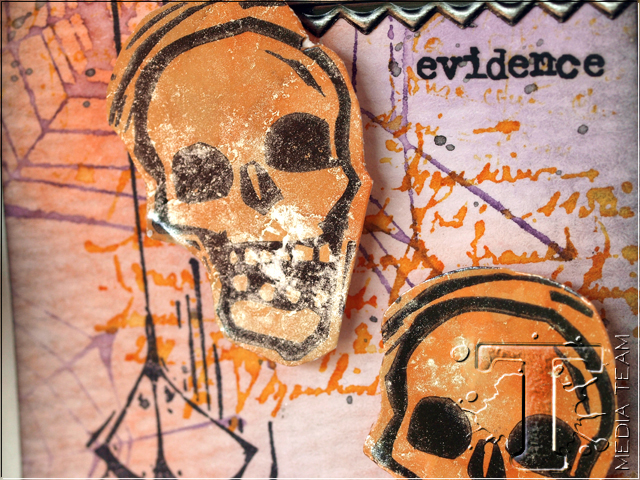
The silver in the alcohol ink gives a great look to the skulls.
Here’s a closer look on the stamped detail on the Specialty stamping paper.
Compare the spider web on the photo above to this one with the watercolor look. Both are great, but also pretty different from each other due to the paper surfaces and the addition of water to the second one.
Ever since I was a child, I have had a love for paper; I love the feel of it, the smell of paper, and all the possibilities with a blank sheet of paper. I hope this tutorial inspired you to try out different paper surfaces, to experiment with various techniques and see what results you will get. Few things are more fun than to transform a white surface into something completely different.
Thank you for looking at my tutorial!
Happy crafting!
Anna-Karin
—
*be sure to check your local stores for these supplies or you can click the links below to purchase online…
(SSS=simon says stamp / IE=inspiration emporium)
                              |
Pin it to remember it!