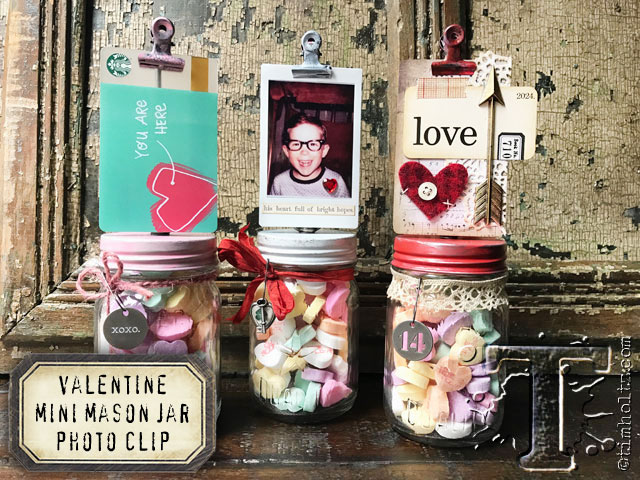
 with valentine’s day a week away i want to share a quick, creative, and let’s face it “cute” idea for using the idea-ology mini mason jars and new photo clip kit. this kit allows you to easily convert the mason jars into a holder for mini photos like instax, gift cards, or mini works of art. since the mini mason jars are food safe you can fill them with all types of treats, but what can be better than candy? check out the tutorial below and imagine the possibilities for these little gifts for any occasion all year long…t!m
- surface: mini mason jars, photo clip kit
- trimmings: crinkle ribbon, jute string, lace
- trinkets: loop pins, heart charms, mini keys, typed tokens, number tokens, mirrored stars, arrow adornments
- paperie: flashcards, clippings stickers, vial labels, remnant rubs, design tape, paper stash
- paint: distress paint/barn door, worn lipstick, picket fence
- ink: distress ink/frayed burlap, distress spray stain/fired brick/antique linen
- tools: scissors, mini blending tool, distress collage medium
- dies: heartfelt/bigz, doily/thinlit, vagabond
- misc: craft thread, wool felt, button, paint brush
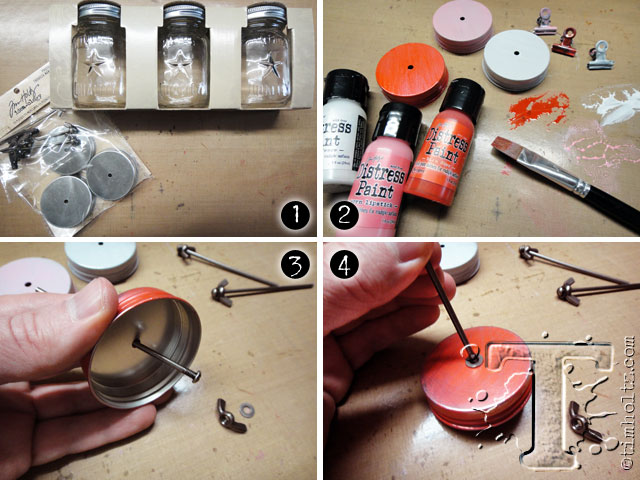
step 1: since we are using this with “food”, start by washing the mini mason jars and lids – dry completely. *note: you will not need the original lids from the mini mason jars, the lids in the photo clip kit have a hole drilled for the hardware.
step 2: paint the lids and clips from the kit using distress paint and let dry for a few minutes. once paint feels tacky, wipe with dry paper towel to remove some paint for a distressed look. note: once distress paint dries completely it is permanent so be sure to wipe excess before it’s totally dry.
step 3: insert the screw post through the hole in the lid from the inside as shown.
step 4: slide the washer down the post.
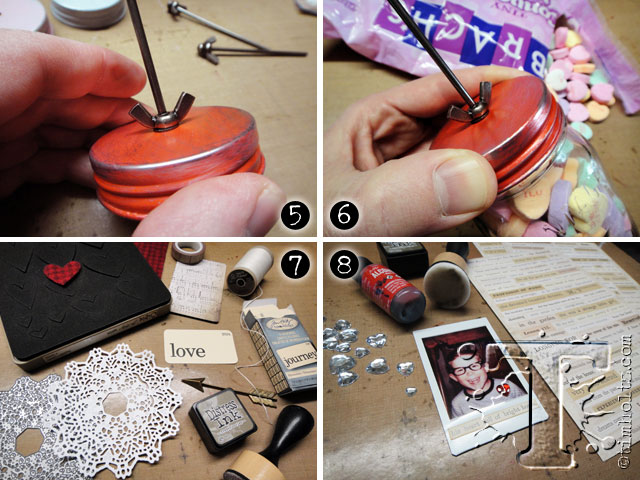
step 5: screw on the wing nut to the threads on the bottom of the post. note: i use a small screwdriver to hold the inside screw to tighten.
step 6: fill the jar with your favorite treat and screw on the lid.
step 7: create mini artwork using your favorite papers, die cuts, and embellishments.
step 8: print mini photos (love my instax) and embellish with stickers, etc. *note: yep that’s me
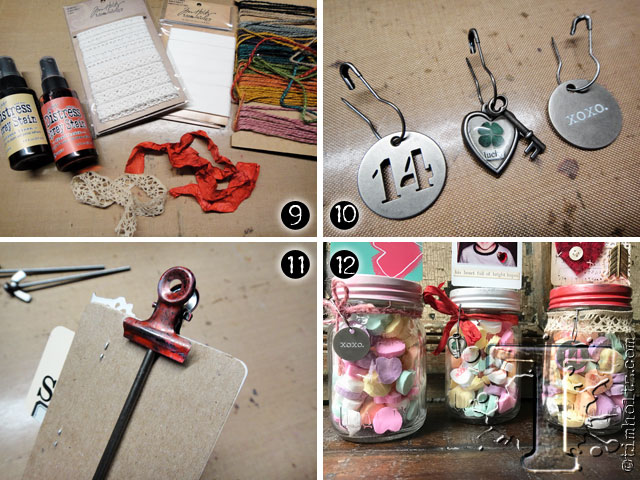
step 9: it’s great to customize idea-ology trimmings using distress stain. both the crinkle ribbon and lace are designed to be “inkable”.
step 10: create accents using your favorite trinkets.
step 11: secure your photo, artwork, or gift card to the post on the jar using the included hinge clips.
step 12: add your trimmings and accents around the jar to embellish.
*be sure to check your local stores for these supplies, or click on the links below to purchase online from Simon Says Stamp with a discount of 10% off your purchase – use code: Tim958


