 happy summertime! i love this time of year when the days are longer, the weather is warmer, the bbqs are fired up, and the list goes on and on… living in a small town there is always something to remind you of summer; whether it’s an antique show on the square, a parade around the courthouse, or even the rodeo (which by the way, prescott claims to have the worlds oldest rodeo). i love to decorate this time of year in the festive and patriotic red, white, and blue colors so i thought i would share a few creative ideas with you this week (so be sure to check back)!!!
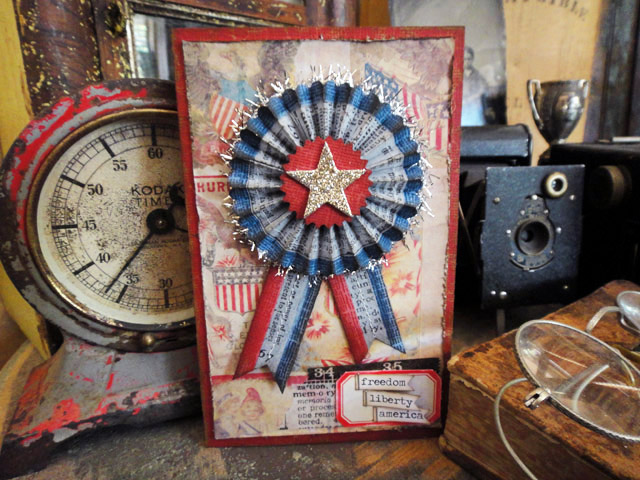
today i wanted to show you how to create these festive rosette ribbons that can be used on a card, or perhaps make several to use as a garland, or lots of other decorating accents. let’s get started…
supplies: craft sheet, distress paint/picket fence, distress ink/walnut stain, glossy accents, stickles glitter/platinum, core’dintations cardstock/kraft core shattered/distress, sizzix alterations rosette die, base tray, mini star die, vagabond, tinsel twine, tissue tape, vial labels, seasonal chitchat stickers, seasonal paper stash, sanding grip, tiny attacher, grungeboard, xyron w/permanent adhesive, glue gun
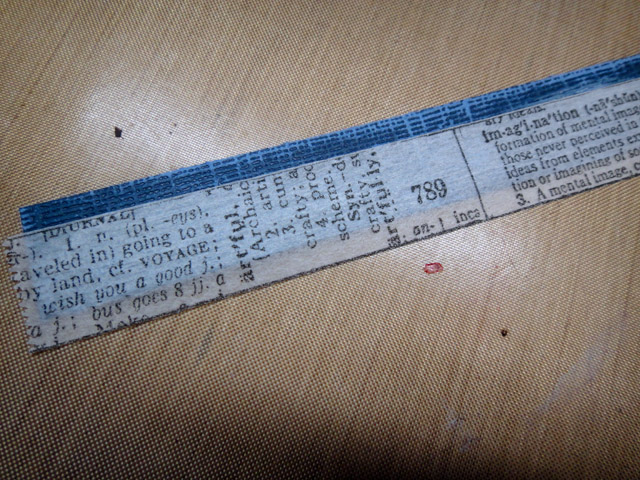
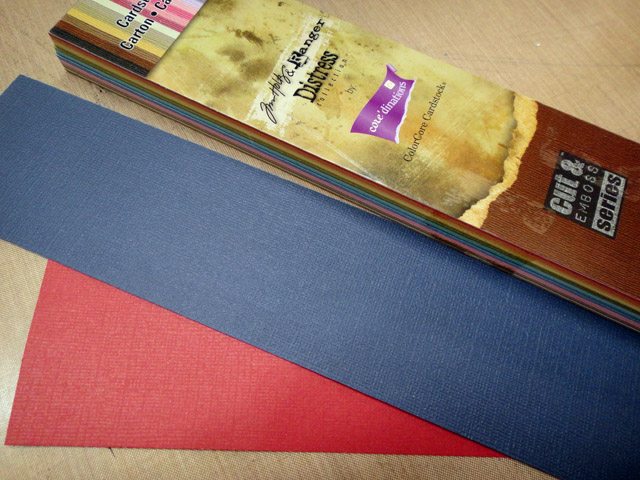 step 1: remove 2 strips of distress core’dinations paper / red and blue (love the convenience of this ready to cut n’ emboss series).
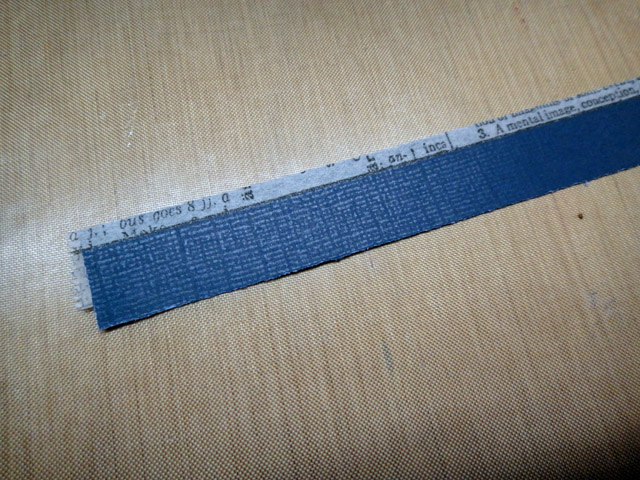
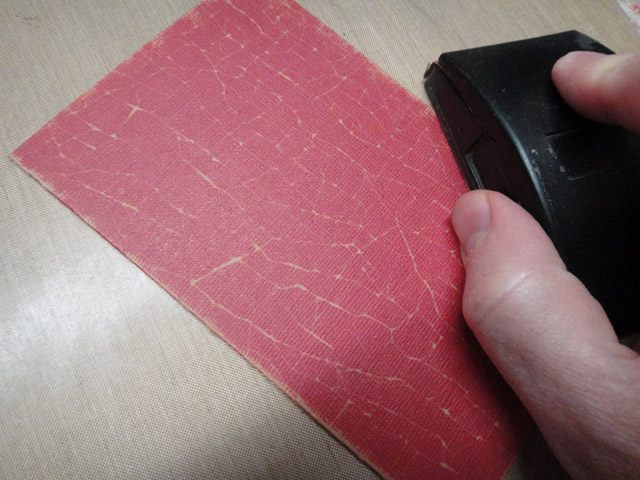
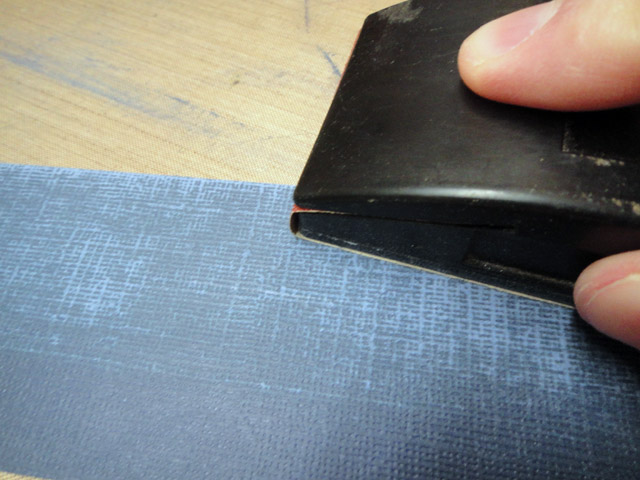 step 2: sand over the textured side of the cardstock with sanding grip to reveal the core color *note: it’s very important to do this step before you die cut.
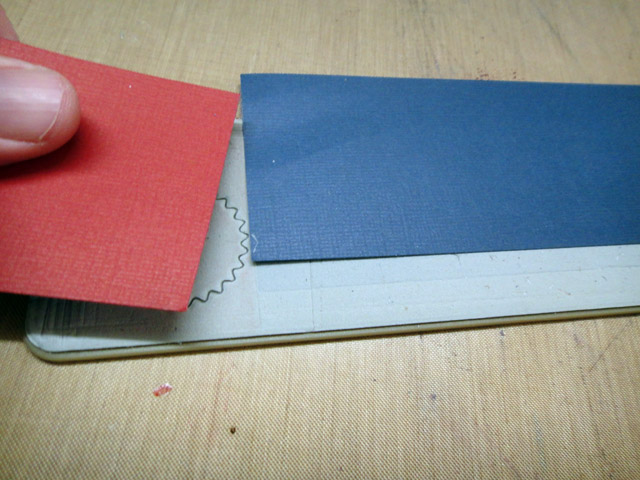 step 3: place both papers over the rosette die cutting the center with red and strip in blue.
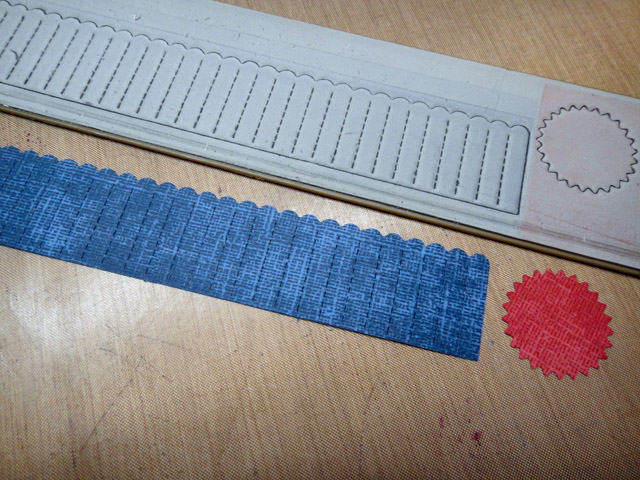 step 4: die cut as shown.
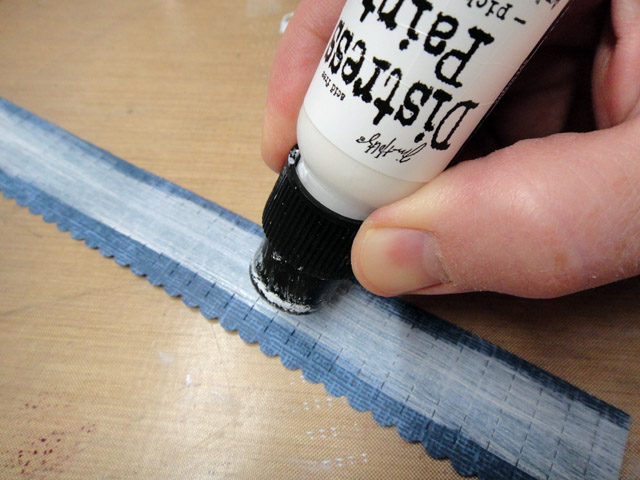 step 5: apply picket fence distress paint down the center of both sides of the rosette.
 step 6: apply tissue tape over painted surfaces on both sides. *note: the tissue tape provides added durability when folding the rosette.
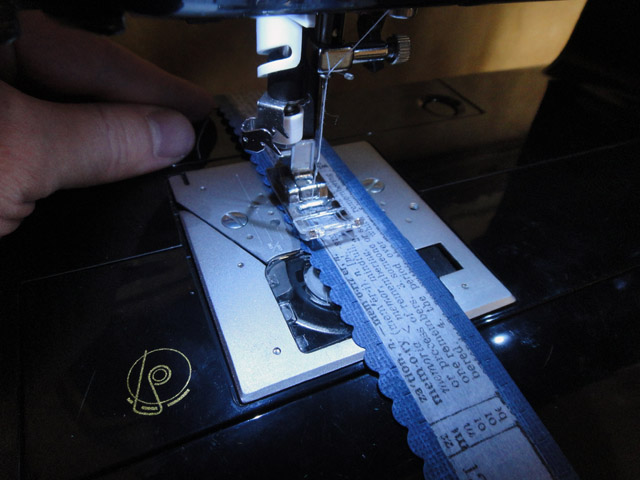 optional step: sew a stitch down the entire rosette for an added element.
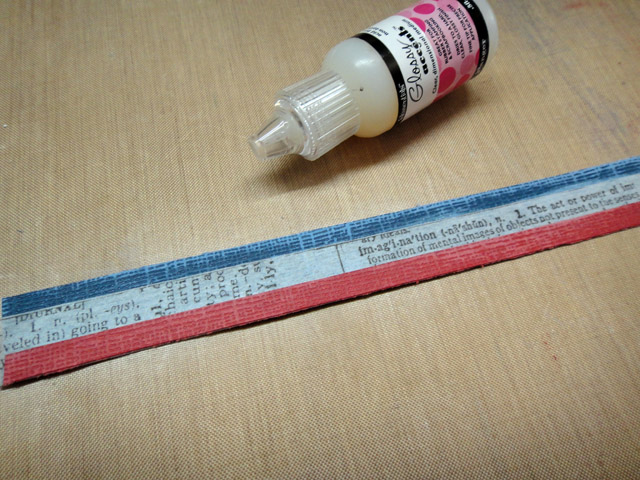
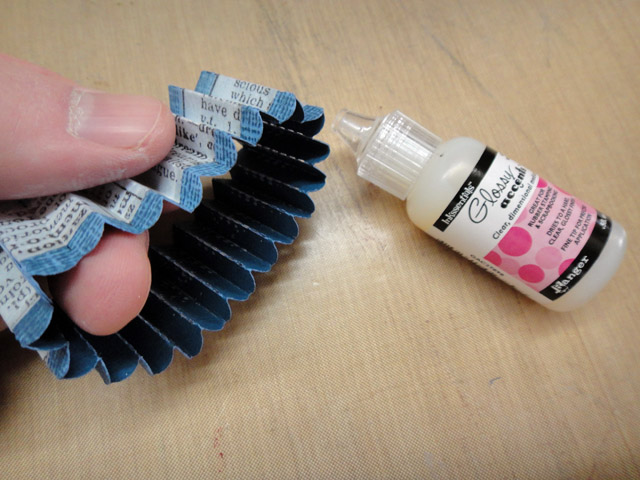 step 7: accordion fold the entire strip and adhere ands together with glossy accents to create a ring.
 step 8: apply a “blob” of hot glue to the craft sheet.
 step 9: place rosette ring around glue blob and gather in the top center and press down.
 step 10: your rosette should fan out perfectly so press and hold into the hot glue allowing it to cool.
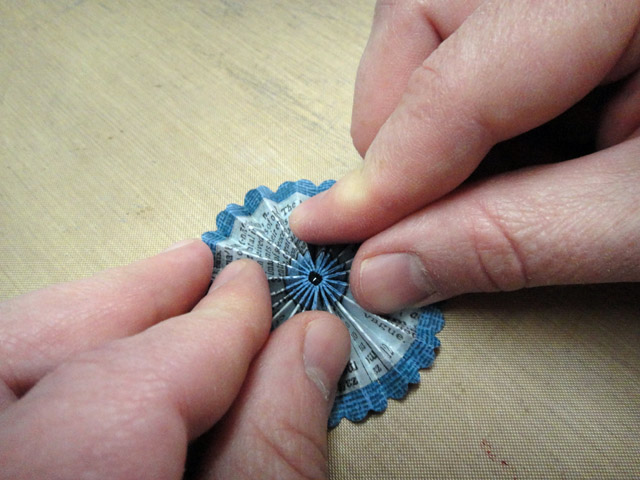
 step 11: apply a dot of hot glue to center of rosette and press the center in place.
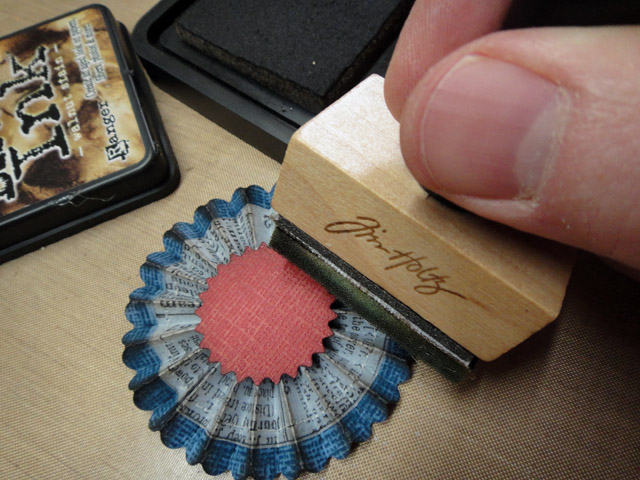 step 12: while rosette is still attached to the craft sheet, ink the entire rosette with distress ink using ink blending tool.
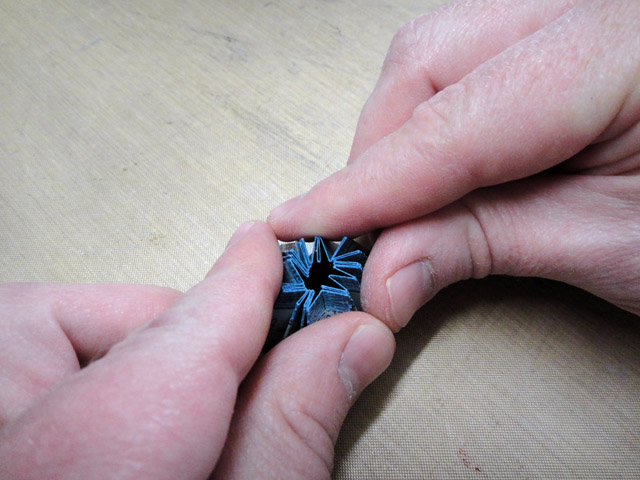
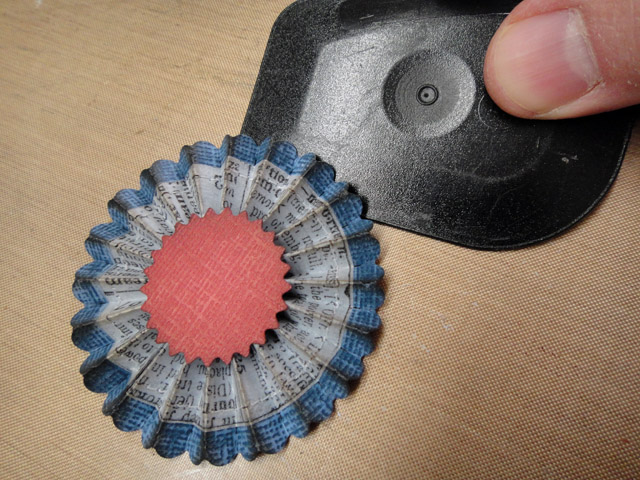 step 13: slide a craft scraper or other thin object under rosette to lift from craft sheet.
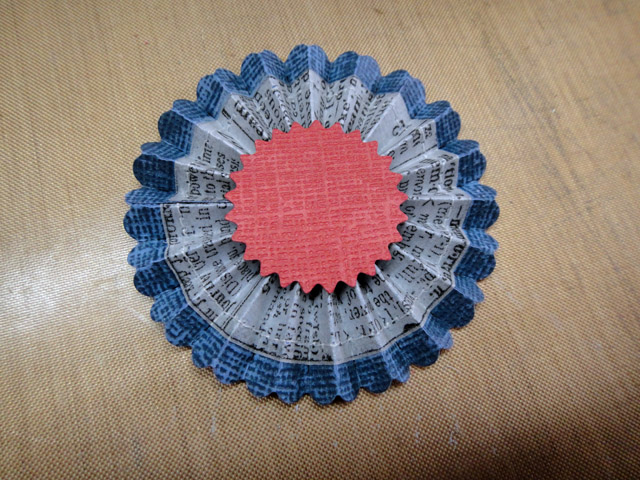
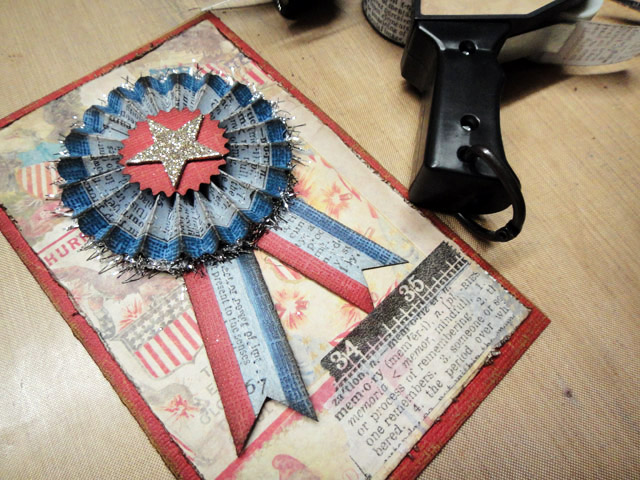
 *this is what you should have, the perfect rosette! now if you were going to create rosettes for a garland or ornament, then you would simply adhere a center on to both sides.
 step 14: cut a 3/4” wide strip of coredinations in blue, paint 2/3 of it with picket fence distress paint, and adhere a strip of tissue tape leaving approx. 1/4” of blue showing.
 step 15: wrap the excess tissue tape that’s hanging over, around the back.
 step 16: cut a 1/4” wide strip of coredinations in red and adhere with glossy accents.
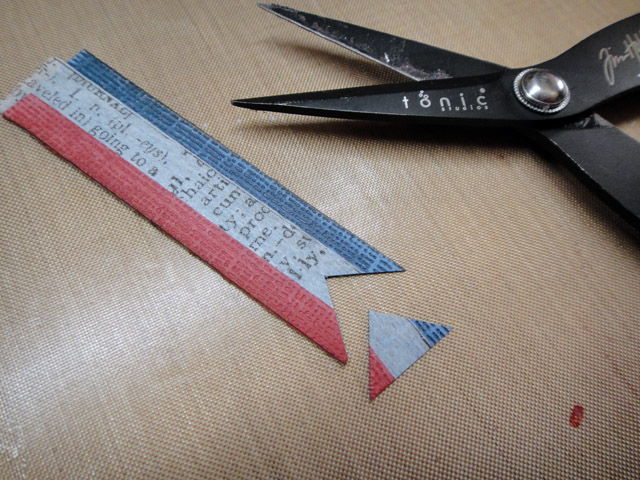 step 17: cut the strip in half and snip each end creating flag points as shown.
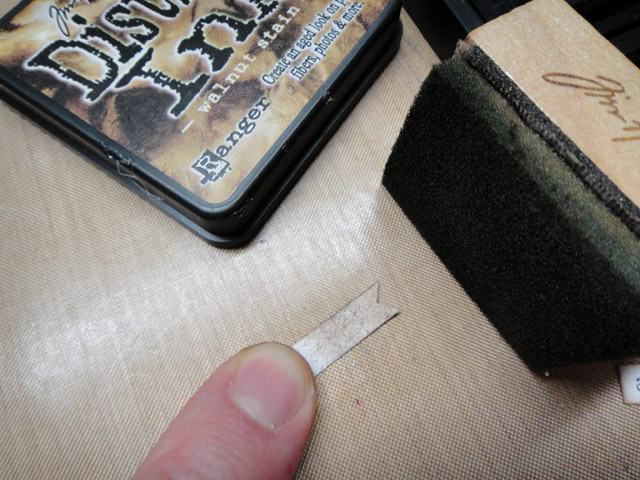
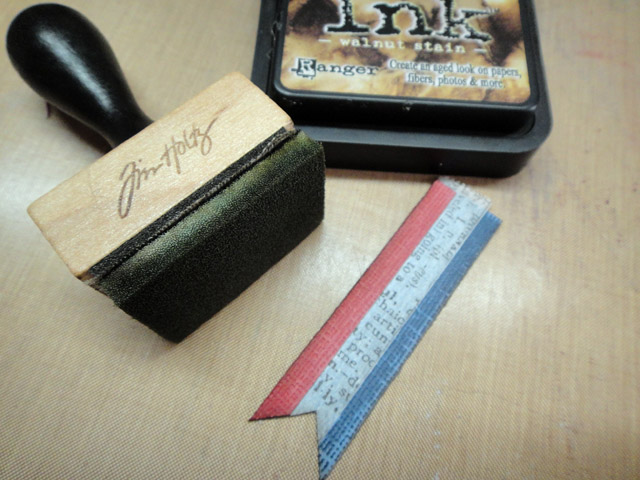 step 18: ink the edges with distress ink and ink tool.
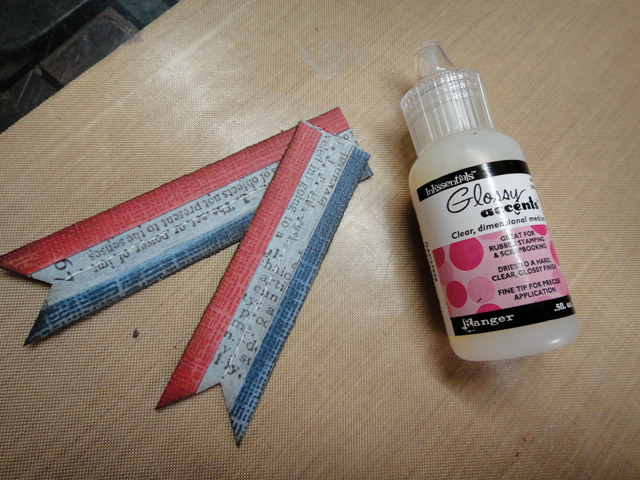 step 19: adhere the two straight together and slightly overlap as shown. *note: i decided to sew these too, i like the look of it don’t you?
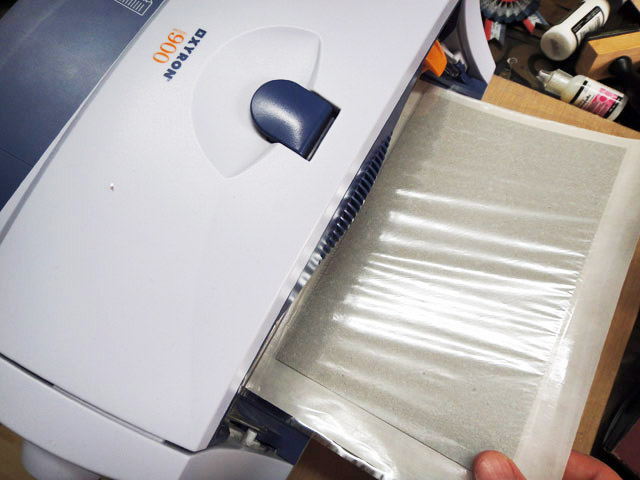 step 20: run a sheet of grungeboard through the permanent adhesive cartridge of a xyron. *note: i use my xyron when using fine glitter to avoid clumpy glitter.
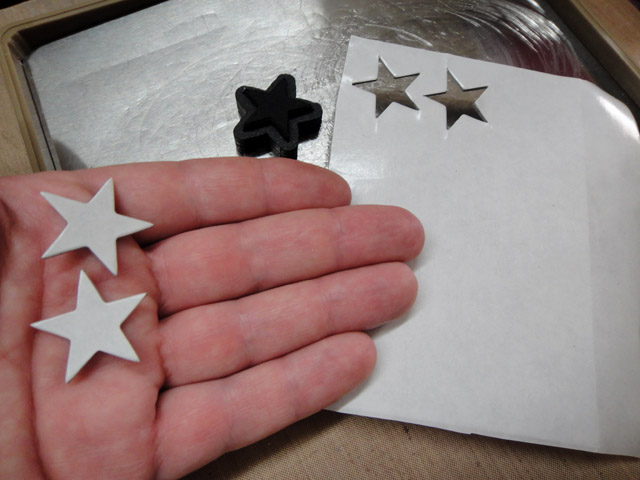 step 21: place the lined side of the grungeboard on to a mini star die on base tray and die cut through the vagabond.
 step 22: remove the liner from the star.
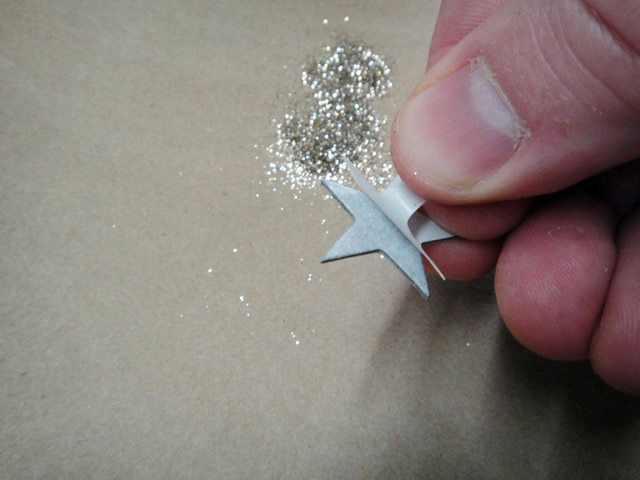
 step 23: press down on to stickles dry glitter covering the star.
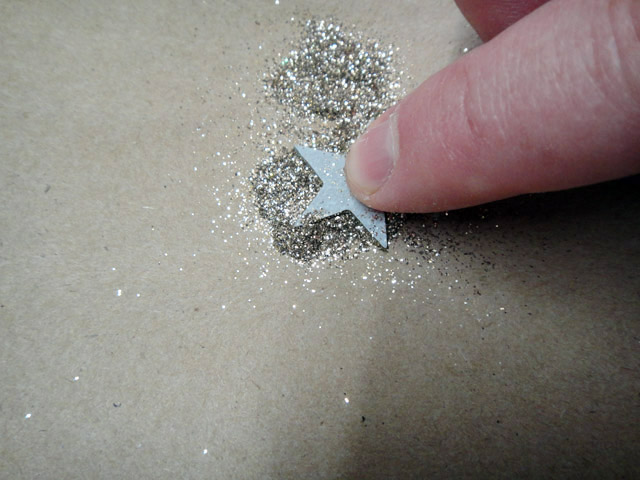
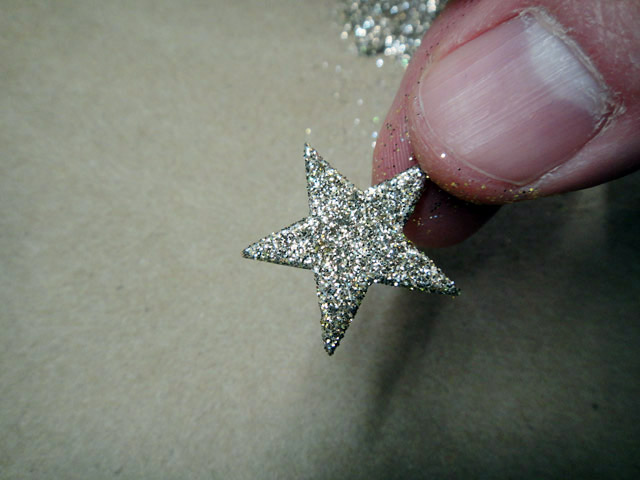 step 24: burnish excess glitter away with your fingers – simple as that.
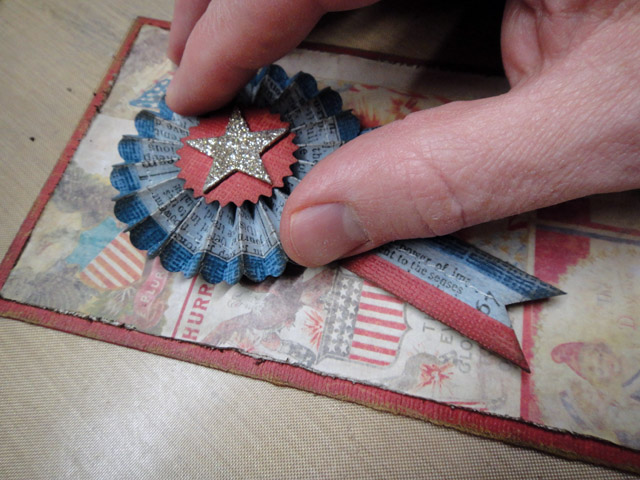
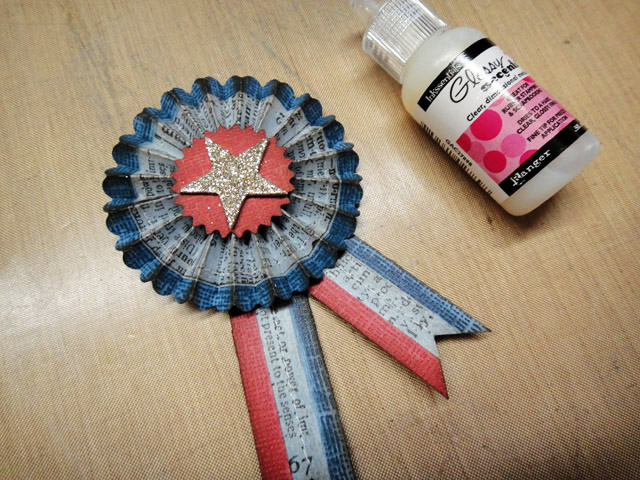 step 25: adhere the star and ribbon strips to rosette with glossy accents.
 step 26: for a card, cut and fold a piece of coredinations shattered cardstock. sand with sanding grip.
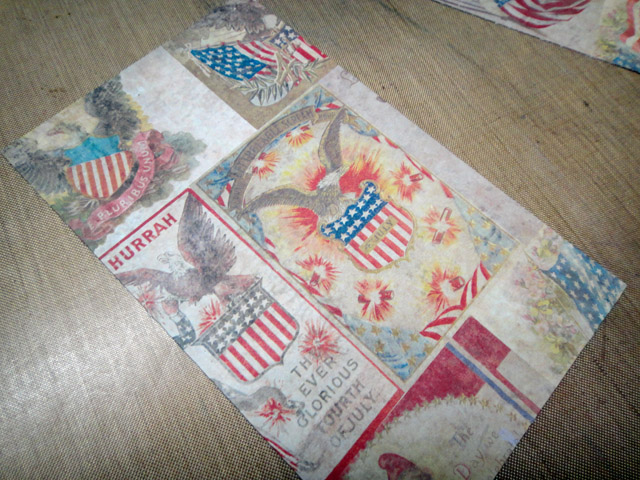 step 27: cut a piece of americana seasonal paper from stash slightly smaller than folded card size.
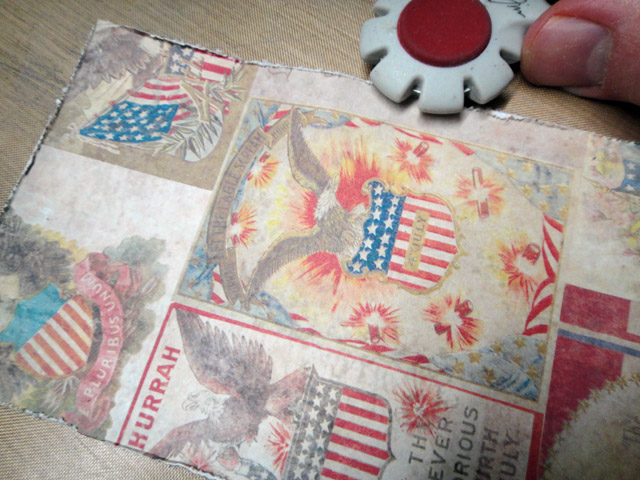 step 28: distress the edges of paper with paper distresser.
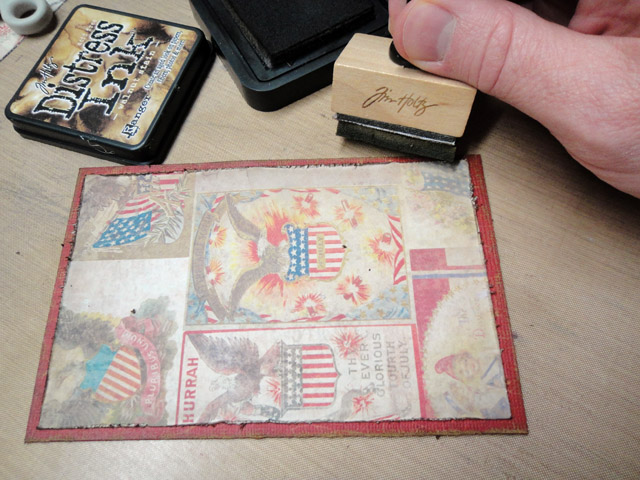 step 29: adhere patterned paper to cardstock and ink edges with distress ink using ink blending tool.
 step 30: adhere rosette ribbon to card with glossy accents.
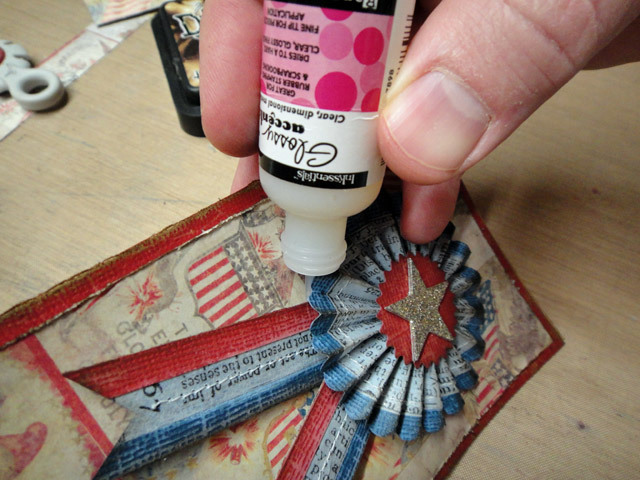 step 31: apply small amounts of glossy accents under the edge of the rosette.
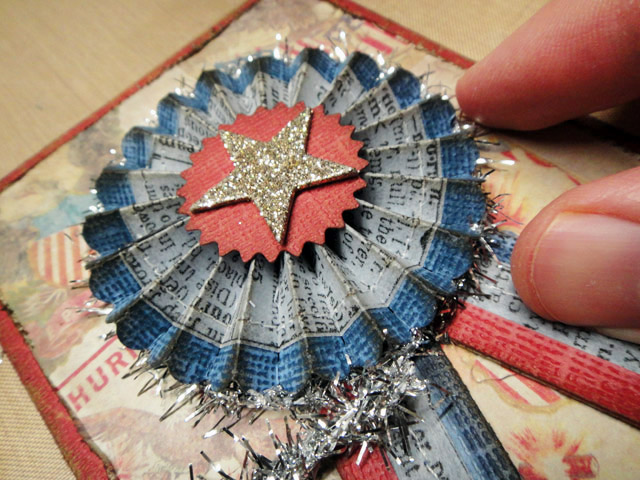 step 32: tuck tinsel twine under rosette allowing some to stick out around edges.
 step 33: apply a couple of pieces of tissue tape to card as shown.
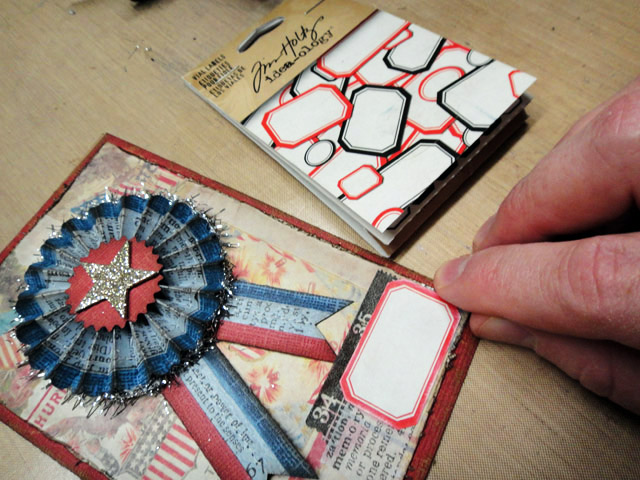 step 34: adhere a vial label to bottom corner of card.
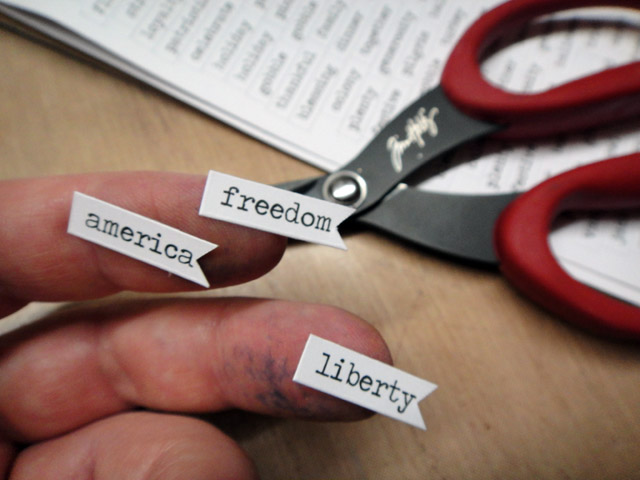 step 35: choose words from seasonal chitchat stickers and snip ends like a flag.
 step 36: ink the edges with distress ink using ink tool.
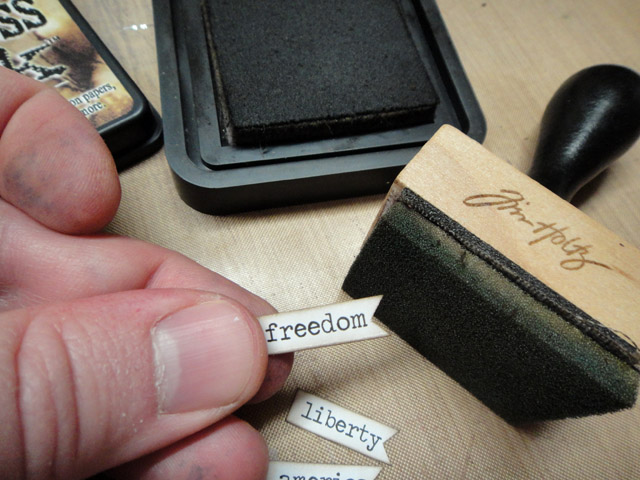
 step 37: flip sticker over and ink the back of the stickers to make them lose their sticky (this way they will lift from the card like flags when we attach them).
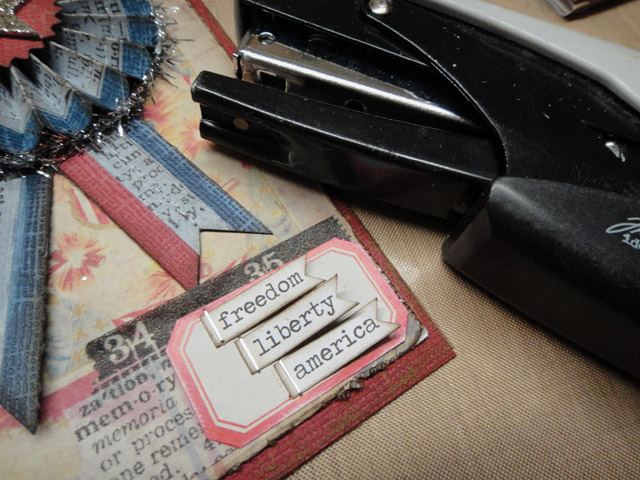 step 38: place chitchat words on vial label and secure with tiny attacher.
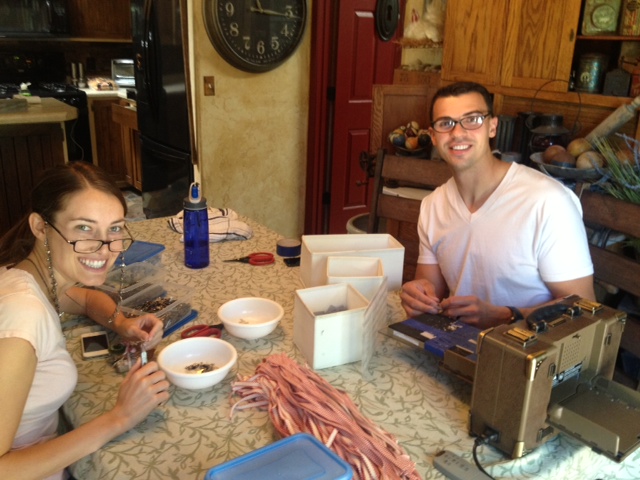
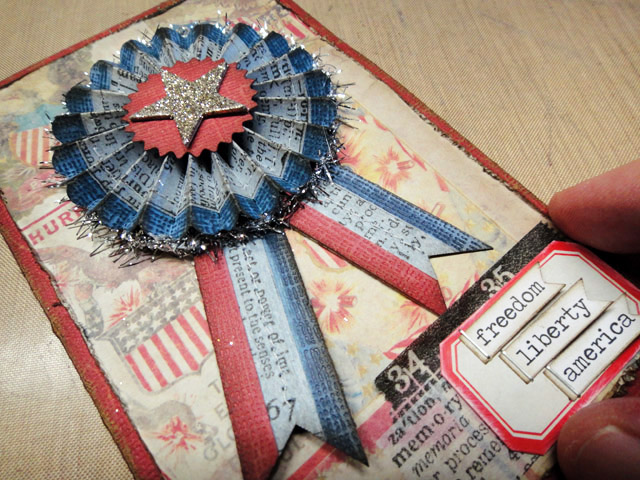 pretty fun aren’t they? i think they would be great to make anytime of the year. hope you’ll try and make a few yourself. we just landed in new jersey early this morning after catching a red eye and i’m headed into ranger headquarters soon. we have a busy week planned to work on final prep and logistics for the upcoming cha-summer show next month, then we’re off to orlando, florida from here to demo this weekend at stampfest in the stampers anonymous booth. it’s another crazy schedule that’s for sure. good thing mario III (mj3) and his wife sara are working all week back in the studio kitting the classes and make & takes for the show (love the photo – thanks guys!).
i’ll be back tomorrow with another festive, colorful and creative idea – enjoy today…t!m
|
|
|
|
|
|
|
|
|
|
|
|
|
|
|
|
|


