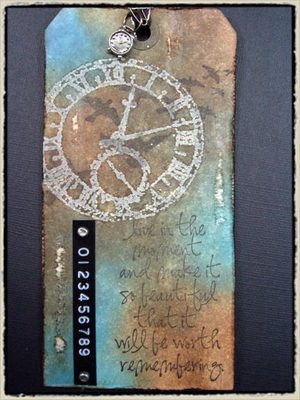
 "january technique challenge" – tim holtz(c) 2008
supplies: non-stick craft sheet, distress inks: faded jeans, broken china, vintage photo, walnut stain, black soot, ink blending tool, clear embossing powder, heat tool (ranger); paper distresser, scratcher tool (tonic studios); craft iron (clover); stamps (stampers anonymous); #8 tags (office supply store)
step 1: ink stamp with a lighter color distress ink and stamp on to surface.
step 2: working quickly, cover the stamped image with regular clear embossing powder and remove excess powder and place back into jar. (*tip: remember distress ink is an embossable dye ink)
step 3: emboss the image using a heat tool until powder is completely melted. (*tip: do not over-emboss the image, when it’s raised and shiny, it’s done)
step 4: choose a variety of colors of distress inks for your background. (*tip: choose colors darker than the stamped image)
step 5: using your ink blending tool, begin inking tag using the lightest color. tap the tool on to your distress ink pad and in a circular motion, apply the ink to the tag. (*tip: only ink various sections of the tag with this color, not the entire tag)
step 6: repeat above steps using the next darkest color. (*tip: again, only ink other sections of the tag you didn’t ink with the previous color, but still leave areas of the tag un-inked)
step 7: repeat with next color following above steps.
step 8: finish inking the tag with the darkest color. this step should cover up any un-inkned spaces left on the tag. (*tip: you can always go back to the previous colors if desired – be sure there is contrast from your embossed image to your background colors)
step 9: place a piece of newsprint old paper bag over your embossed image.
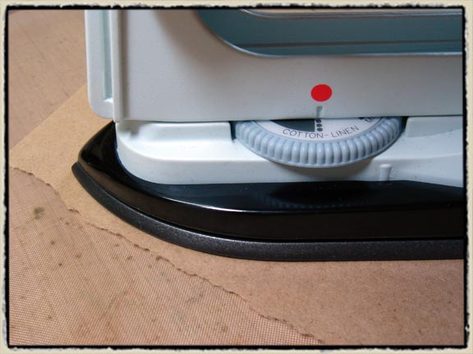
step 10: iron over the newsprint using a craft iron set to the highest heat setting. (*tip: a craft iron is twice the temp of a household iron and does not have any holes)
step 11: continue ironing until you can start to see the embossed image show through the back of the newsprint. (*tip: this step is re-melting the embossing powder and absorbing it into the newsprint. your image is now smooth and the original color you stamped in as the embossing powder acted as a resist to the top layer of inks. this is similar to wax batik but using embossing powder instead)
step 12: drag paper distresser along edges of the tag. this will tatter the edges and prep them for ink.
step 13: ink distressed edges of tag using your ink blending tool and a brown color of distress ink.
step 14: stamp bird image near the top of the tag across batiked image using black soot distress ink. this will still resist the ink from the stamped image too!
step 15: stamp verse stamp in bottom corner using black soot distress ink.
step 16: distress the surface of the tag using a scratcher tool by extending the wires and dragging it across certain areas of the tag. this will scratch away layers of the tag. (*tip: do not be too aggressive with this step to avoid putting holes into the tag.)


