supplies: kraft glassine, adirondack alcohol inks/bottle/lettuce/oregano/meadow/red pepper, metallic mixative/gold, blending solution, distress stain/antique linen/pumice stone/forest moss, distress ink pads/vintage photo/frayed burlap/blakck soot, distress stickles/picket fence, craft sheet, mister bottle, heat tool, ink applicator tool, ink blending tool, paint dabber/gold/snow cap white, distress embossing ink, black embossing powder, glossy accents, #8 manila tags, #8 kraft tags; baubles, sanding grip, trimmings; die cut/holly branch; CMS119 joyful song stamp set; paper distresser, scissors, wire, lace

step 1: colorize a sheet of kraft glassine using alcohol inks, mixative, and blending solution following the directions given in the video.

step 2: once dry, crumple into a ball several times to create wrinkles and break through the coating in the glassine.

step 3: swipe distress ink pad (vintage photo) directly over the raised wrinkles in the paper.

step 4: dry the distress inks by heat setting them into the glassine with a heat tool. *note: remember any time you want to embed something into the glassine, you need to heat it.

step 5: cut the piece of paper in half as shown.

step 6: stack glassine and place both pieces on top of holly branch die.

step 7: die cut the holly leaves (this will give you 6 leaves total).

step 8: paint a 1/2 piece of grungeboard with gold paint dabber and let dry.

step 9: die cut the branch part of the die and scuff the edges with sanding grip.

step 10: ink the branch with distress ink (vintage photo) using an ink blending tool.

step 11: mist the branch with water.

step 12: wipe away excess distress ink to create and antiqued gold look. dry with heat tool and cut branch in half.

step 13: to create a snowy effect on the branch, swipe the edge with snow cap paint dabber. dry in between layers, and add about 3-4 layers to create a textured white effect.

step 14: apply distress stickles (picket fence) over the white painted areas only on the branch. let dry.

step 15: apply distress stains (pumice stone, antique linen) to craft sheet. *note: you need to squeeze the stain bottle while pressing down to dispense the stain.

step 16: be sure when you’re applying multiple colors, not to swipe through the previous color already on the sheet.

step 18: swipe tag through stain.

step 19: spritz the inked tag with water droplets to react the distress stains.

step 21: check out the effect spritzing does to the distress stains.

step 22: drag a paper distresser along the edges of the tag.

step 23: ink the edges of the tag with distress ink (frayed burlap) using an ink blending tool. *note: distress the edges first with a paper distresser allows the distress ink to absorb into the tattered edges of the tag giving a more vintage look and feel.

step 24: ghost stamp the crackle and music backgrounds on tag by holding the stamp in both hands, bend the stamp and just roll on part of the stamp to the tag. this will give the image and random faded-out effect. i like to do this to many larger background stamps as well when i only want to have some of the image.

step 25: stamp text with distress embossing ink on kraft tag.

step 26: apply black embossing powder over image and remove excess.

step 27: heat emboss the image until shiny.

step 28: cut out text leaving a slight border.

step 29: ink edges with distress ink (vintage photo) using an ink blending tool…ahh kraft paper and distress ink, what a match!

step 30: apply foam tape to the back of the image.

step 32: gather a few pearl baubles, a small zip-bag, and some alcohol ink (red pepper).

step 33: drop the pearls into the bag and a few drops of alcohol ink.

step 34: use your fingers to smooch the outside of the bag coating the pearls in ink (mess free!).

step 35: open bag and dump the pearls out on your craft sheet to dry. note: these should take a couple of minutes to dry completely or 30 seconds with a heat tool.

step 36: string the 3 baubles on to a thin piece of wire.

step 37: gather a torn piece of lace and twist the wire around it and twist the wire in the back like a twist tie. snip the ends of the wire with scissors.

step 38: adhere the branches to the bottom of the tag with glossy accents.

step 39: adhere the holly leaves (i only used 4 of the 6 cut) and lace cluster to the tag using a glue gun. *note: i also adhered some tinsel scraps by tucking it in under the baubles which helped the baubles stay in a cluster.

step 40: stain a piece of trimmings ribbon with distress stain (forest moss) and secure to top of tag and attach a few more baubles. vintage bliss…

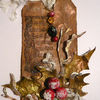
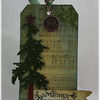
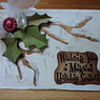
the details: the wrinkled effect of the guilded glassine is absolutely stunning on this tag. the way the light reflects off of the leaves and the glittery branches, and the contrast of the tattered lace and vibrant pearl baubles…

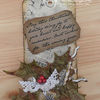
the details: the embossed detail of this image cut out and layered complimented by the ghost stamping of the other background images gives this tag such depth.

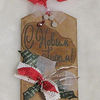
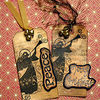
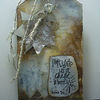
a variation: well if you own this stamp set (joyful song) you just want to use every stamp on it. here i chose to make another tag using the angel stamp and the same background stamps from the previous tag. i also used the two remaining holly leaves.

the details: just like the previous tag, i love the layered effect and contrast of stamping the text on to kraft, embossing, distressing, and cutting out to layer with foam tape.
i have to say, so far, today’s tag has to be my favorite…or was it tag one?…oh no wait it’s tag three….nope, it’s today’s tag as of today. well anyways, i just hope that regardless of your favorite tag, you’re giving yourself the creative freedom to try out each one of them – you simply never know. just wanted to say thanks again to so many of you who are following the tags and uploading yours to the blog daily (thanks to inlinkz). i’ve added a “blinkie” to the sidebar on my blog so you can add to your blog if you want (thanks to my friend boo!)…enjoy…t!m
here's a place to share your own project inspired by today's 12 tags of christmas technique right here on my blog!
to get started: click on the (add your link) button at the bottom of the post. after you enter your info, click (next step) and you'll be able to select the photo you wish to display as a thumbnail *please only post your project photo. you may link from your blog or from a public image-hosting site. *note: your photo will appear in random order so please upload it only once. you will be able to upload photos until Sunday, January 1, 9amPST.
thanks so much for sharing your creativity and joining the festive fun - happy holidays...t!m
| | | |
| | | |
| | | |
| | | |
| | | |
| | | |
| | | |
| | | |
| | | |
| | | |
| | | |
| | | |
| | | |
| | | |
| | | |
| | | |
| | | |
| | | |
| | | |
| | | |
| | | |
| | | |
| | | |
| | | |
| | | |
| | | |
| | | |
| | | |
| | | |
| | | |
| | | |
| | | |
| | | |
| | | |
| | | |
| | | |
| | | |
| | | |
| | | |
| | | |
| | | |
| | | |
| | | |
| | | |
| | | |
| | | |
| | | |
| | | |
| | | |
| | | |
| | | |
| | | |
| | | |
| | | |
| | | |
| | | |
| | | |
| | | |
| | | |
| | | |
| | | |
| | | |
| | | |
| | | |
| | | |
| | | |
| | | |
| | | |
| | | |
| | | |
| | | |
| | | |
| | | |
| | | |
| | | |
| | | |
| | | |
| | | |
| | | |
| | | |
| | | |
| | | |
| | | |
| | | |
| | | |
| | | |
| | | |
| | | |
| | | |
| | | |
| | | |
| | | |
| | | |
| | | |
| | | |
| | | |
| | | |
| | | |
| | | |
| | | |
| | | |
| | | |
| | | |
| | | |
| | | |
| |


