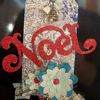
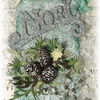
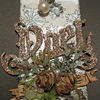
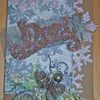
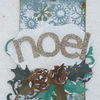
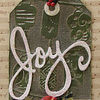
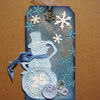
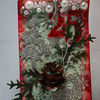
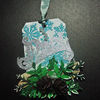
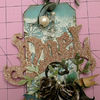
supplies: craft sheet, distress ink/frayed burlap/iced spruce (winter seasonal set), distress embossing ink, embossing powder/white, paint dabber/snow cap white, ink blending tool, glossy accents, glue n’ seal, distress stickles/rock candy, heat tool; kraft core; dies/vintage noel/tag & bookplate/tattered pinecone/festive greenery/tattered banners, texture fades/snow flurries, vagabond; baubles, jump rings, trimmings, lost & found paper stash, sanding grip; paper distresser, scissors; glitter, toothpicks, glue gun
what i wanted to share on this first tag more than anything was a tutorial on how to use my tattered pinecone die. i would have to say, next to the paper rosette, it’s my most favorite die from my alterations line so far. i thought the best way to share the tips and tricks was with a video – so…lights, camera, action…

step 1: die cut a #8 tag using the tag & bookplate die from kraft core (color no.14) and adhere both reinforcers to the front and back of the tag with glossy accents. also die cut the vintage noel from plain grungeboard.

step 2: die cut festive greenery from various colors of kraft core (color no.10, no.11, no.12, no.24). i like to save time and only die cut once, so i cut chunks of paper in various colors to cover the areas of the die i want that color.

step 3: just like the trick i shared in the video, while the die cuts are still in the paper, place on a scrap chipboard sheet and sand over the cardstock using a sanding grip to expose the kraft core around the edges of the die cuts.

step 4: carefully remove the die cut pieces – cool huh?

step 5: paint a heavy layer of glue n’ seal over the die cut noel *be sure glue is still wet for next step.

step 6: place on a piece of scrap paper and cover with fine glitter (i love the martha stewart white gold).

step 7: i like to share this tip since i’m not a huge fan of glitter, place a second piece of scrap paper over the glitter you just poured.

step 8: press the glitter down with your hand to embed it into the adhesive and remove top paper. *this trick keeps the glitter from covering your hands – ugh!

step 9: carefully remove noel from scrap paper and place on craft sheet to dry. replace excess glitter back in jar.

step 10: this next step i’ve done many times (although it still freaks people out), but i love to slice my embossing folders. just place them on a cutting mat, and using a sharp craft knife, slice the fold of the folder leaving about 1/2″ on each end un-cut. *if things go wrong, you can always tape it back together with packing tape.

step 11: gently tap distress embossing ink on the front side of the folder (where the designs are recessed).

step 12: insert the cut tag through the slot and position the tag on the folder making sure the inked side of the folder is on top.

step 13: emboss the tag through the vagabond (or your die cut machine) and immediately take it out of the folder, place on a piece of scrapbook paper, and cover with any white embossing powder.

step 14: shake excess powder on to scrap paper and replace powder back into jar.

step 15: with your finger, begin rubbing the excess embossing powder off of all of the raised designs.

step 16: also use your finger to randomly rub off around the top and bottom edges and well and spots here and there – remember random…

step 17: heat emboss this until the powder melts to a speckly white. you see, by rubbing away some of the powder, it creates the look of that spray snow, or snow flurries.

step 18: once the powder cools, sand over the tag with a sanding grip to expose the kraft core of the paper around the raised designs.

step 19: ink the tag with distress ink (iced spruce) using an ink blending tool. i love this color!

step 20: distress the edges of the tag to expose the kraft core by sliding a paper distresser across the edges.

step 21: cut a piece of trimmings and mist it with water on your craft sheet.

step 22: swipe the distress pad (iced spruce) over the ribbon to color.

step 23: crinkle ribbon into a ball and let dry or dry with a heat tool.

step 24: open the ribbon and check out the awesome mottled color distress ink pads do to ribbon (different from the evenly saturated effects distress stains give).

step 25: die cut a tattered banner set using music paper (i used the sheet from the lost & found paper stash).

step 26: fold each end of a medium size banner by folding a small “s” or “z” ink edges with distress ink (frayed burlap).

step 27: cut and create 2 mini pinecones and 2 pieces of juniper from the die. lightly swipe paint dabber (snow cap white) along the tips of the pinecones.

step 28: squeeze out a blog of distress stickles (rock candy) on craft sheet.

step 29: using your finger, lightly dab stickles along tips of pinecone.

step 30: repeat previous steps using paint dabber and distress stickles on all greenery.

step 31: position glittered noel on tag and adhere with glossy accents.

step 32: begin shaping and adhering the tattered banner and festive greenery to tag using glossy accents. *glossy accents has a fast drying time when gluing paper to paper.

step 33: snip off excess toothpicks from pinecones using scissors.

step 34: adhere pinecones over greenery on tag using a hot glue gun. (this really does work the best for these)

step 35: adhere small pearl baubles to the greenery using glossy accents or glue gun.

step 36: tie trimmings through top of tag – be careful not to pull too hard or you’ll rip the cardstock.

step 37: attach more baubles using a jump ring and that’s it!

the details: i love the effect the snow cap paint dabber and rock candy distress stickles add the wintery look to the pinecones and greenery.

the details: don’t forget to bend and shape your festive greenery to give it a more realistic look.

the details: the speckled effect of the white embossing powder on the background really sets off the textured snowflakes.

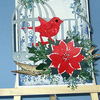
another idea: like i showed in the video, this die doesn’t always have to be used to make pinecones. these little dried roses work perfect in this frame i picked up for $1, distressed it, added some background paper, and then stamped the word LOVE on another piece from the tattered banners. i finished it off with a bird charm from my adornments pack by attaching it with a memo pin. great gift idea i think…

the details: these little spiked petals really give these flowers a unique look of dried roses.
whew! so day one…done! what did you think? are you inspired to create? i sure hope so. remember that even though the holiday season can get a bit chaotic, take time to enjoy the festive journey – you’ll be so happy to did. be sure to post a comment on the blog for a chance to win a prize! i can’t wait to see your projects using the tattered pinecone die so please be sure to follow the instruction below to upload your finished tag, card, or whatever you create. i sure love this time or year, don’t you?…t!m
here's a place to share your own project inspired by today's 12 tags of christmas technique right here on my blog!
to get started: click on the (add your link) button at the bottom of the post. after you enter your info, click (next step) and you'll be able to select the photo you wish to display as a thumbnail *please only post your project photo. you may link from your blog or from a public image-hosting site. *note: your photo will appear in random order so please upload it only once. you will be able to upload photos until Sunday, January 1, 9amPST.
thanks so much for sharing your creativity and joining the festive fun - happy holidays...t!m
| | | |
| | | |
| | | |
| | | |
| | | |
| | | |
| | | |
| | | |
| | | |
| | | |
| | | |
| | | |
| | | |
| | | |
| | | |
| | | |
| | | |
| | | |
| | | |
| | | |
| | | |
| | | |
| | | |
| | | |
| | | |
| | | |
| | | |
| | | |
| | | |
| | | |
| | | |
| | | |
| | | |
| | | |
| | | |
| | | |
| | | |
| | | |
| | | |
| | | |
| | | |
| | | |
| | | |
| | | |
| | | |
| | | |
| | | |
| | | |
| | | |
| | | |
| | | |
| | | |
| | | |
| | | |
| | | |
| | | |
| | | |
| | | |
| | | |
| | | |
| | | |
| | | |
| | | |
| | | |
| | | |
| | | |
| | | |
| | | |
| | | |
| | | |
| | | |
| | | |
| | | |
| | | |
| | | |
| | | |
| | | |
| | | |
| | | |
| | | |
| | | |
| | | |
| | | |
| | | |
| | | |
| | | |
| | | |
| | | |
| | | |
| | | |
| | | |
| | | |
| | | |
| | | |
| | | |
| | | |
| | | |
| | | |
| | | |
| | | |
| | | |
| | | |
| | | |
| | | |
| | | |
| | | |
| | | |
| | | |
| | | |
| | | |
| | | |
| | | |
| | | |
| | | |
| | | |
| | | |
| | | |
| | | |
| | | |
| | | |
| | | |
| | | |
| | | |
| | | |
| | | |
| | | |
| | | |
| | | |
| | | |
| | | |
| | | |
| | | |
| | | |
| | | |
| | | |
| | | |
| | | |
| | | |
| | | |
| | | |
| | | |
| | | |
| | | |
| | | |
| | | |
| | | |
| | | |
| | | |
| | | |
| | | |
| | | |
| | | |
| | | |
| | | |
| | | |
| | | |
| | | |
| | | |
| | | |
| | | |
| | | |
| | | |
| | | |
| | | |
| | | |
| | | |
| | | |
| | | |
| | | |
| | | |
| | | |
| | | |
| | | |
| | | |
| | | |
| | | |
| | | |
| | | |
| | | |


