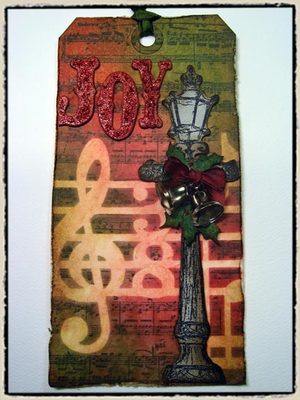
 "day 1" -tim holtz(c) 2008
supplies: craft sheet, distress inks/fired brick, aged mahogany, peeled paint, vintage photo, distress stickles/fired brick, ink blending tool, mini mister, archival ink/jet black, glossy accents, heat tool (ranger); grungeboard/basics plain, seasonal, mask/concerto (tim holtz idea-ology); stamps/lamp post P3-1338, music V1-1339, set CMS-048 (stampers anonymous); scissors, paper distresser (tonic); dot n go (glue dots); tag, ribbon
step 1: place mask on to tag burnishing it lightly with your hand.
step 2: ink over mask with distress ink using an ink blending tool working in a twisting and tapping motion vs. a swiping motion to avoid lifting the mask off.
step 3: repeat until entire tag is inked – be sure to ink the tag with intense color.
step 4: ink stamp with archival ink and stamp over masked tag. (*be sure to use a waterproof ink for this step.)
step 5: when finished inking, wipe excess ink off mask. carefully remove mask by peeling it away from tag and return to storage sheet.
step 6: mist tag with water from mini mister to allow inks to start blending and bleeding into masked area. (*we used distress inks for the background because they are reactive with water and will spread out when wet and create various tones of color.)
step 7: dry inks with heat tool.
step 8: stamp lamp post grungeboard sheet with archival ink. let dry.
step 9: cut image out with scissors.
step 10: ink edges with distress ink using ink blending tool.
step 11: remove "joy" and "mini holly" from seasonal grungeboard pack.
step 12: ink pieces with distress ink using ink blending tool.
step 13: adhere grungeboard lamp post and joy to tag with glossy accents.
step 14: cut holly pieces apart and adhere them to the lamp post with glossy accents.
step 15: drag paper distresser along the edges of the tag to create a tattered effect.
step 16: apply distress stickles over "joy" spreading it around with the tip of the bottle. let dry.
step 17: apply glue dots to lamp post with craft dot n go.
*in the details: tie ribbon on bells and adhere to tag with glue dots. (*i like to use glue dots for any dimensional object since they hold on to just about everything and still allow it to stay flexible.)


