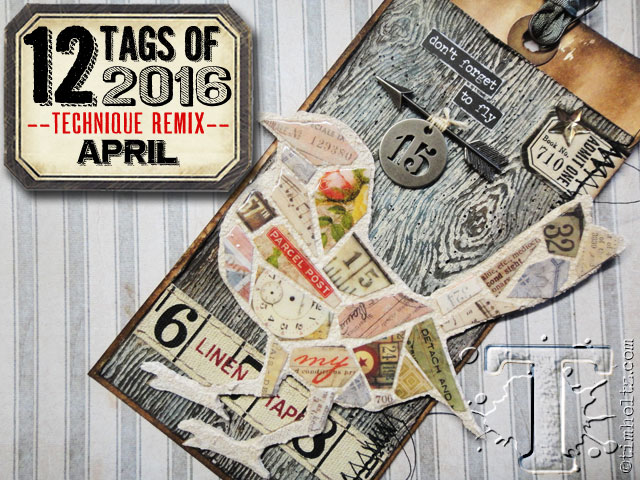
 one of my favorite things about these technique remixes is the opportunity to take an old technique and apply it using a new product. it’s safe to say that as a paper crafter, there is no shortage of paper scraps around my studio. often they are random leftovers of cut up 12×12 sheets, sometimes fragments of ephemera or photos, and occasionally snippets of created collaged backgrounds. whatever those elements may be, designing a dimensional tiled effect with them is now easier than ever with the distress paper mosaic kit to transform the scraps of imagery into new works of art. i’ve paired this with a simple paint resist technique applied to the new distress woodgrain cardstock for the perfect background…
supplies:
- surfaces: manila tag, distress woodgrain cardstock, chipboard, paper scraps
- inks: distress ink/ground espresso, distress stain/weathered wood/tumbled glass/iced spruce, distress spray stain/ground espresso/walnut stain/brushed corduroy
- paints: distress paint/antique linen/black soot
- mediums: distress paper mosaic kit
- embellishments: remnant rubs, ruler ribbon, vial labels, arrow adornments, number tokens, small talk, mirrored stars, crinkle ribbon
- tools: bigz/bird silhouette, distress sprayer, distress splatter brush, mini brayer, heat tool, mini ink blending tool, palette knife, scissors, paper distresser, paint brush

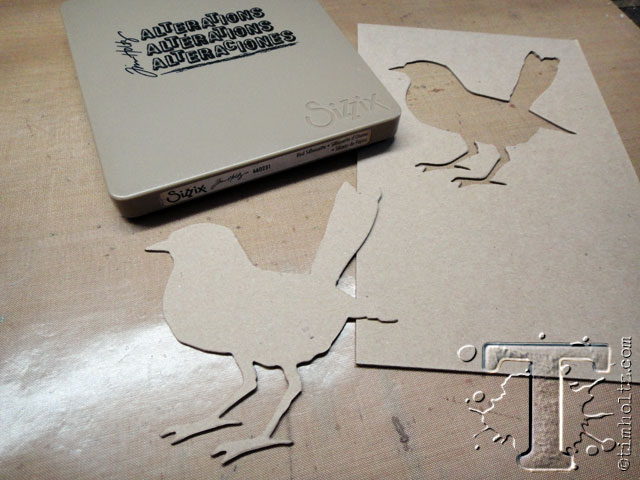 – die-cut the bird silhouette from a piece of chipboard. *it’s important to start with a stable foundation when using the mosaic kit like chipboard, wood, glass, metal, etc.
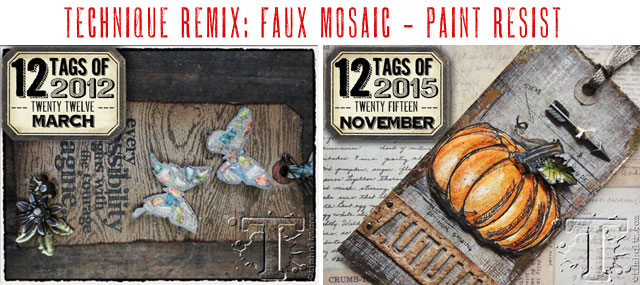
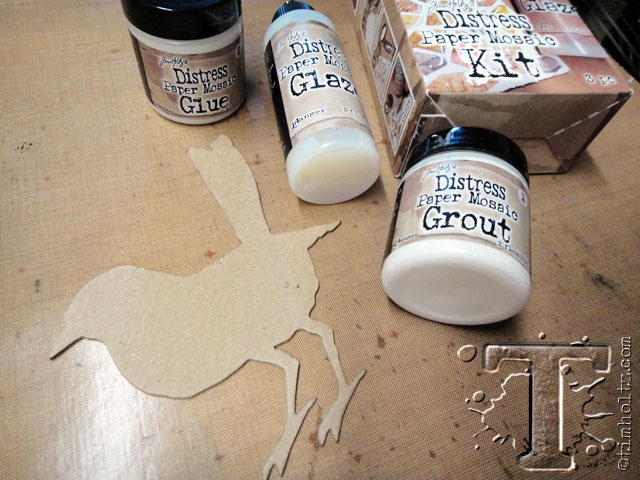 – the original technique linked above features a mosaic effect, but this month we are going to achieve this look an entirely different way using the distress mosaic kit. this kit includes grout, glue, and glaze formulated specifically to create a paper mosaic on a variety of surfaces. check out the video below to learn more…
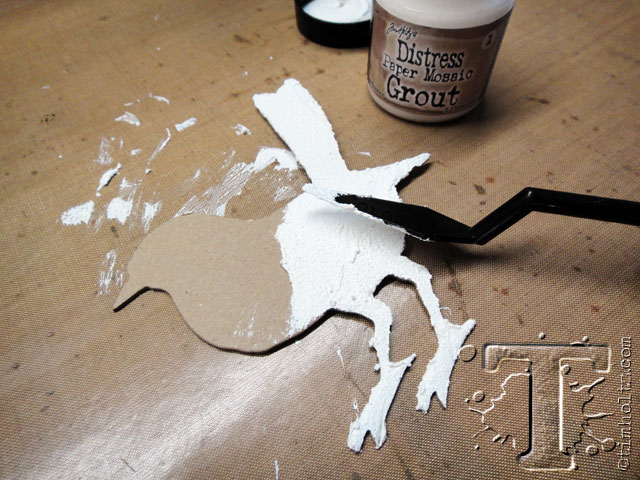 – step 1: apply the grout using a palette knife (although you can use a paint brush, i find a palette knife provides a thinner layer of grout).
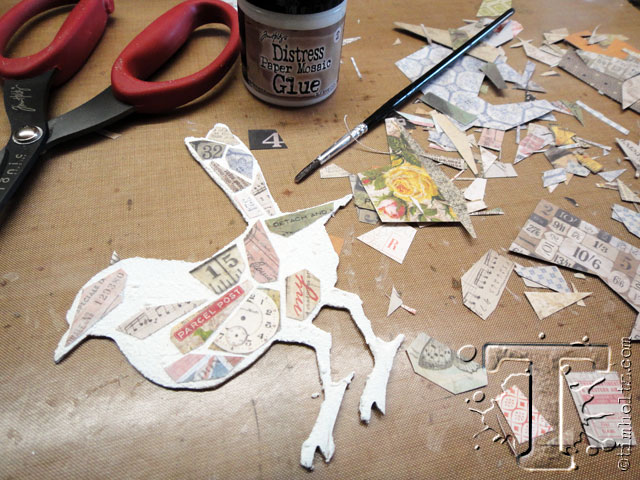 – step 2: glue paper pieces to the grouted surface and cover with a layer of glue.
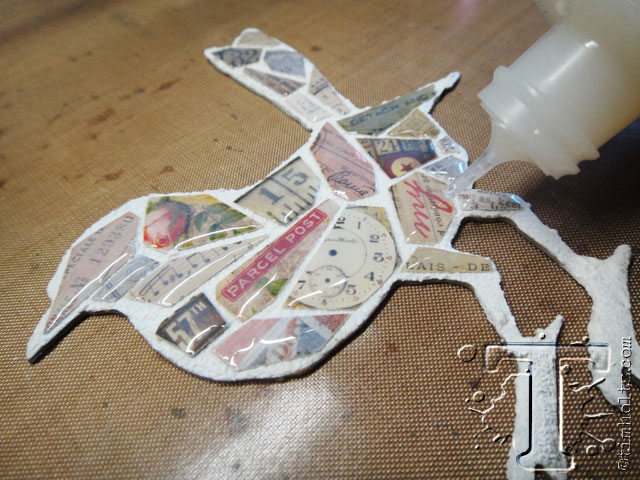 – step 3: glaze each paper tile *note: the viscosity of this glaze is thinner than glossy accents allowing it to flow into the tips of each paper tile without running off the edge.
 – another cool feature of this kit is that glue is “inkable” with distress ink once dry allowing you to tint the grout areas. apply the ink using a blending tool to work the ink into the grout.
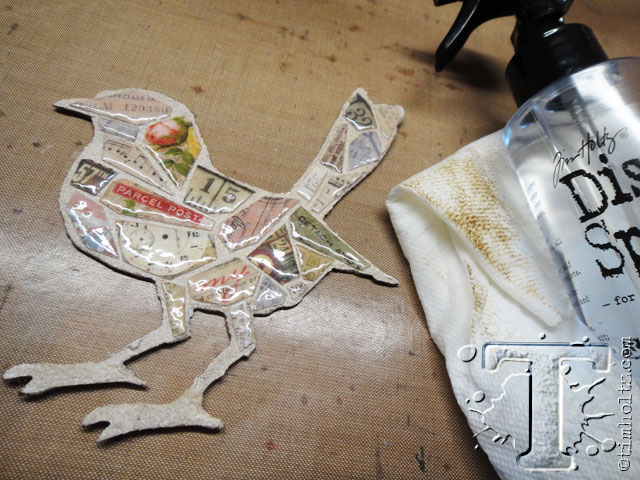 – remove the distress ink from the “tiles” by misting a paper towel with water and lightly blot the surface.

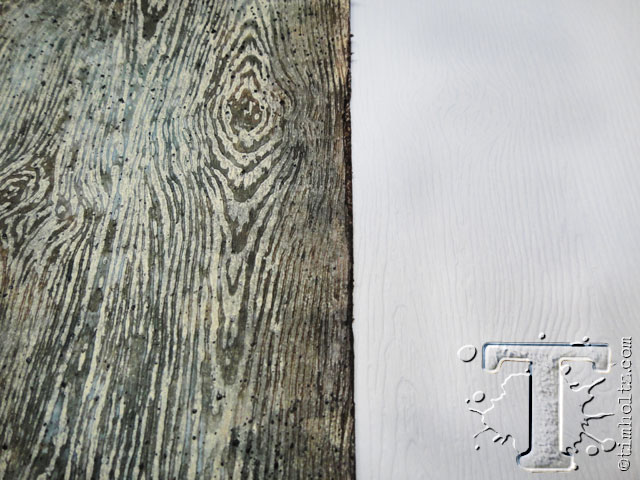 – the original technique linked above features a woodgrain background using distress paint and a rubber stamp, but this month we are going to achieve this look an entirely different way using the distress woodgrain cardstock. this cardstock actually has a very detailed embossed texture creating the most realistic woodgrain look and feel.
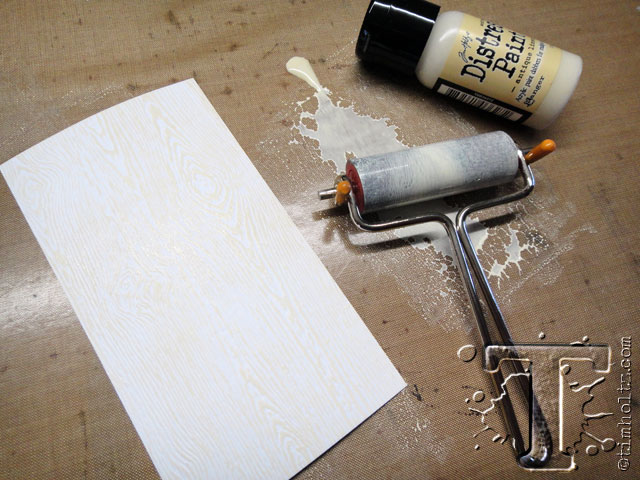 – apply distress paint to the distress woodgrain cardstock using a brayer and let dry.
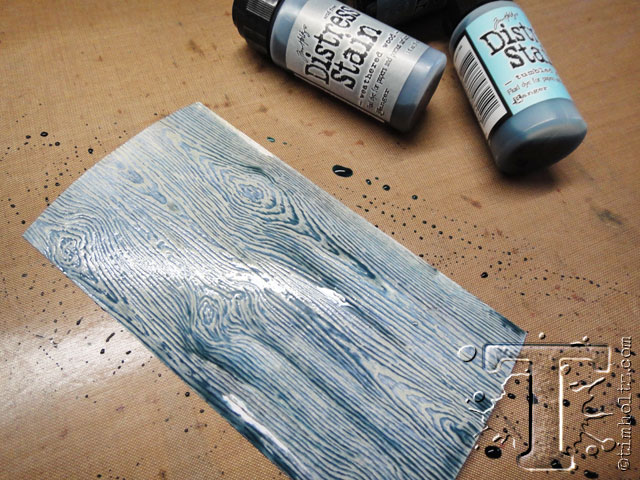 – color the cardstock with various colors of distress stain or spray stain.
 – dry with a heat tool and you will see the paint color rise to the surface working as a resist.
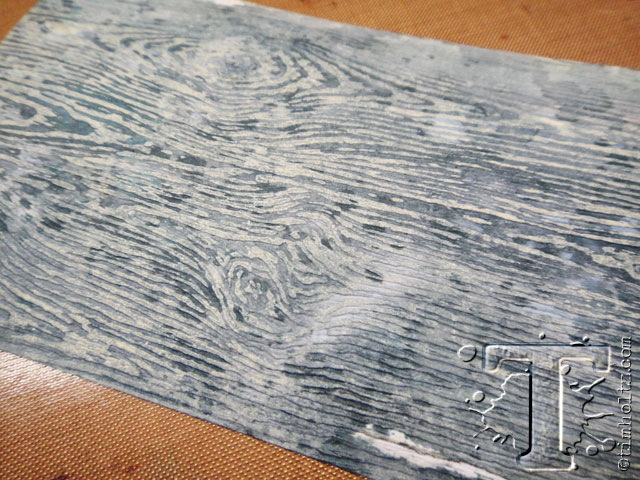
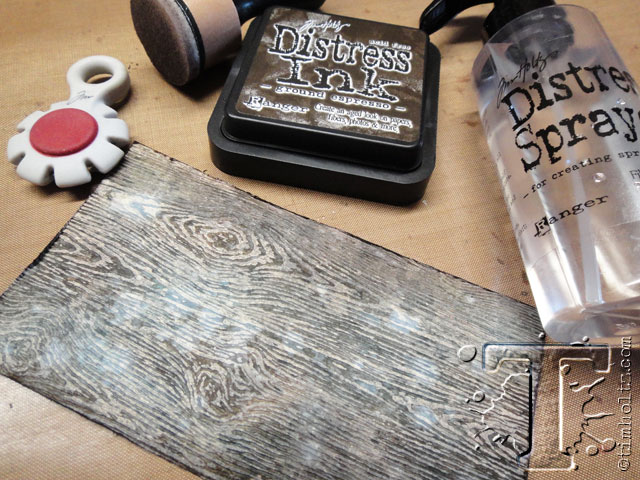 – for added depth, ink the textured cardstock with distress ink using a blending tool and distress the edges with a paper distresser. spritz with water droplets using the distress sprayer for a mottled effect…
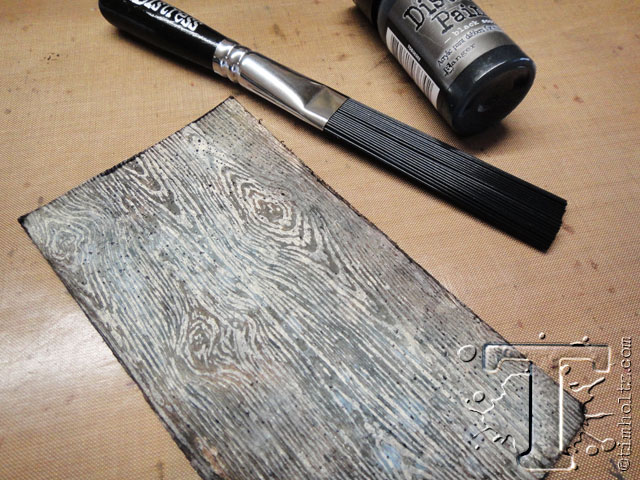 – to finish the look, splatter the tag using the distress splatter brush and black paint – perfect.
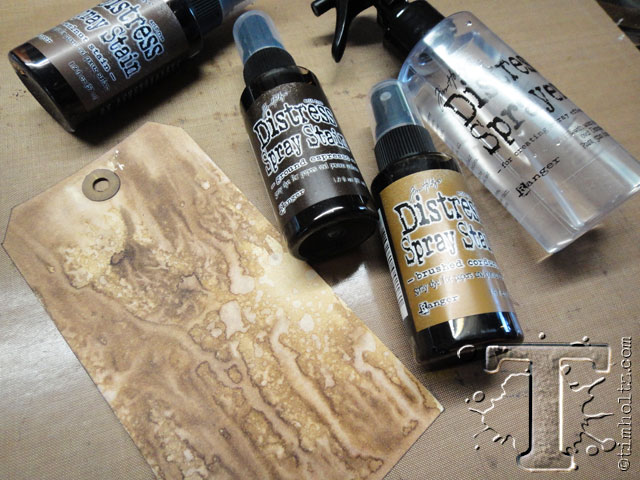 – since the background will be layered on a tag, quickly ink a tag using distress spray stain and water.
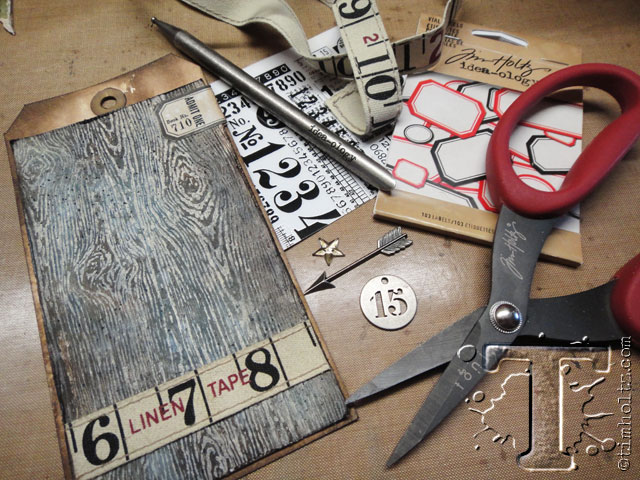 – adhere the woodgrain cardstock to the tag and start adding embellishments. i started with a piece of ruler ribbon and a vial label with some remnant rubs.
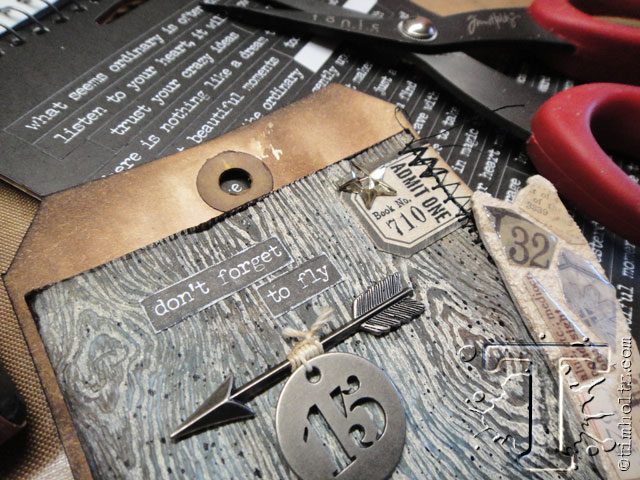 – next i added some random stitching with a sewing machine and a few more details like small talk, a mirrored star, arrow adornment, and a number token tied with string.
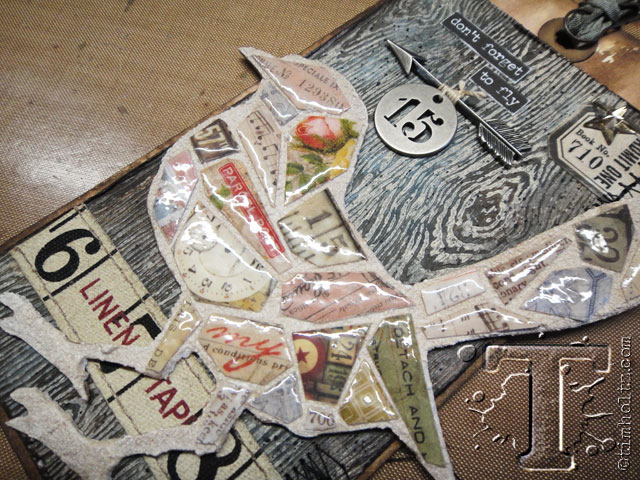 – i really love all of the layers, textures, and dimension this mosaic kit adds to a project. remember these tags are simply the surface to play on, they don’t have to stay “just a tag”. use them on card fronts, add them to your art journals or planners for inspiration, or layer them on a burlap panel or frame them for a quick home decor project…t!m
congrats to the winners from the march 12 tags of 2016. if you see your name (and it links to your tag), please email [email protected] to claim your prize…
1. Lucki
2. Suzanne C
3. Angela
4. Theresa Peterman
5. Mylissa
6. LostArt
7. Bookworm
8. LyndaCreates
9. Claudine C
10. Belinda Basson
11. Frederique
12. Catherine
*be sure to check your local stores for these supplies, or click on the links below to purchase online from Simon Says Stamp with a discount of 10% off your purchase – use code: 10APRILTH4
<


