
i’m lovin’ summertime! the time to get out and enjoy a little sunshine, take a vacation, or just enjoy the longer days to take time to dream. i’m always saying that inspiration is everywhere, many times it’s simply a matter of changing your perspective of a technique, and use what you already know in a different way. in fact, a couple of today’s techniques were shared a few years ago here on the blog during the original 12 tags of christmas (back in 2008 with the faux snow, and 2010 with embossing plastic). well this month’s 12 tags of 2014 is inspired by summer with a trip to the beach to smell the fresh sea air, feel the sand between your toes, and catch a glimpse of an underwater world. not to worry if you don’t have the chance to get to the beach anytime soon, at least we can let our creativity take us there right? paradise found…t!m
supplies:
- surfaces: #8 manila tag, shrink plastic, grungboard, kraft core,
- dies: sand & sea, mini movers die/sand & sea, spring greenery
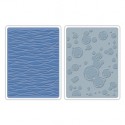
- texture fades: bubbles
- embellishments: word band,
- trimmings: linen ribbon, jute string
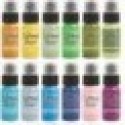
- distress ink: gathered twigs/salty ocean/evergreen bough
- distress markers: frayed burlap/pumice stone
- distress stain: weathered wood/pumice stone
- distress paint: peacock feathers/tumbled glass/salty ocean/rusty hinge/crushed olive/wild honey
- distress crackle paint: rock candy
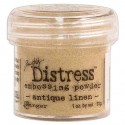
- distress embossing powder: antique linen/black soot
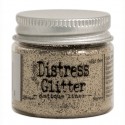
- distress glitter: antique linen
- mediums: utee/clear
- adheisves: glossy accents
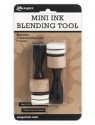
- tools: distress marker spritzer, mister, mini blending tool, heat tool, craft sheet, tiny attacher, sanding grip, vagabond machine, scissors, paper distresser, craft stick, palette knife
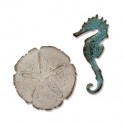
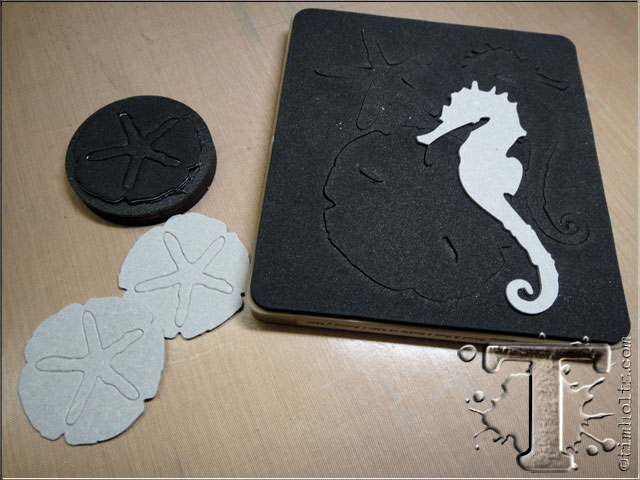 step 1: first let’s start with our accent pieces by die cutting a large seahorse and two mini sand dollars from grungeboard. *i chose to use both the bigz and mini versions of these dies simply for scale.
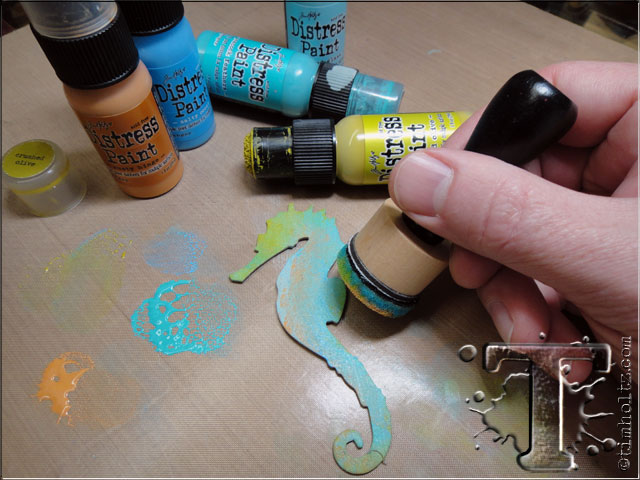 step 2: paint the seahorse with various colors of distress paint using mini blending tool. *i find this tool really convenient for dabbing various colors of paint to a surface (remember the blending foam is washable after use too).
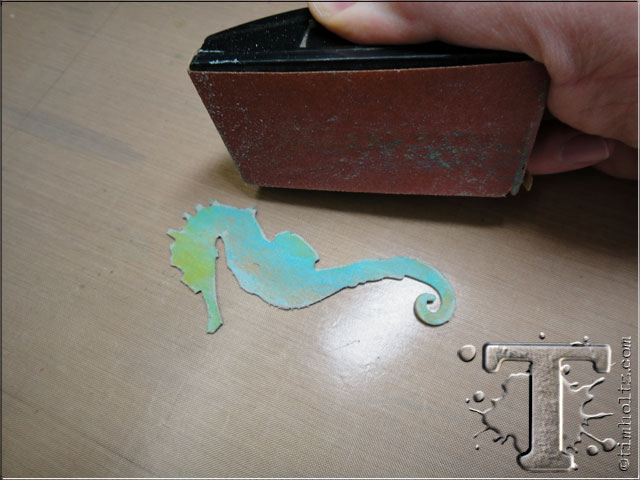 step 3: once paint is dry, sand and scuff the edges to reveal the grungeboard.
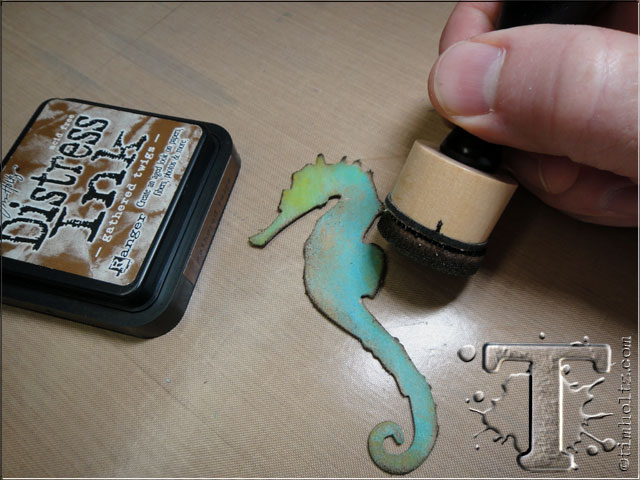 step 4: ink the edges with distress ink using ink blending tool.
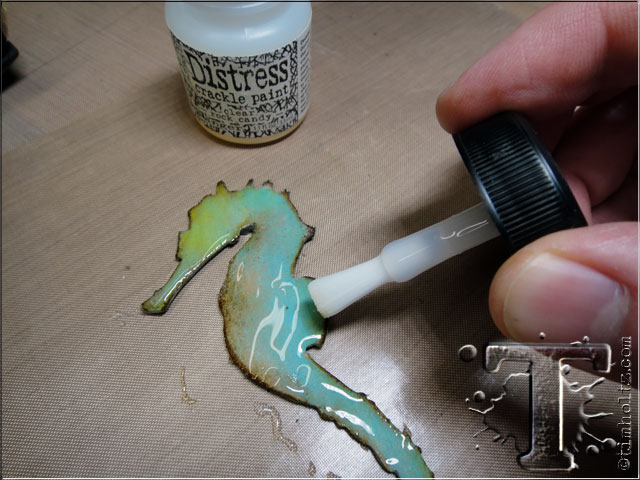 step 5: apply a medium layer of clear rock candy distress crackle paint to the entire surface and set aside to dry and crackle.
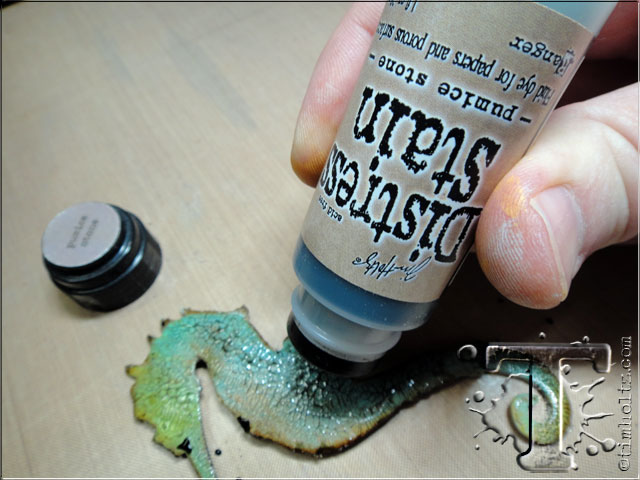 step 6: once paint has crackled, apply distress stain over surface allowing stain to seep into the cracks.
 step 7: dry the stain into the cracks using a heat tool. *i think this step is important to heat dry vs. allowing to air dry.
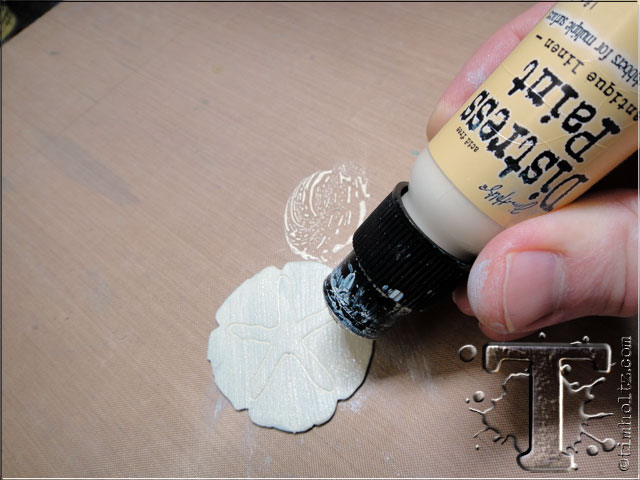 step 8: apply distress paint to one sand dollar to create a wet layer of paint.
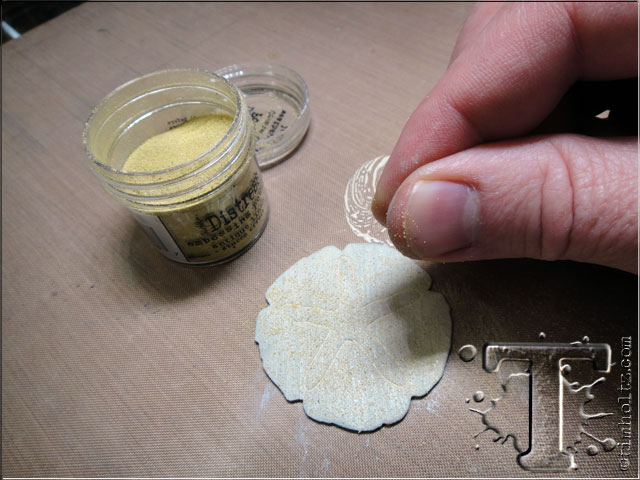 step 9: shake distress embossing powder and sprinkle over the wet paint (do not cover the entire surface).
 step 10: heat emboss to melt embossing powders and create a cool gritty texture.
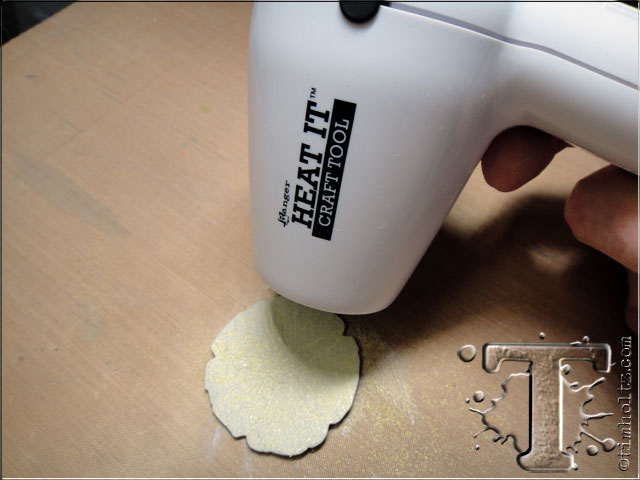
 step 11: on the second sand dollar, cut out along the score lines for the starfish.
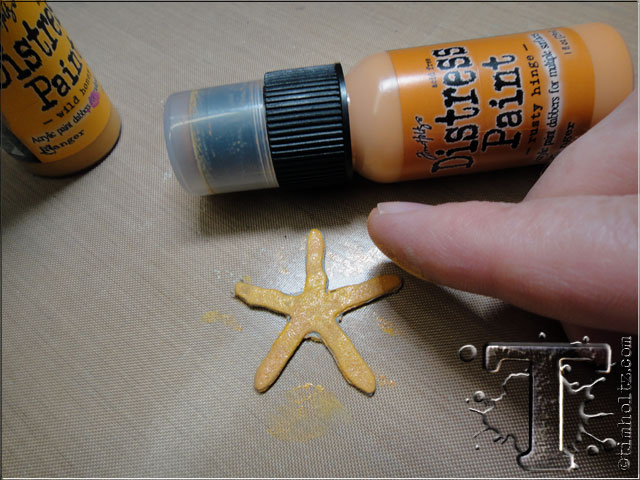 step 12: apply distress paint to the starfish to create a wet layer of paint.
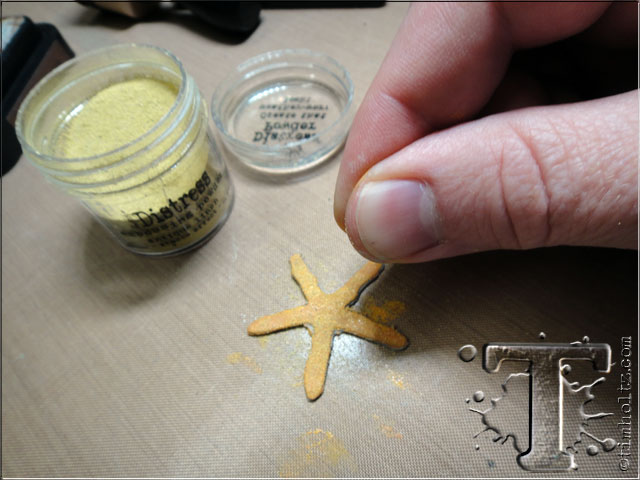 step 13: shake distress embossing powder and sprinkle over the wet paint (do not cover the entire surface).
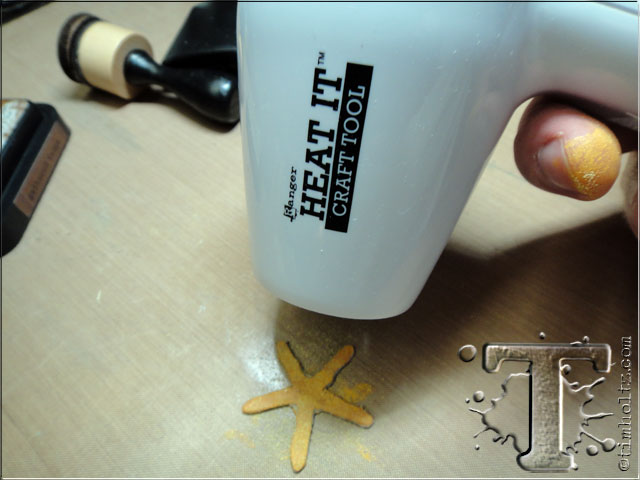 step 14: heat emboss to melt embossing powders and create a cool gritty texture.
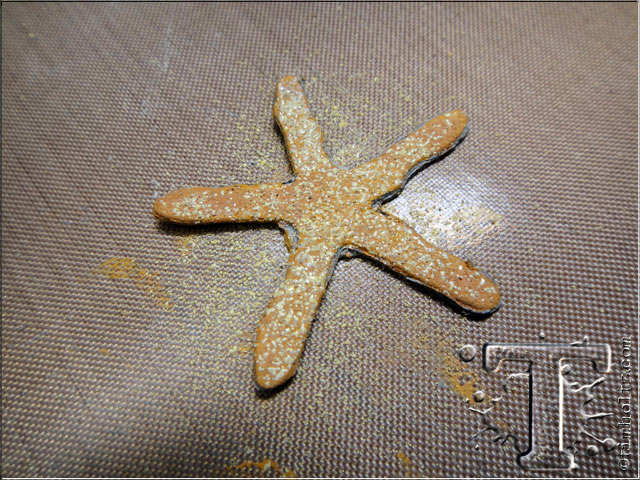 *here’s an up close look of the textured effect distress embossing powders create – cool huh?
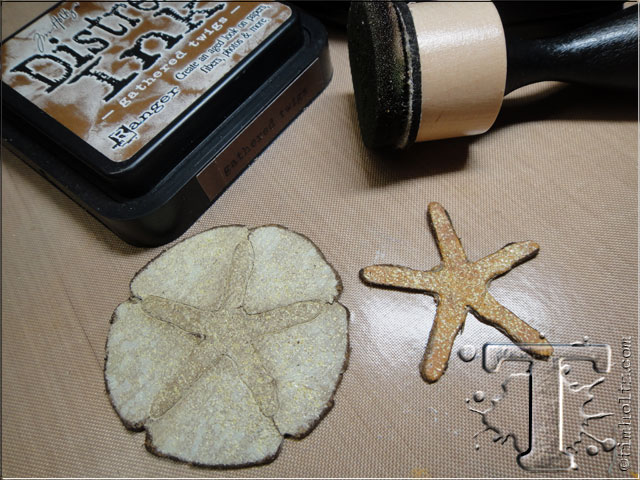 step 15: sand and ink the edges of both shapes.
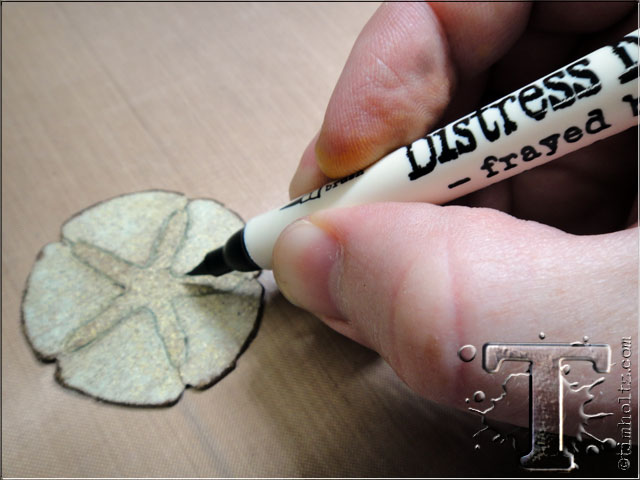 step 16: using a distress marker, outline the scored star on the sand dollar to create a shadow.
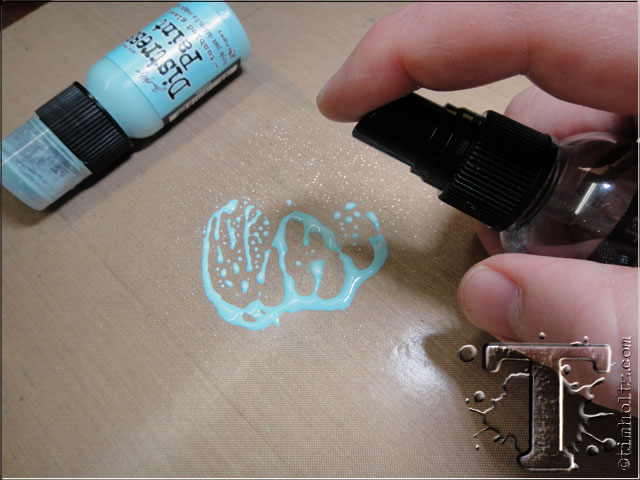 step 17: now let’s work on creating a cool layered distress background for our tag by applying distress paint to craft sheet, and mist paint with water.
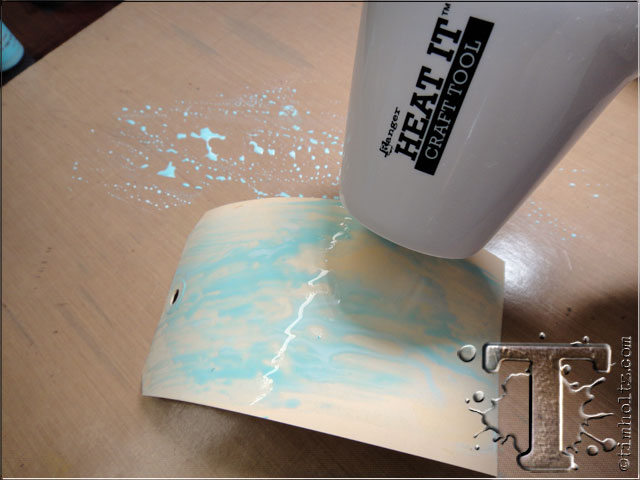 step 18: swipe tag through wet paint and dry with a heat tool.
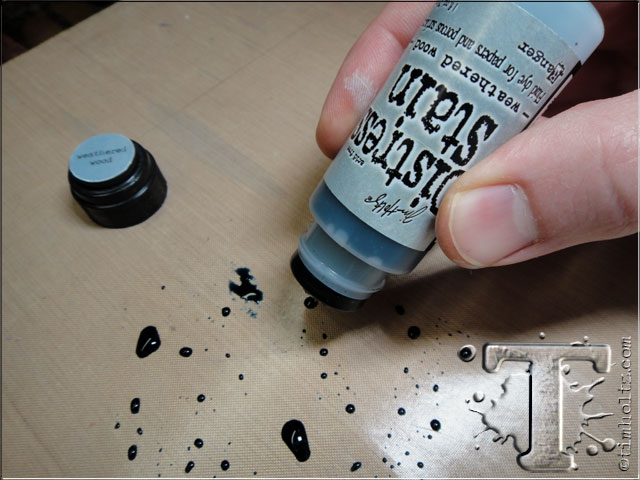 step 19: apply distress stain to craft sheet and mist stain with water.
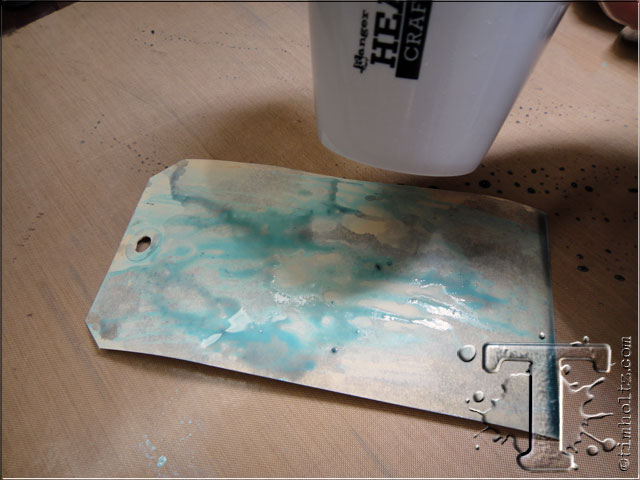 step 20: swipe painted tag through stain and dry with heat tool.
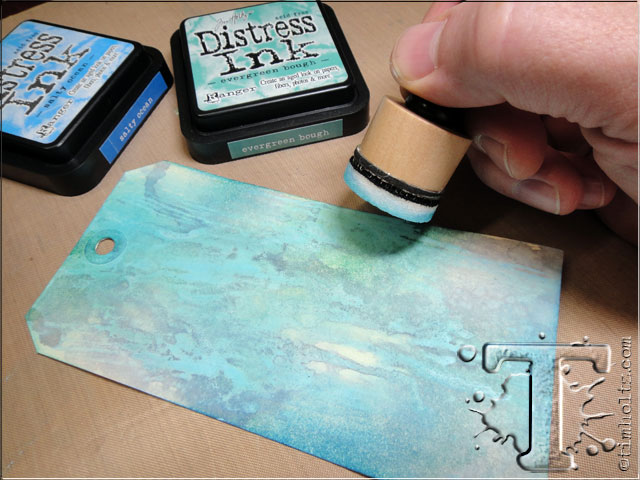 step 21: apply various shades of distress ink to painted and stained tag using ink blending tool.
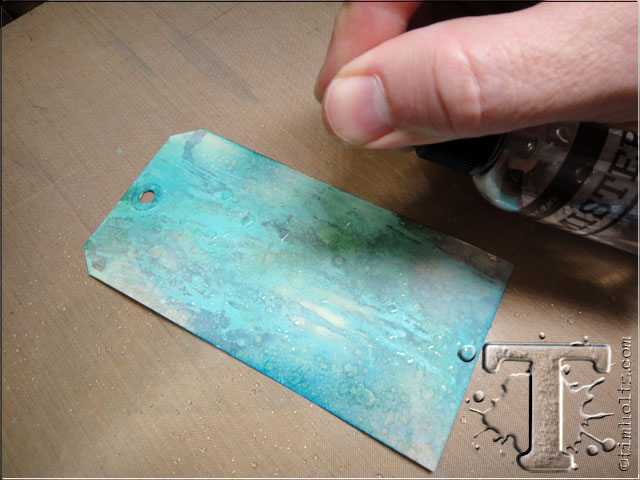 step 22: spritz drops of water over inked tag.
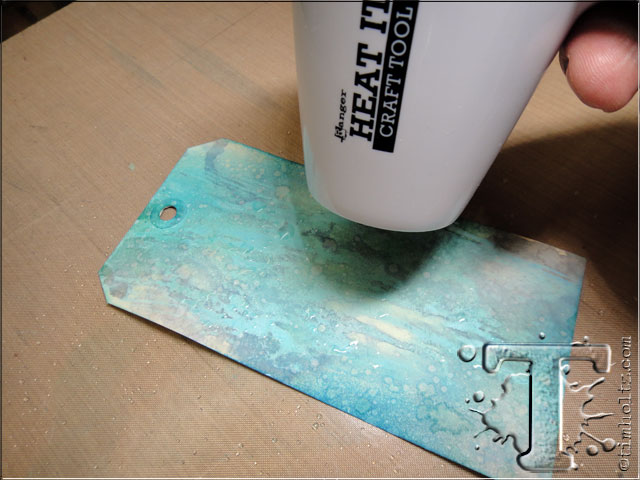 step 23: dry water droplets on tag with heat tool.
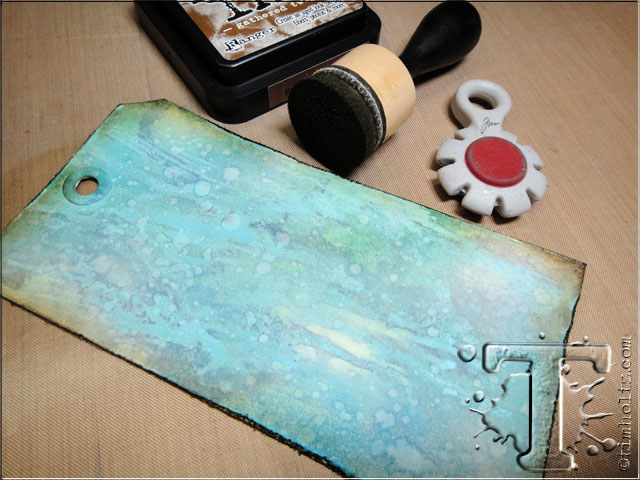 step 24: distress edges of tag with paper distresser and ink with distress ink using blending tool.
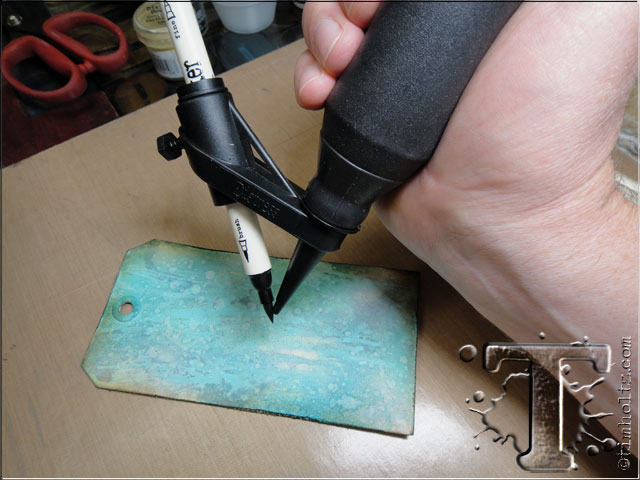 step 25: lightly spritz distress marker over the tag for effect and dry with heat tool.
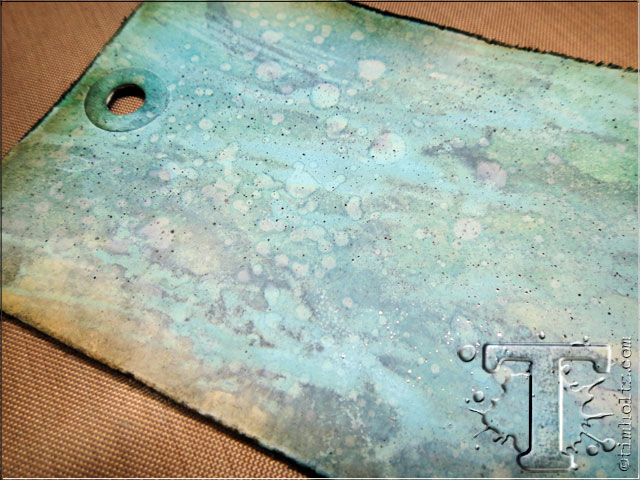 *check out this awesome grunged layered tag – oh how i love all things distress!
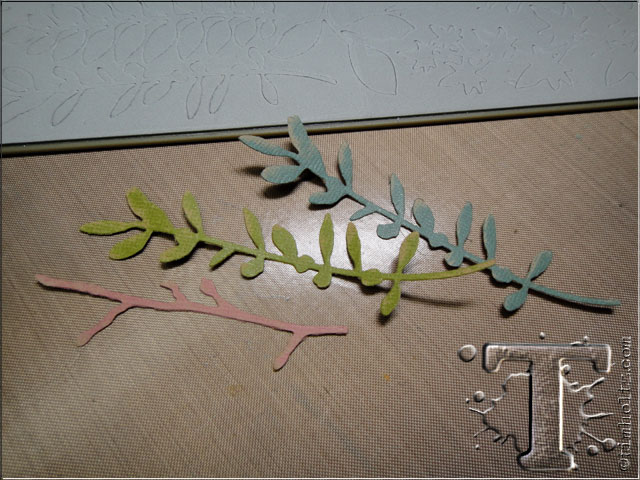 step 26: die cut a few pieces of the spring greenery die from kraft core.
 step 27: ink the edges of die cut pieces with distress ink.
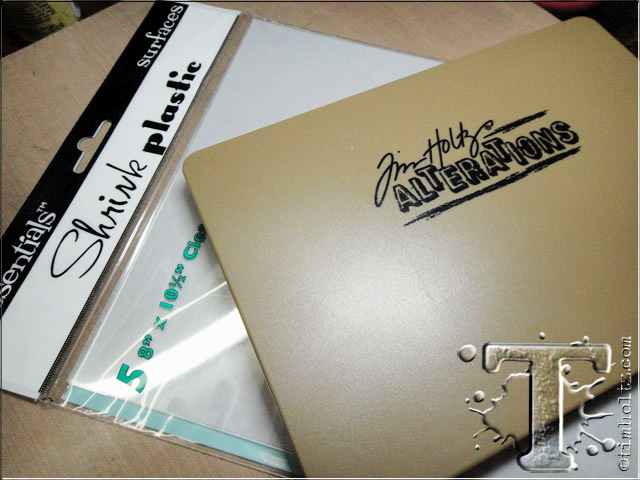 step 28: die cut a piece of clear shrink plastic (or other plastics will work) using the #8 tag die.
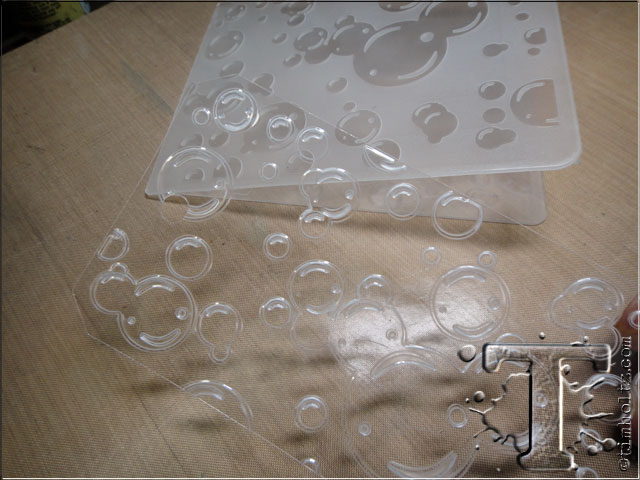 step 29: emboss the top portion of the die cut tag using the bubbles texture fade. *the cool thing about shrink plastic is it “stresses” the plastic when embossed creating a white halo around the design. other plastics do this as well so try what you have.
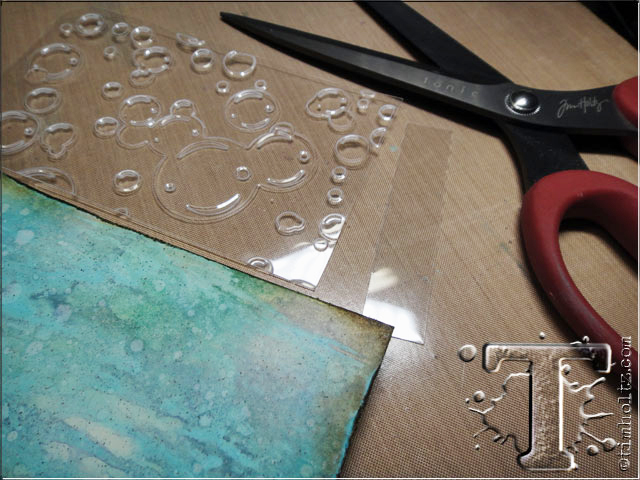 step 30: cut off the “un-embossed” bottom area of the clear tag with tonic scissors (the new big shears are great for this).
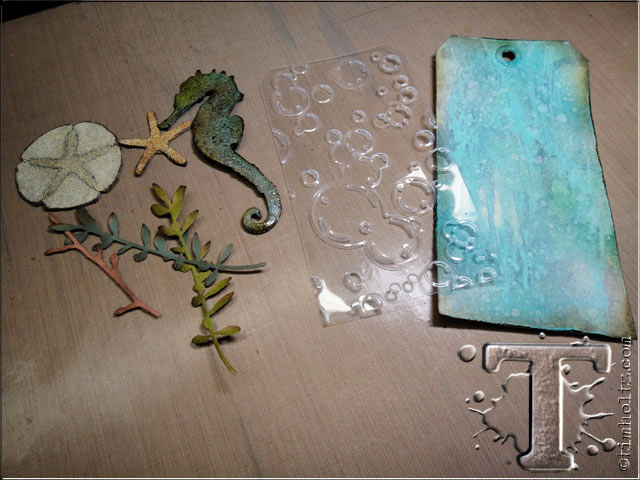 *it’s time to start putting this tag together so gather your tag, bubble layer, and die cut pieces.
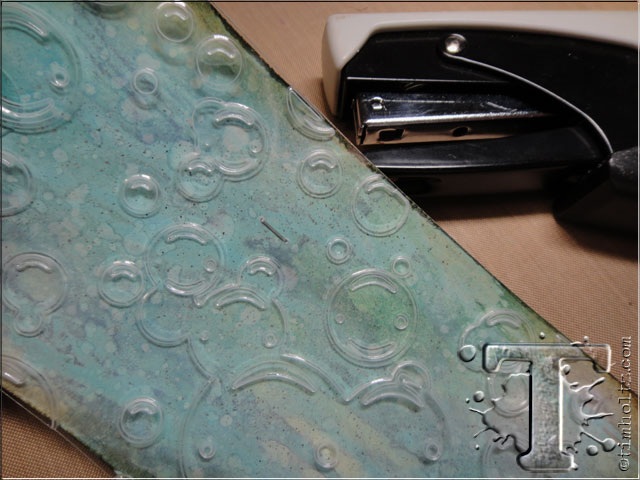 step 31: layer the clear bubble layer over the tag background, and secure using the tiny attacher (which will be hidden by the seahorse).
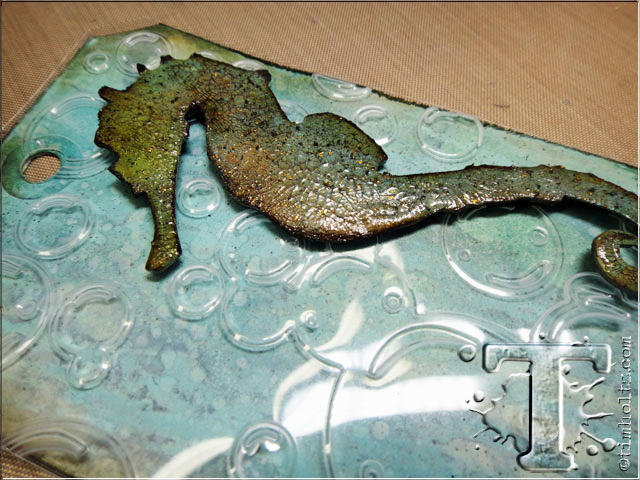 step 32: adhere seahorse to the background using glossy accents or dimension adhesive. *creative confession…okay, i could resist spritzing a little gold krylon metallic paint pen and black paint pen on the seahorse using the distress marker spritzer – i love that thing…
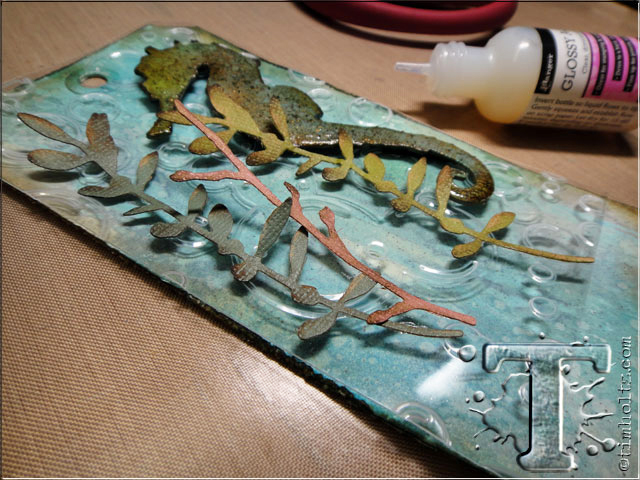 step 33: adhere the greenery to the background using glossy accents. *tip: leave the top areas loose to add dimension to your finished tag.
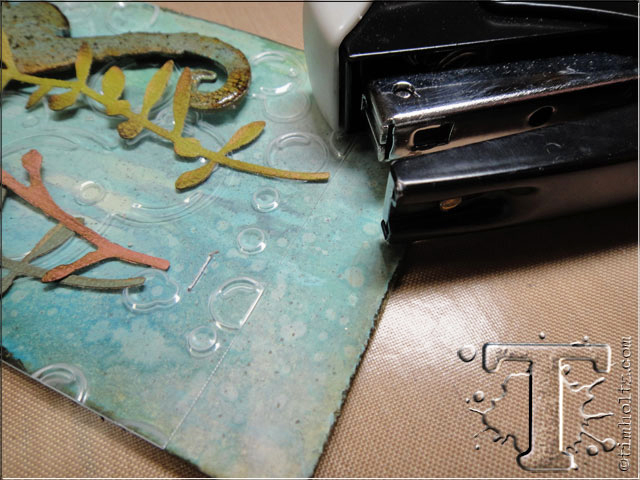 step 34: secure the bottom area of the bubble background with the tiny attacher (which will be hidden by the sand dollar).
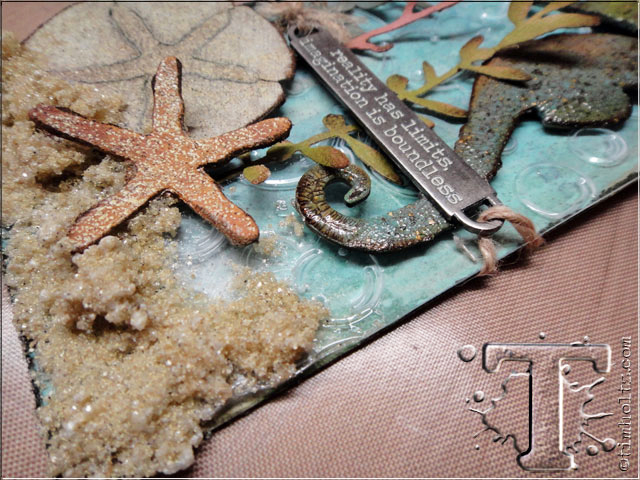
*so are you ready to mix things up a little? we’re going to make our own unique “sand” for this tag. if you’ve ever tried to glue actual sand to a project you know it doesn’t turn out so great, however this trick will create dimension, textured “sand” that can adhere to any type of surface.
note: i don’t have a measured recipe for this, i just wing it to get the look that i like – you should too…
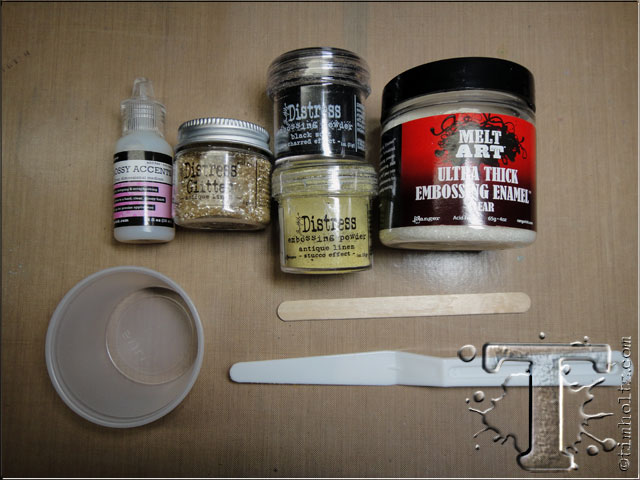 step 35: gather all of these ingredients together since once you start making this you have to use it right away: glossy accents, distress glitter, distress embossing powder, clear utee, disposable mixing cup, craft stick, palette knife.
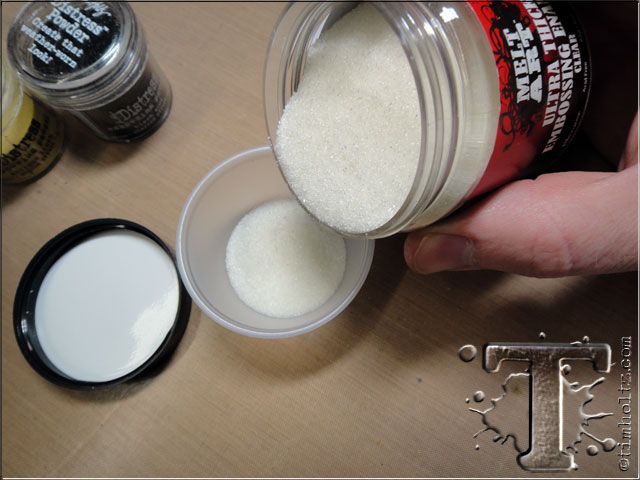 step 36: pour clear utee into a small disposable cup covering the bottom area.
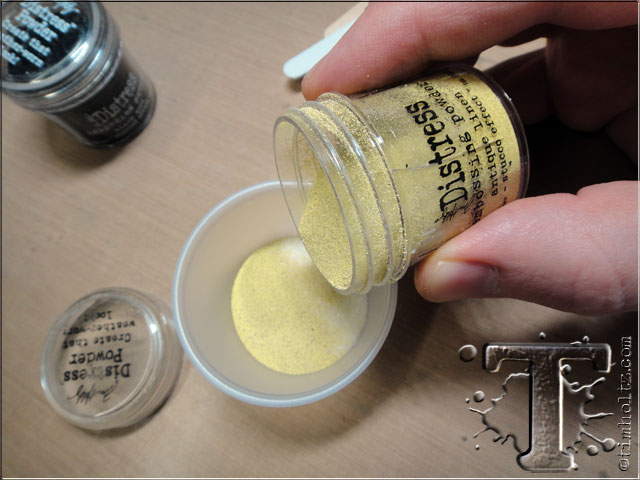 step 37: pour a thin layer of distress embossing powder over the clear utee.
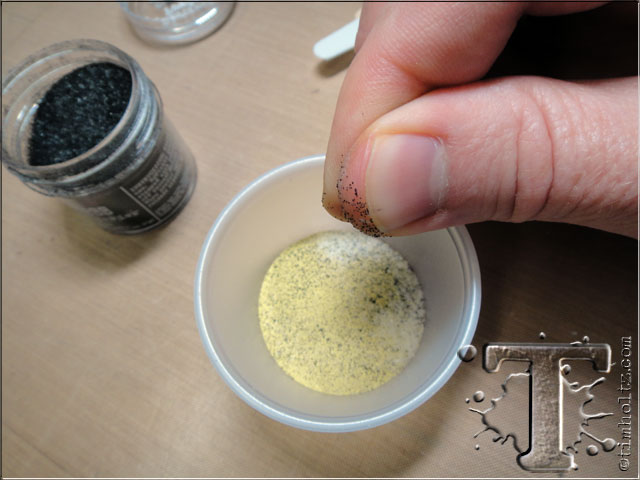 step 38: add just a sprinkle of black distress embossing powder for contrast.
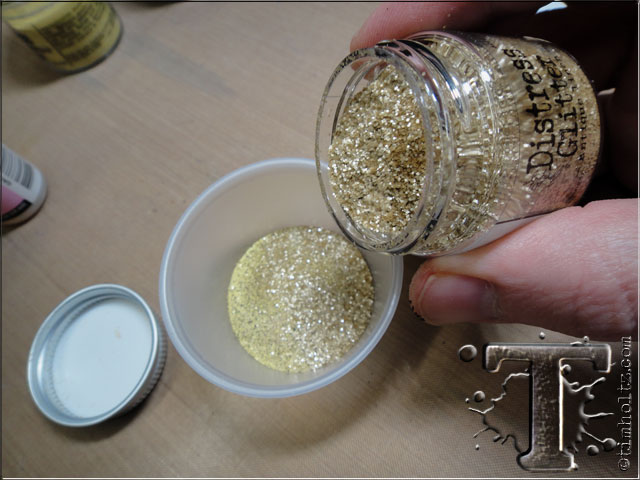 step 39: pour a thin layer of distress glitter covering the entire layer.
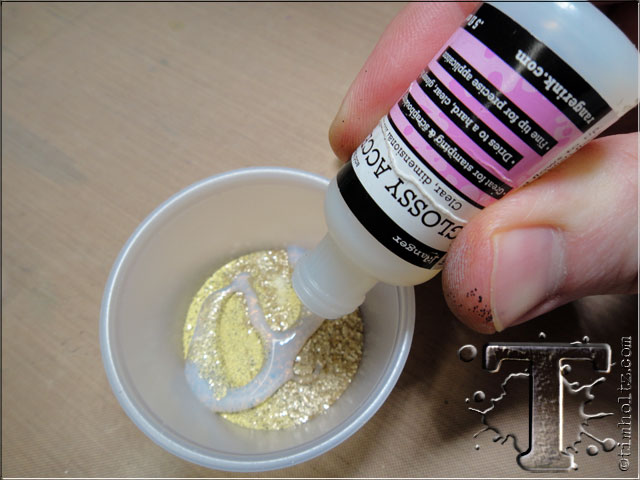 step 40: add a good squeeze of glossy accents to the mixture. i suggest starting with less since you can always add more glossy accents. if you get the sand too wet, you’ll need to add more powder to get the right consistency.
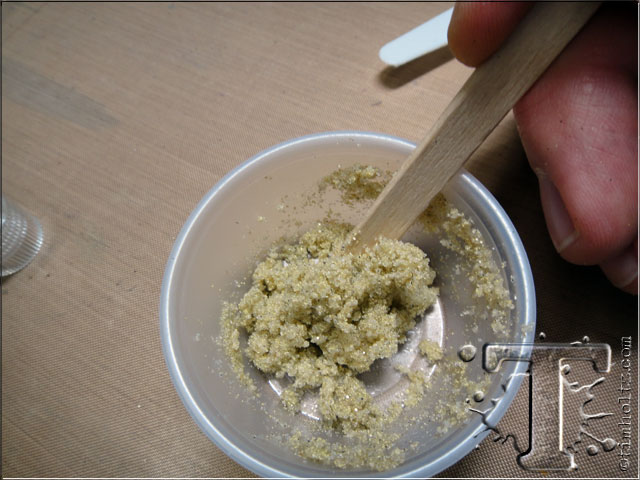 step 41: begin mixing all of the ingredients with a craft stick. be sure to scrape the stick along the edge of the cup so you can continue to mix the wet glossy accents into the powder – we’re going for a crumbly “wet sand” consistency.
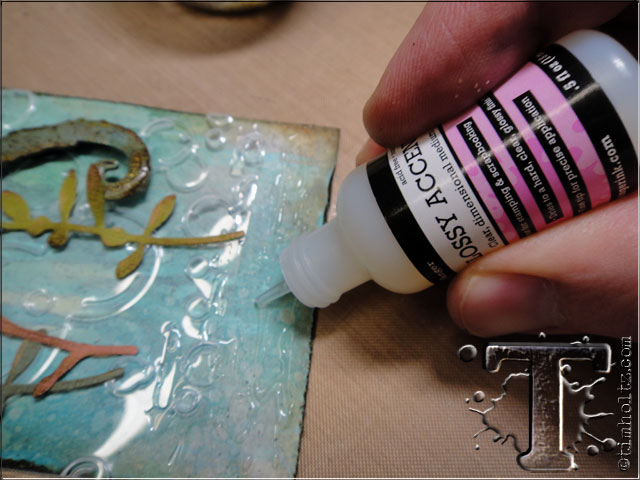 step 42: apply a thin layer of glossy accents to the area of the tag you want to adhere the “sand” mixture to.
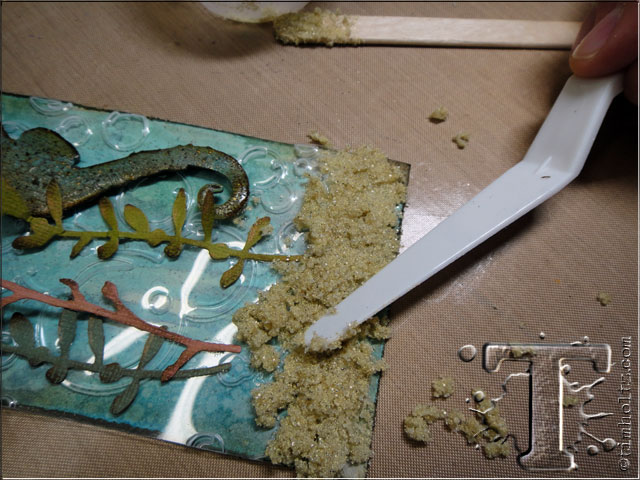 step 43: using a palette knife, spread the sand mixture on to the tag.
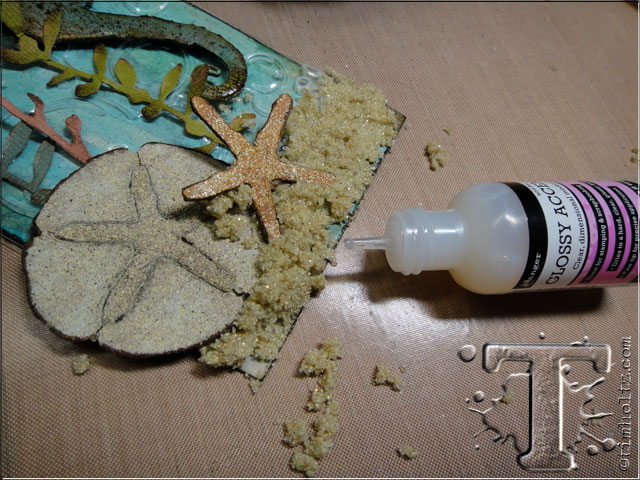 step 44: add elements to the sand by adhering them with glossy accents.
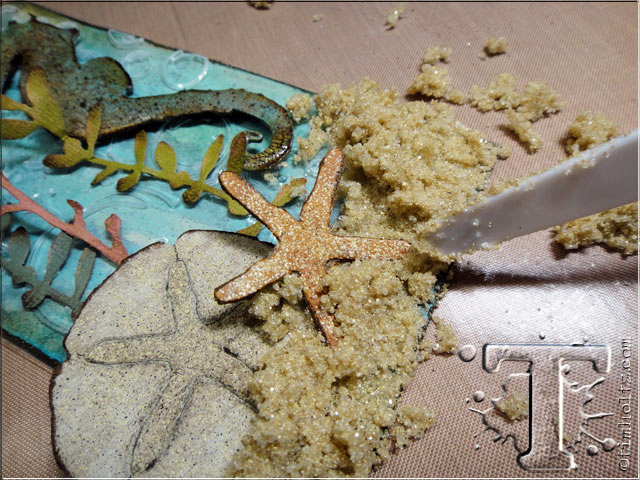 step 45: using the palette knife to add finishing texture to the sand and set it aside to dry completely. *note: keep in mind some of the sand will fall off or become too brittle when dry, however you can always adhere areas back with glossy accents if needed.
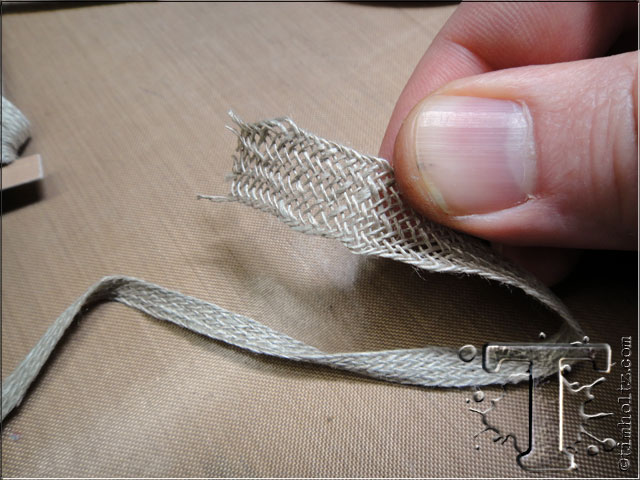 step 46: cut a piece of linen ribbon and begin pulling the sides apart to create a wide mesh.
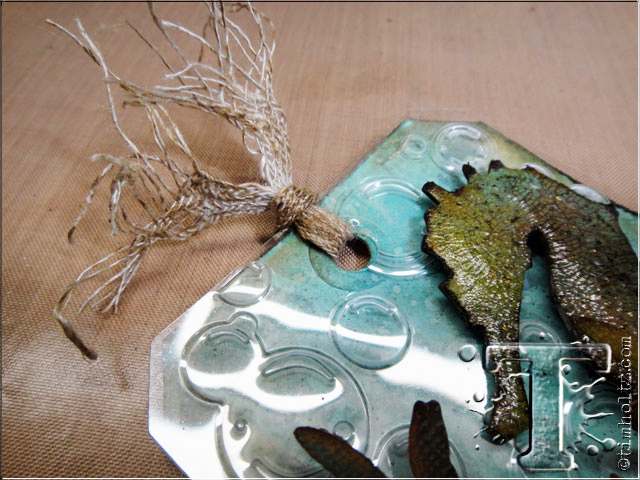 step 47: tie through the top of the tag and fray the ends to create a cool fish net look – smudge with distress ink.
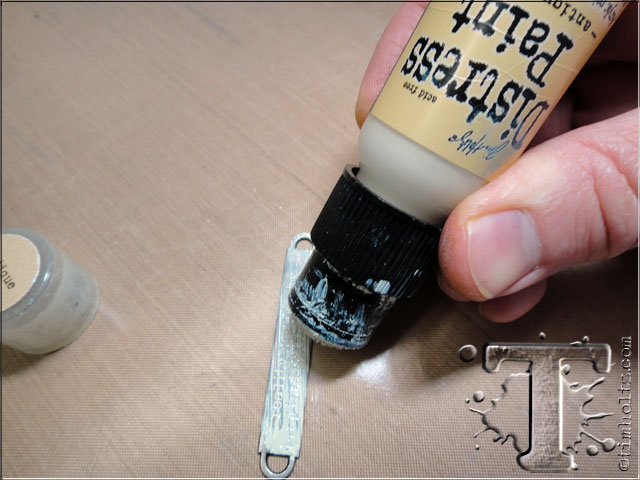 step 48: apply distress paint over a word band covering the recessed words entirely.
 step 49: wait just a minute for the paint to begin to set and then wipe away excess paint using your fingers allowing paint to remain in the recessed areas.
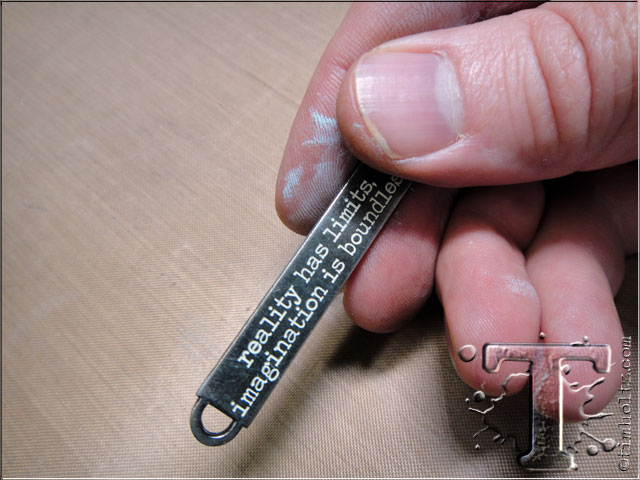
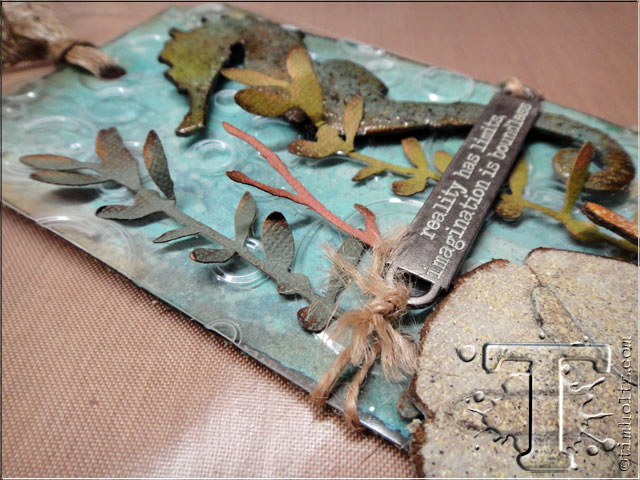 step 50: tie the word band around the tag using a piece of jute string.
 *the details: i just love the finished textured look of this tag between the crackled seahorse, the embossed plastic bubble layer, the paper and grungeboard elements, and of course the “sand”. this technique can be used on a burlap panel, the cover of a mini book, or in a shadowbox or configuration – endless possibilities…
*be sure to check your local stores for these supplies or you can
click the links below to purchase online…
(SSS=simon says stamp / IE=inspiration emporium)
GREAT NEWS! both of these online stores are offering a discount of 10% off your purchase – use the following codes with your order:
(SSS code: JULYTH10 / IE code: timtime)
 |
 |
 |
 |
 |
|
 |
 |
|
|
|
 |
|
|
|
|
 |
|
|
|
|
|
|
 |
|
|
|


