
i’m really excited about this month’s tag and sharing how i use my new layering stencils from stampers anonymous. there is no doubt stencils have become a craft staple to many and why not? their versatility to provide texture and imagery are a great creative tool. there are also many ways to use stencils on a variety of surfaces with a multitude of mediums. so whatever your artistic vision can imagine, you should definitely give stenciling a try. i designed layering stencils for a simple reason – layering. that’s why layering stencils are not your typical 6×6 or 12×12 size so you can easily just use various parts and pieces to design amazing backgrounds. their tag shape also makes it convenient to organize with a single book ring to hold them all together and hang for easy storage (no more tangled and bent stencils tucked away in a drawer). so let’s get started…
supplies: layering stencils/THS001/003/005/006/008/011/012, distress stain/picked raspberry/crushed olive/broken china/peacock feathers/wild honey/tarnished brass, distress ink/walnut stain/picked raspberry/black soot, distress paint/picket fence, distress markers/black soot, ink blending tool, mister, archival ink pad/jet black, heat tool, craft sheet, multi-medium, #8 manila tag, stamp/papillon CMS106, chit chat stickers, crinkle ribbon, type charms, pen nibs, wire pins, jump rings, paper distresser, studio 490 white embossing paste, palette knife
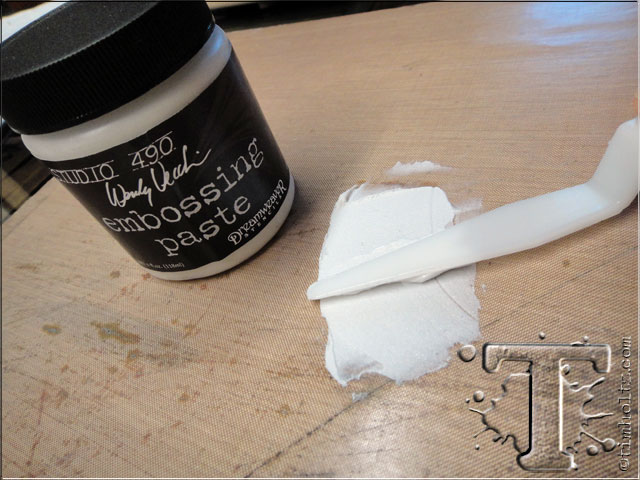
 step 1: begin with a #8 manila tag, a layering stencil, white embossing paste and a palette knife.
 step 2: place the layering stencil (stars) over the tag and position it how you would like.
 step 3: using a palette knife, apply a small amount of embossing paste to the craft sheet.
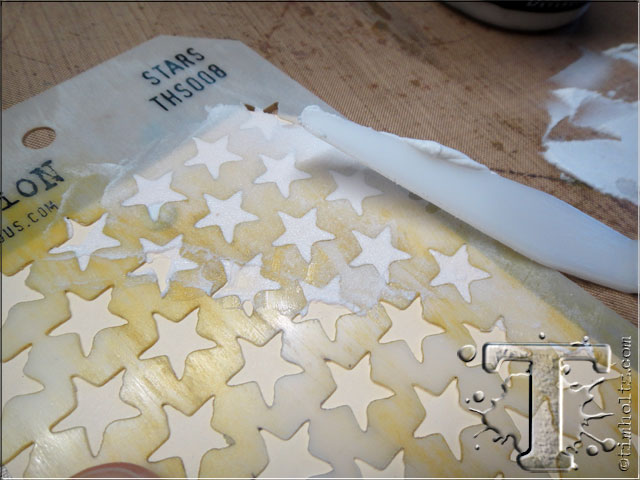 step 4: apply the embossing paste over various areas of the stencil by swiping the palette knife over the stencil. scrape the excess paste off the top of the stencil with the knife leaving the excess in the stencil areas.
 step 5: lift the layering stencil straight off – simple as that. the layering stencils are thin enough to ink and paint through, yet thick enough to apply heavier mediums like pastes through and still be able to lift off with ease.
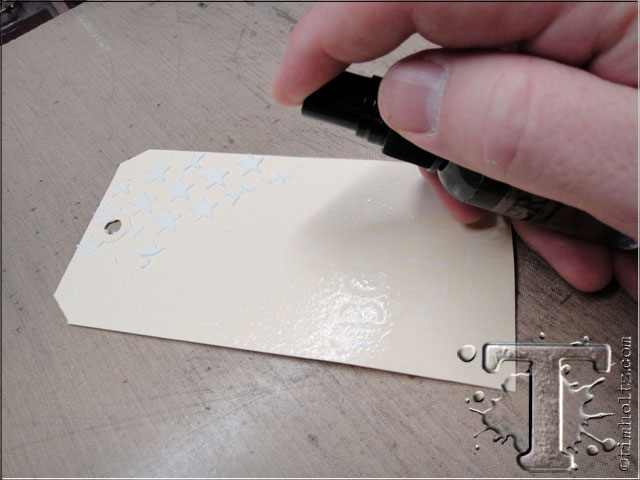
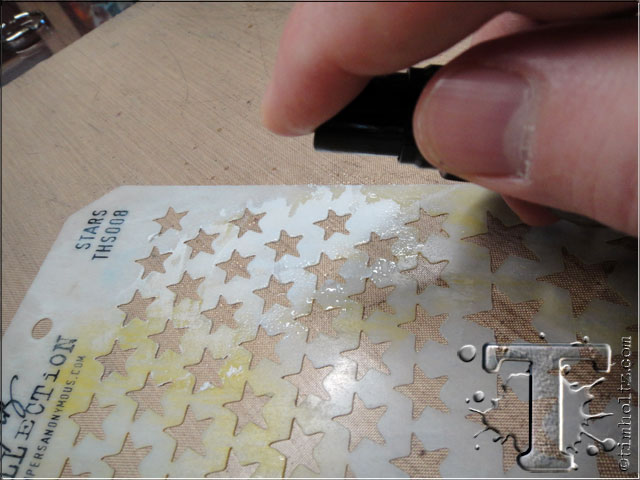 step 6: immediately mist your stencil with water and wipe clean. *as you can see from the yellow tint on my stencil from paint, i clean my stencils as well as i clean my stamps…lol – oh well they still work great.
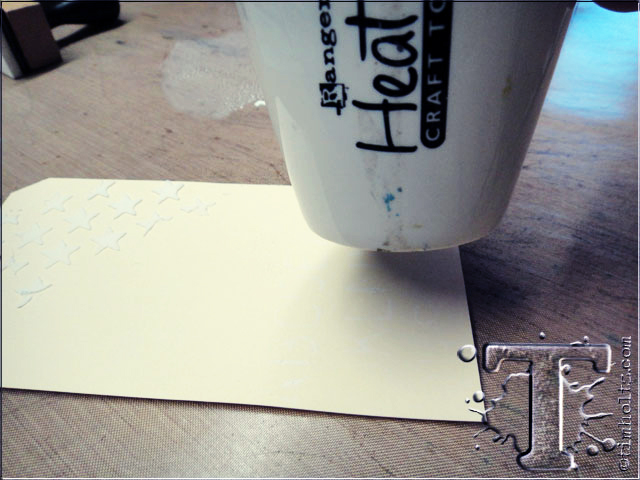
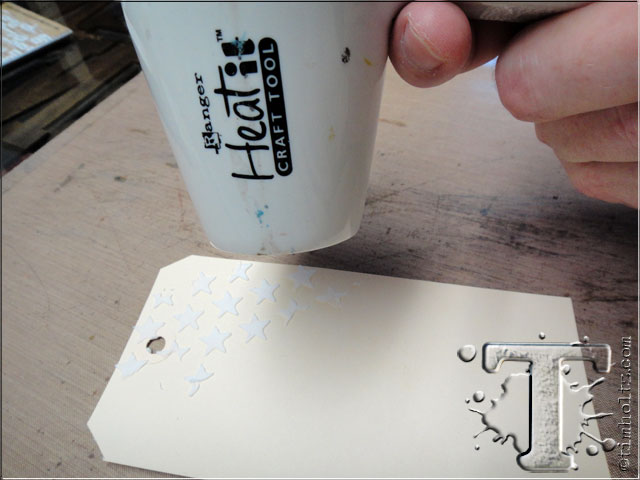 step 7: next you can either let your embossing paste air dry, or dry with a heat tool. if you use a heat tool be sure not to “cook” the embossing paste or it will bubble. just alternate with heating it, let it cool for a few seconds, and continue heating until it’s dry.
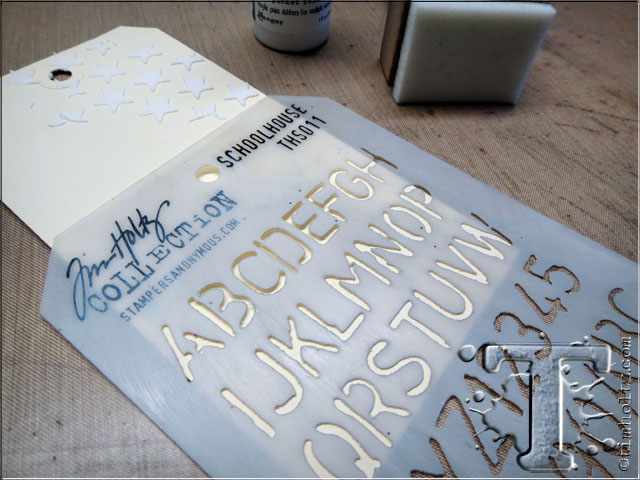 step 8: place another layering stencil (schoolhouse) along the bottom of the tag.
 step 9: shake picket fence distress paint and apply paint to your craft sheet.
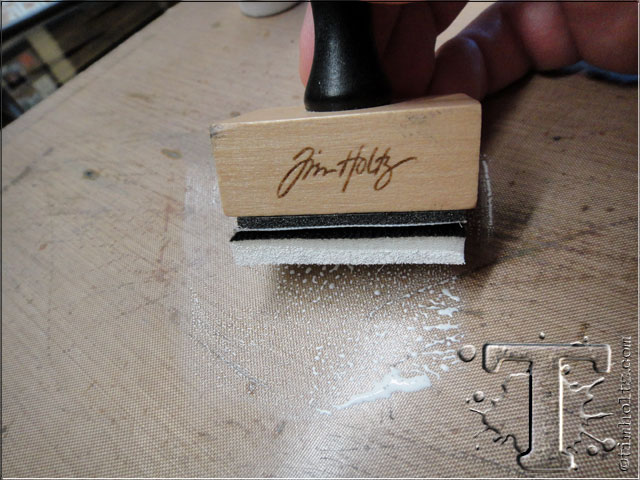 step 10: using a clean piece of blending foam on the ink tool, swipe the tool through the paint to pick it up off the sheet.
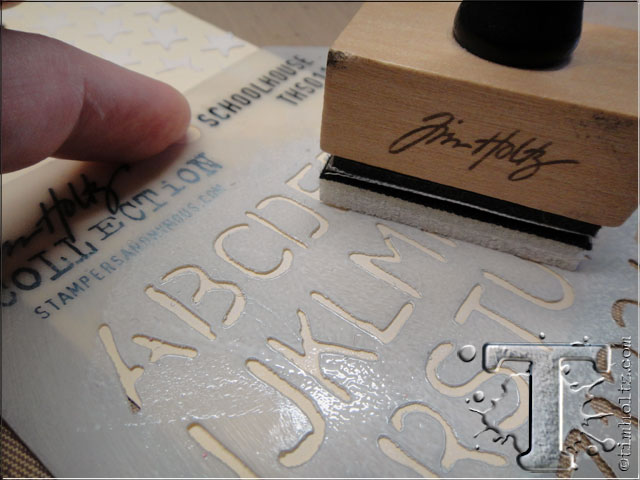 step 11: lightly pounce the blending tool over the stencil to apply paint to the tag. *note: i prefer applying distress paint with the blending tool vs. directly from the bottle as i think the paint is too fluid and could seep under the stencil.
 step 12: remove the stencil, clean stencil with water, and dry the paint with a heat tool. *note: you can also clean the distress paint from the blending foam with water to reuse the foam.
 step 13: mist the tag with a few sprays of water to dampen (this will help the distress stains blend on contact).
 step 14: swipe various colors of distress stain over the tag.
 step 15: lightly spritz water droplets over the stained tag to blend colors.
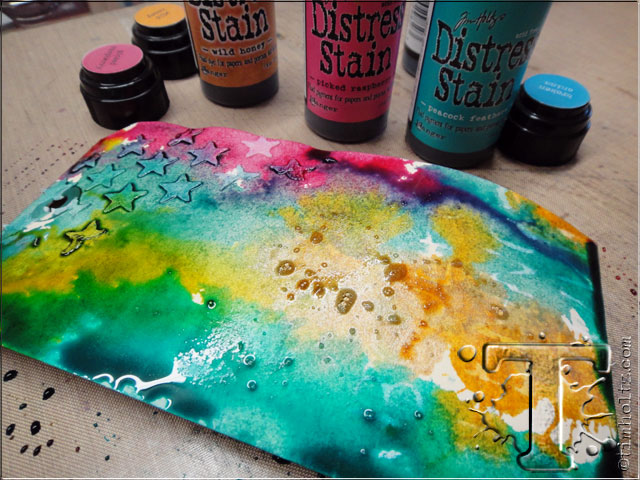
 step 16: dry the tag completely with a heat tool. notice a couple of things happening: the embossing paste actually absorbs the distress stain creating colorful texture while the distress paint resists the distress stain creating a faded design…so cool.
 step 17: place layering stencil on the tag (rays) and this time tap and swipe over stencil with distress ink using ink blending tool.
 *check out the layers and texture so far with embossing paste, paint, and distress ink?
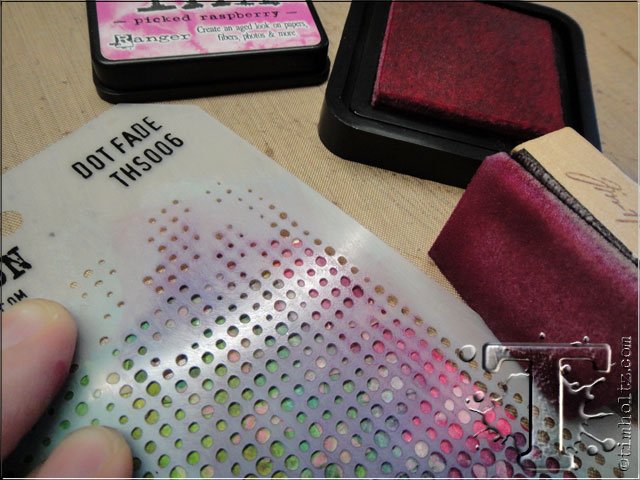 step 18: place layering stencil on the tag (dot fade) and tapped over stencil with a bright color of distress ink using ink blending tool for contrast.
 *see the effect using various colors of distress ink can achieve?
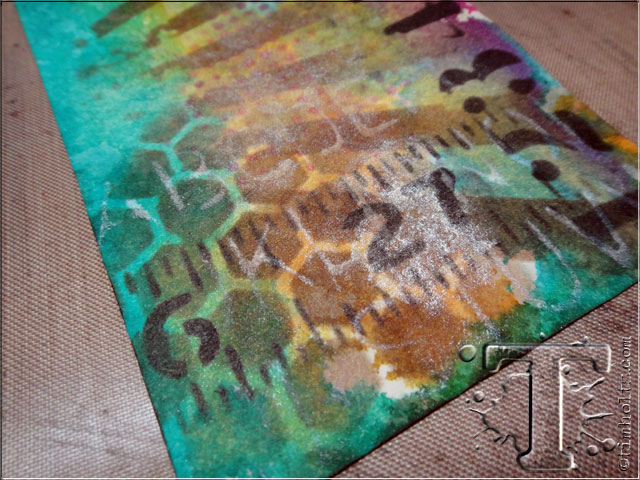
 step 19: place layering stencil on the tag (honeycomb) and tap over just a few areas of stencil with distress ink using ink blending tool. it is very important with layering with stencils that you remember to just use parts of it.
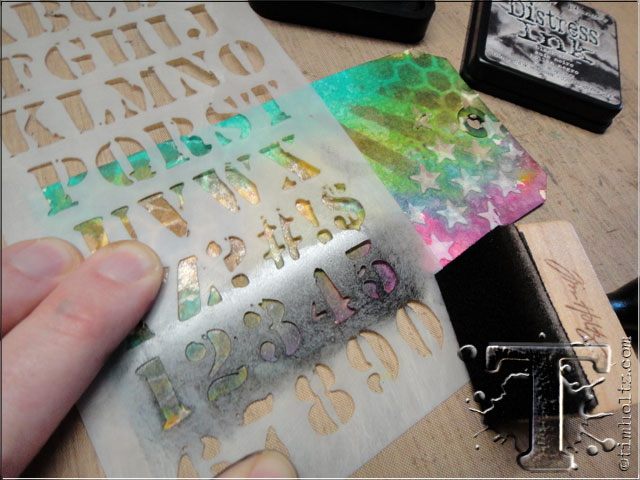 step 20: place layering stencil on the tag (cargo) and swipe over with black soot distress ink using ink blending tool.
 *notice how black soot makes this layer pop?
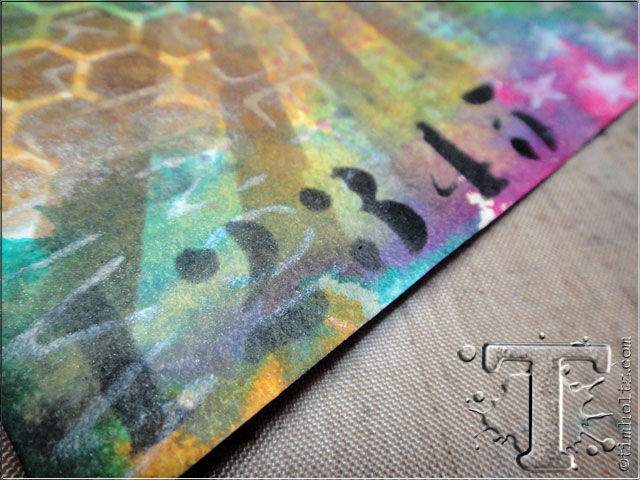
 step 21: place our final layering stencil (measured) and swipe over with black soot distress ink using blending tool.
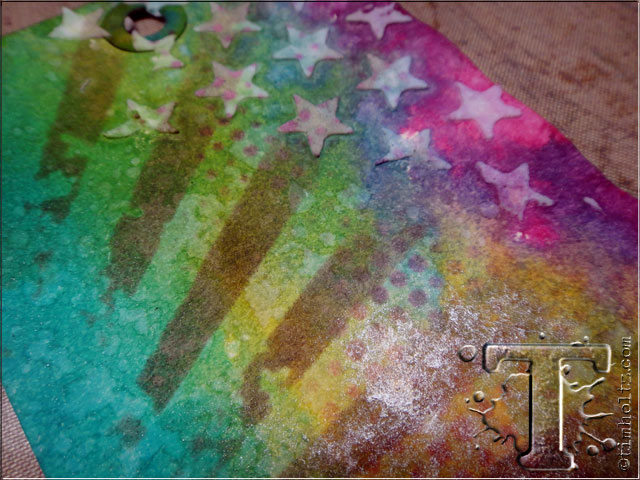
 *remember when building layers of distress ink to work light to dark. the background tag colors were bright, then i added some layers with brown, and the final with black soot – i love the depth this creates.
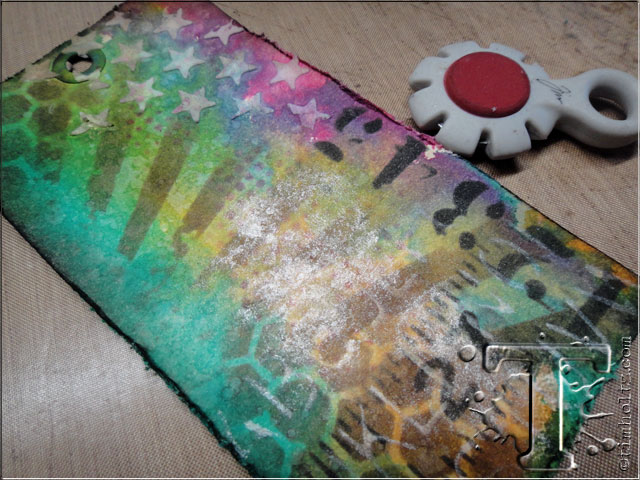 step 22: ink the edges of the tag with blending tool and tatter using a paper distresser. notice how using some metallic distress stain in our background creates a cool luminous reflection in areas.
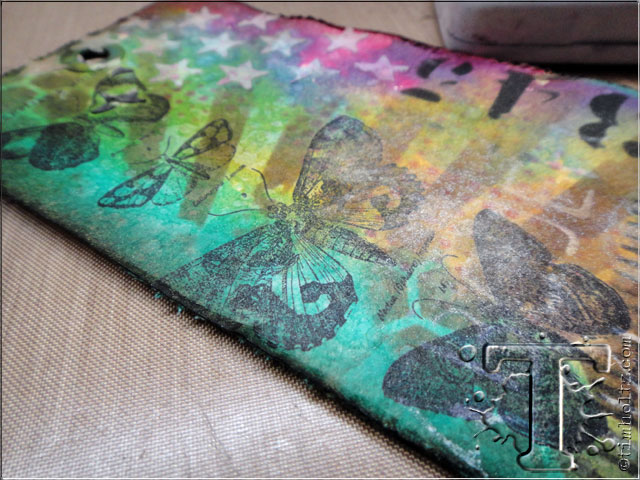 step 23: stamp image with jet black archival ink. to me, adding a stamped image or two on the top creates the ultimate layering.
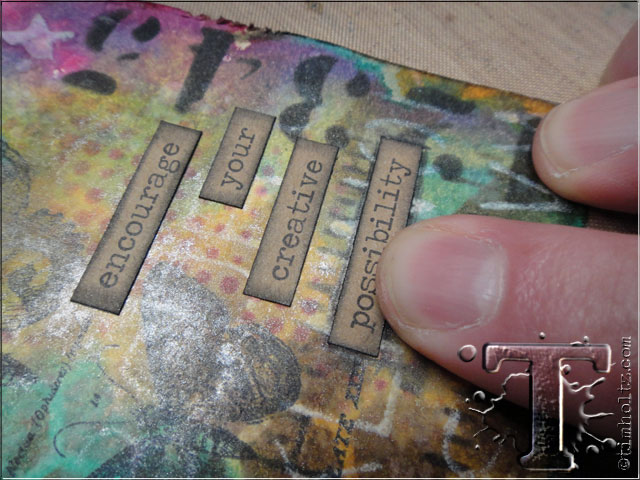
 step 24: select some words from the chit chat stickers (remember you can use either white or kraft from this sticker book).
 step 25: ink the edges of the stickers with distress ink using ink blending tool.
 step 26: adhere them to your tag and press firmly to secure.
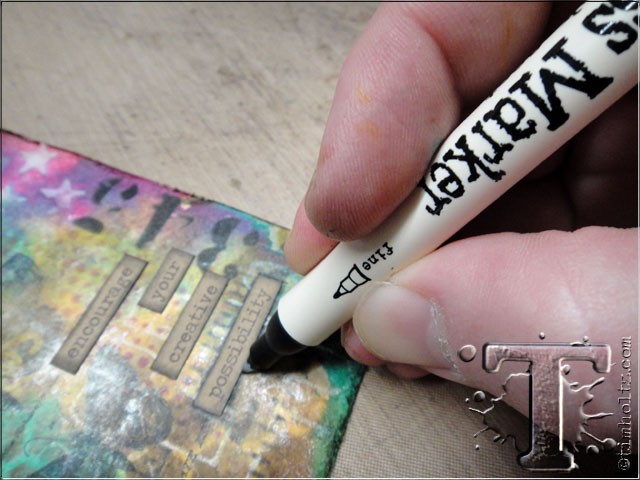 step 27: using the plastic fine point of your distress marker, scribble an outline around the edges of the stickers.
 step 28: immediately use your finger and smudge the distress marker. *note: sometimes i will tap my finger on a damp paper towel first to help smudge the distress ink more.
 *see what a difference this technique makes? you can try this effect anytime you are layering ephemera and want it to look more dimensional.
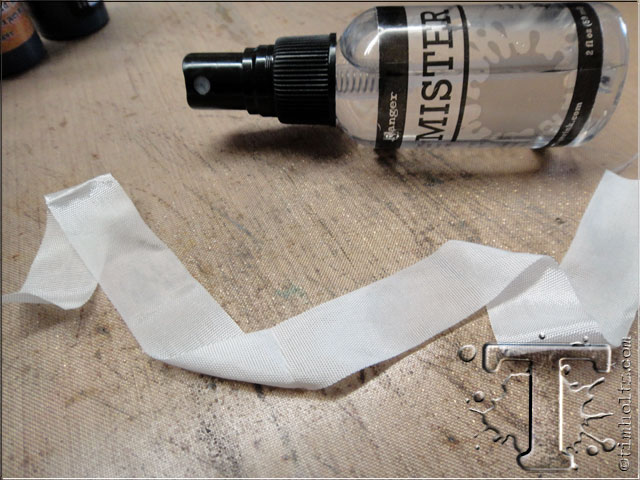 step 29: mist a piece of crinkle ribbon with water.
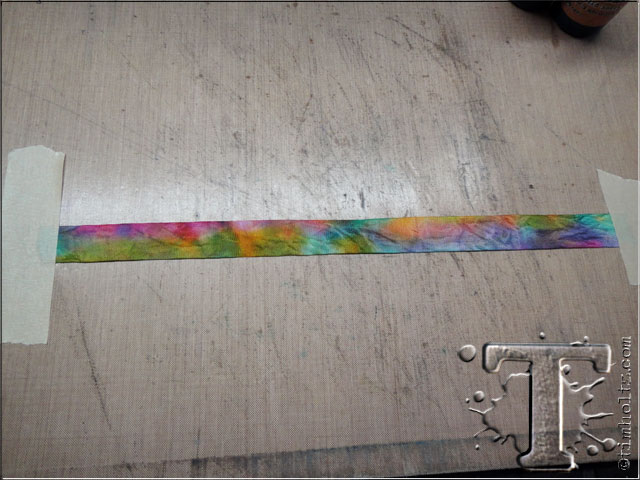
 step 30: dab several colors of distress stain over ribbon and dry with a heat tool. *note: the water helps the distress stains blend immediately – just like what we did on the tag background.
 step 31: tape the crinkle ribbon flat to the craft sheet.
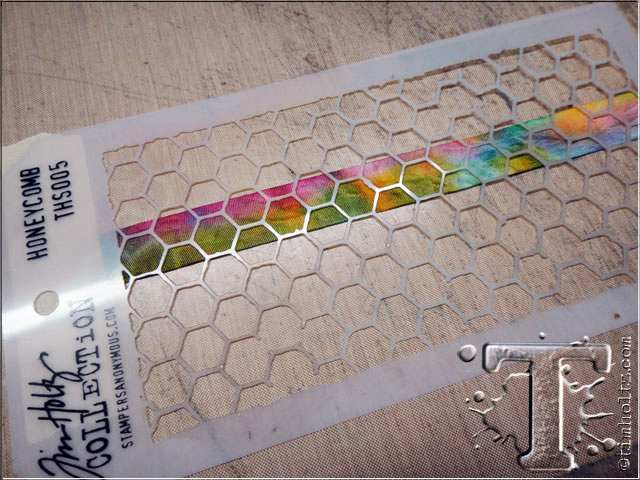 step 32: place layering stencil (honeycomb) over ribbon.
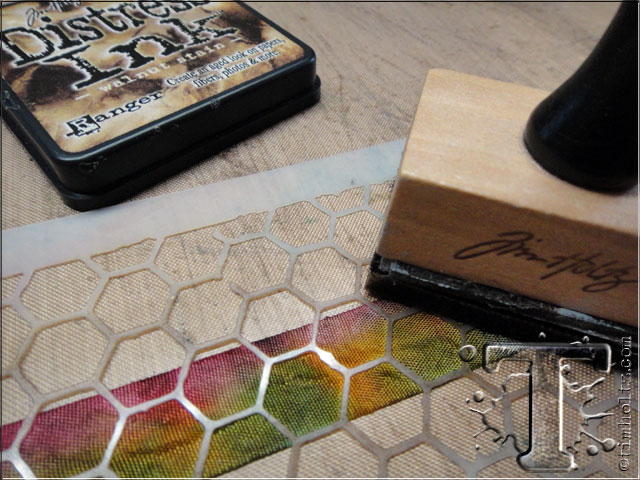 step 33: tap over stencil with distress ink using ink blending tool and repeat across ribbon.
 *the details: check out the cool stenciled ribbon that coordinates perfectly with the tag.
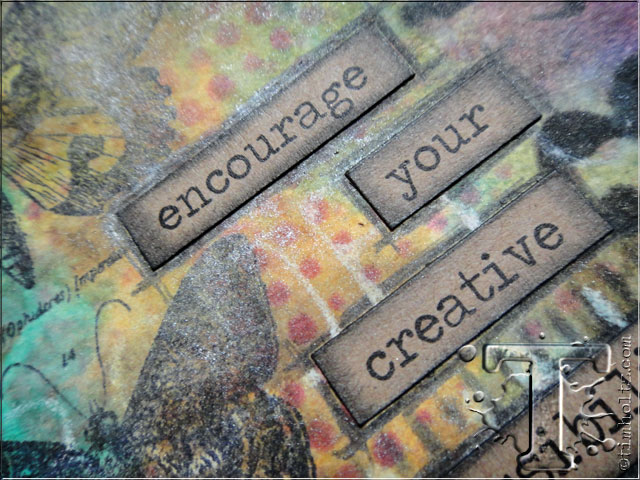
 *the details: outlining the word with the smudged distress markers is a cool alternative for adding words to projects. i also adhered a pen nib with multi-medium for a metal element.
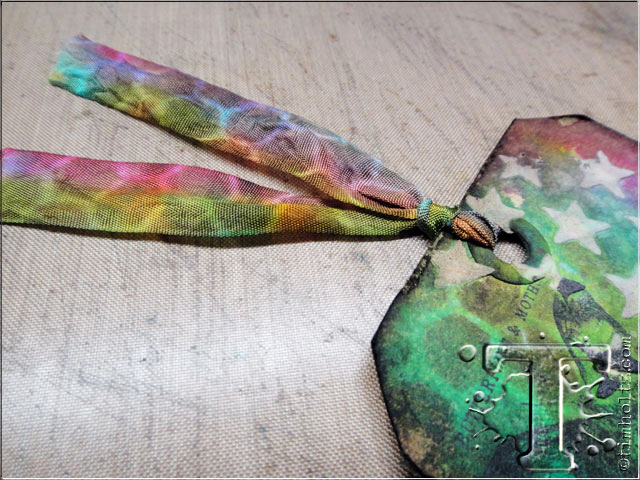
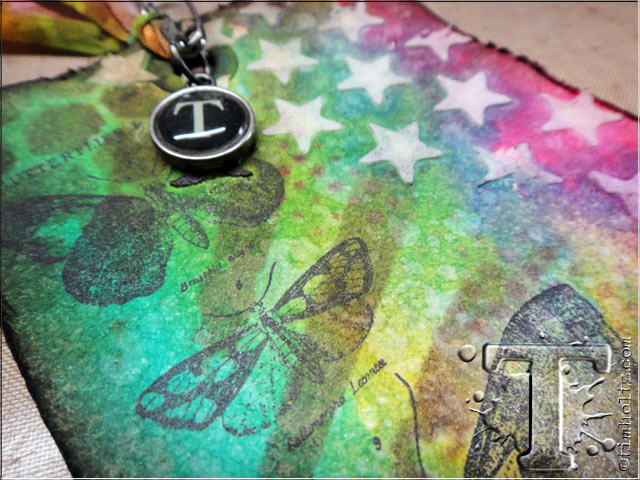 *the details: the combination of color, texture, and imagery is what this tag is all about. i also added a type charm to the ribbon pinned with a wire pin.
pretty awesome tag this month i think, i hope you do too. it’s always great to add a new design element to the creative process and layering stencils are definitely a new addiction of mine. i hope you give these a try this month and experiment with various designs and products along with them. don’t forget to embrace imperfection…t!m
congrats to the winners from the august 12 tags of 2013.
if you see your name (and it links to your tag)
please email [email protected] to claim your prize…
1. die amelie
2. velvet
3. that crazy chick
4. Laurie Y
5. Tasha Cosenza-Mechels
6. Synnove
7. Caro
8. Brandy
9. Julia
10. Monique
11. Michelle Nun
12. Brigita
*be sure to check your local stores for these supplies or you can
click the links below to purchase online…
(SSS=simon says stamp / IE=inspiration emporium)
GREAT NEWS! both of these online stores are offering a discount of 10% off your purchase – use the following codes with your order:
(SSS code: 12TAG913 / IE code: timtime)
|
|
|
|
|
|
|
|
|
|
|
|
|
|
|
|
|
|
|


