
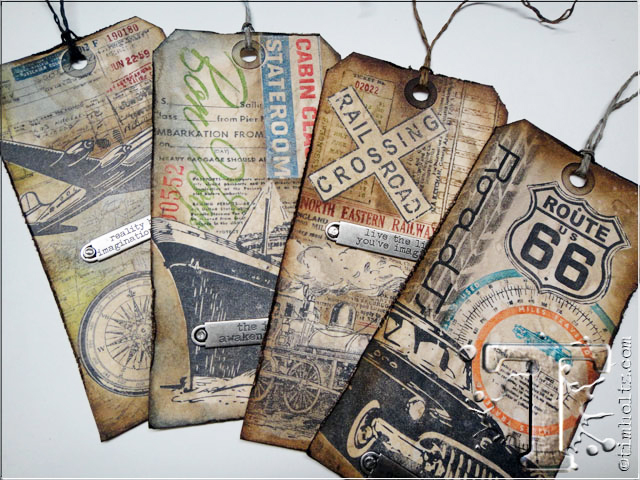
the summer months certainly seem to be a great time for many to travel and take vacation time. even though i travel throughout most of my calendar year, i still love the adventure of it all, going places, and seeing the world. whether you’re a road warrior, or one who doesn’t travel much, many of us still have visions of where our dream journey would be, where would you go, what you would hope to see? today’s tags is inspired by the three simply words i say often – “enjoy the journey”…
i said tags because i was inspired to make several tags using this month’s layered mask technique since we have so many ways to travel – ships, planes, trains, automobiles. so whether you want to create a travel themed tag, or just play with some of your favorite images, today’s technique is all about stamps. i know i’ve said it many times, but it’s worth repeating: stamps are by far one of the most versatile creative tools, and after you try this month’s tag hopefully you’ll agree…
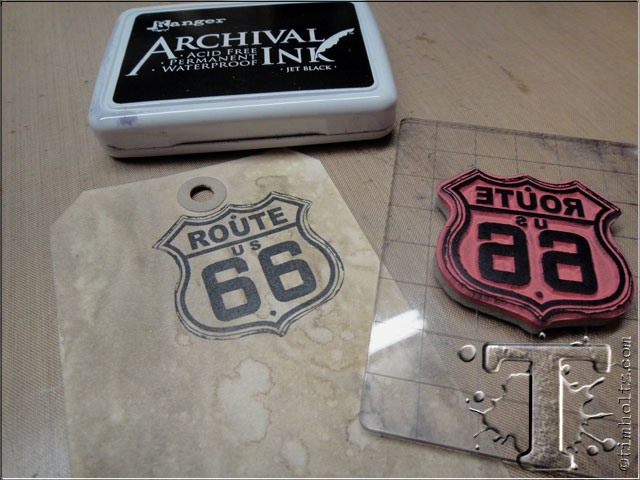
supplies: idea-ology mask sheets, craft sheet, distress stain/pumice stone/frayed burlap, distress ink/walnut stain, distress markers/black soot/salty ocean/faded jeans/ripe persimmon/pumice stone, archival ink/jet black, heat tool, mister, ink blending tool, grid-blocks, stamps/cms102/cms127/cms128/cms129, paper string, scissors, distresser
 step 1: for the background of these tags, i wanted something vintage, yet light enough for my ink colors i will be stamping with to show so i am using distress stain. i love the color combo of pumice stone and frayed burlap – simply swipe both colors side by side on to the craft sheet.
 step 2: since distress stains are fluid i don’t need to spray the inks with water, but a quick and easy way to blend stains on a surface is to actually mist the surface itself with water.
 step 3: swipe the misted tag through the stains to cover completely with color.
 step 4: spritz the stained tag with even more water to react the distress stains and create some cool effects.
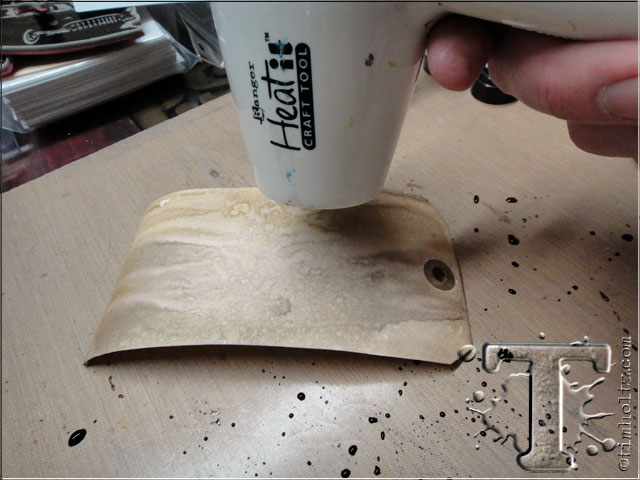 step 5: dry the tag completely with a heat tool.
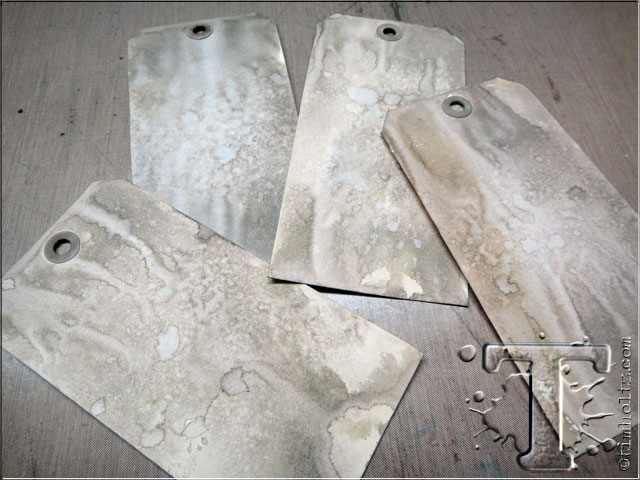 step 6: this technique is so easy i usually do a batch of this color combo so i have some inked tags always at the ready.
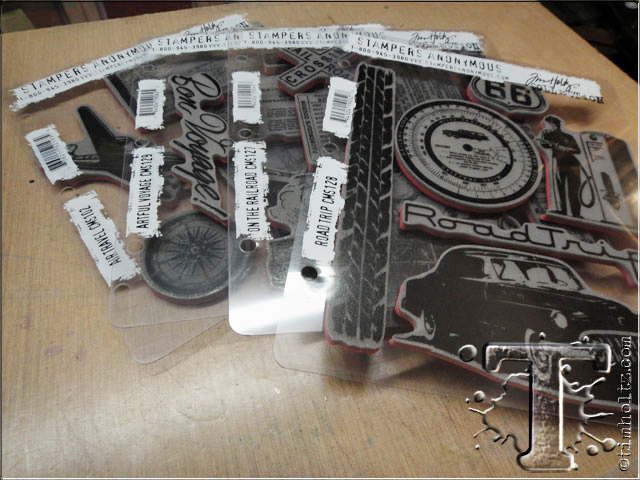 step 7: usually when i create something i don’t put much thought into it. in fact, i often say thinking is overrated, but this particular technique is more effective when you have a visual strategy. so first select the images you want to use.
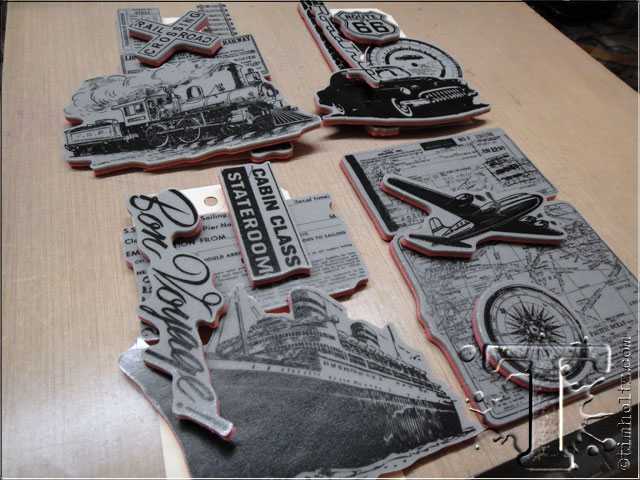 step 8: i like the fact that with cling mount stamps i can take the images and “pre-layer” them on a tag to give me perspective as to what images i want on the top, and what images i want more in the background (you can always change your mind later if you need to).
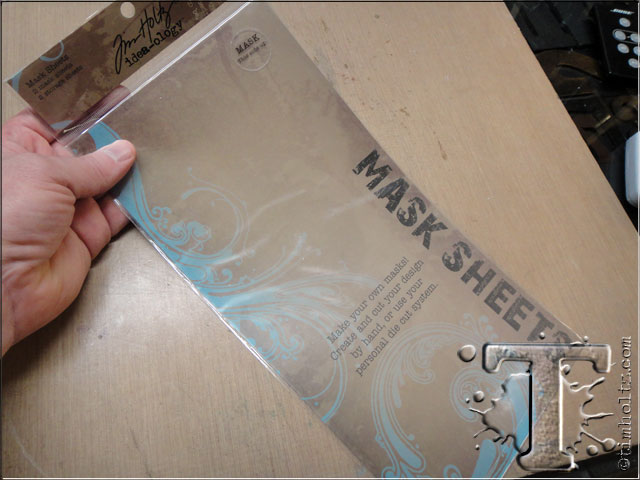 step 9: for the images i want to be the top layer or focal points we need to make a mask of that image. i’m using my mask sheets from idea-ology. these mask sheets are clear acetate with repositionable adhesive backing and completely reusable.
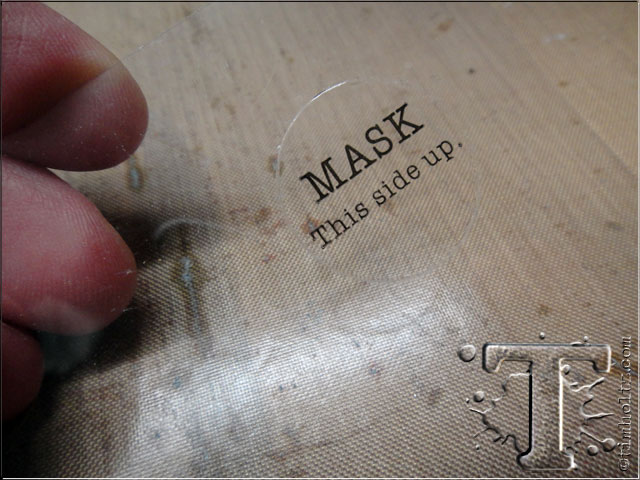 step 10: inside the package there are 4 sheets of clear material. 2 of the sheets are labeled “MASK” and the other 2 are completely clear. the sheets marked “MASK” are the ones we actually use to create the mask. the other ones are the storage sheets for the masks you make. *make sure you stamp on the side that says “MASK THIS SIDE UP”!
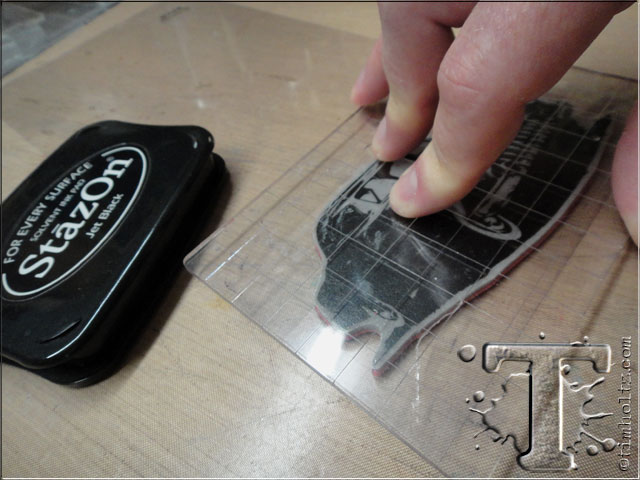 step 11: when stamping on a mask sheet, you need to stamp the images with staz-on ink (insert gasp here). i always use the best ink for the job even if it many not be a ranger ink, and in this case since the mask sheets are an oil based plastic archival ink won’t ever dry.
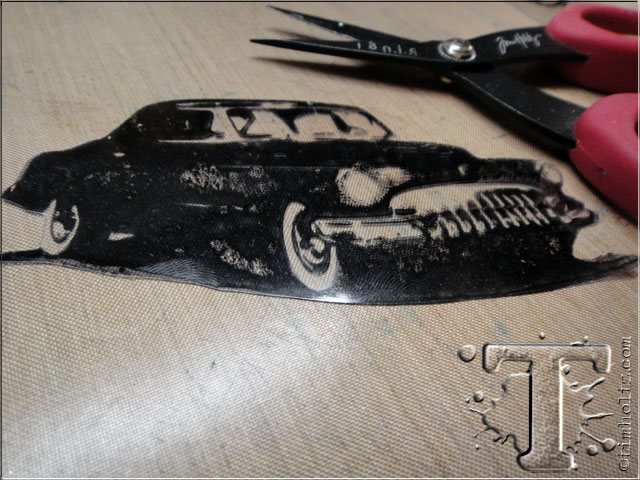 step 12: once the stamped images are dry, cut them out using sharp scissors and be sure to cut on the actual image itself. in other words don’t leave any halo around the image, you need to cut directly on the image edge. if you have stamp2cut you can quickly cut out your masks.
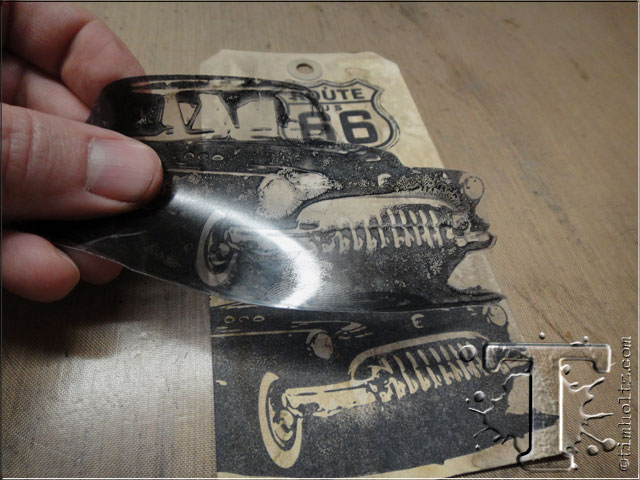
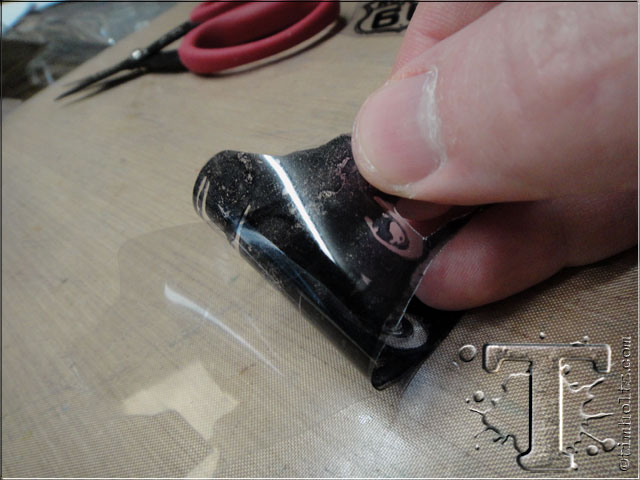 step 13: once your mask is cut out, remove the clear backing. here you will notice the back of the stamped piece is sticky and that is the only piece we need, the back piece can be thrown away.
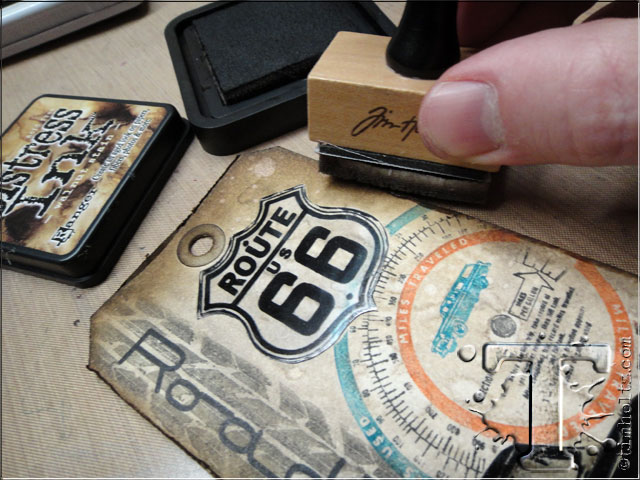
 step 14: stamp you first focal image (top image) on to your tag with archival ink.
 step 15: stamp any additional focal images with archival ink.
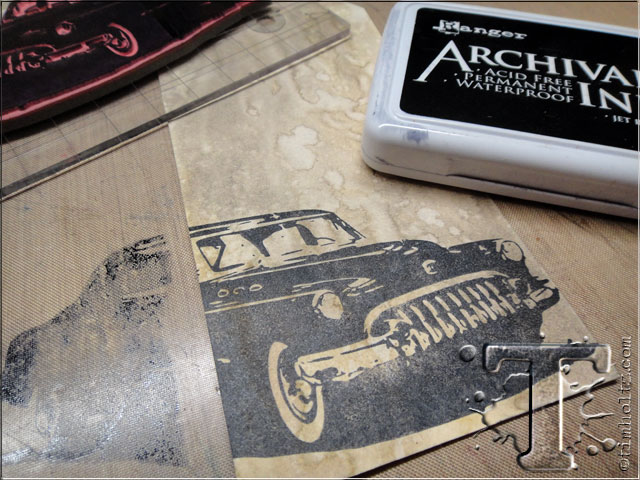
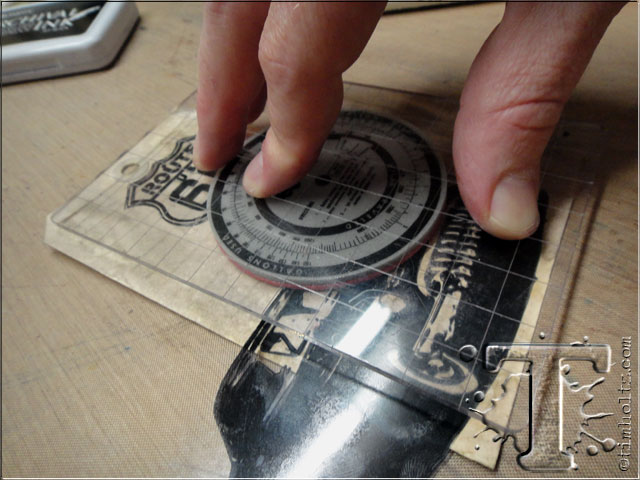
 step 16: place masks directly over both stamped images.
 step 17: the cool thing about the clear masks is you can see to line them up perfectly.
 step 18: next choose the images you want to layer as select the colors of distress markers you want to stamp with (yes stamp with).
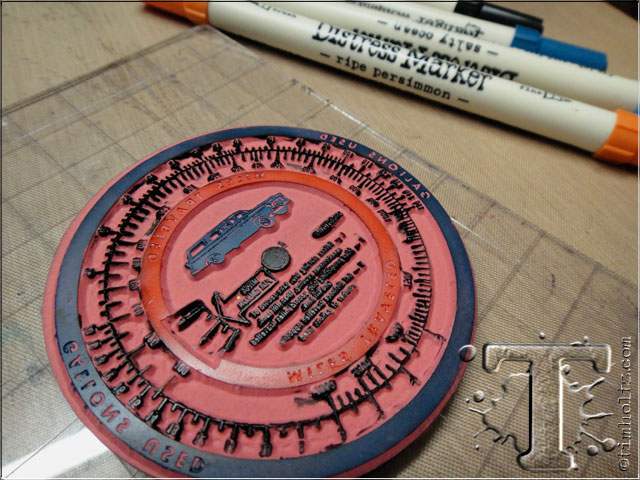
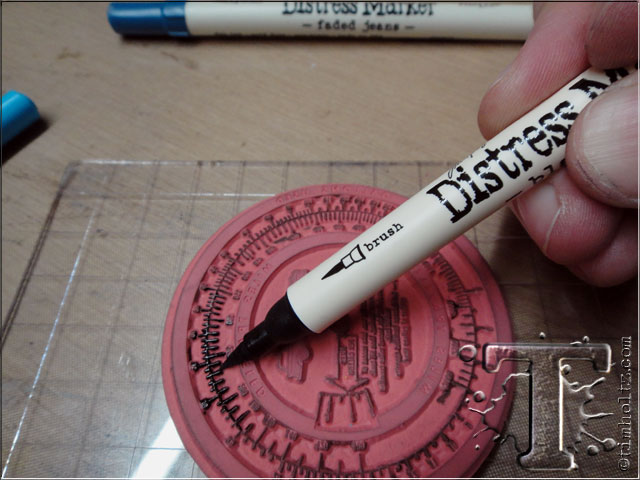 step 19: begin coloring directly on to the stamp using the side of the brush tip end of the distress marker. *note: the brush tip is designed to be flexible, not indestructible, so don’t color using the tip of the marker – use the side. also, if you don’t have distress markers you can also stamp using distress ink pads.
 step 20: repeat with additional colors of distress markers directly on the stamp. you have plenty of time so don’t rush.
 step 21: next “huff” the stamp a few times with warm breath to reactivate the distress markers and stamp on to the tag with good pressure.
 step 22: lift the stamp and see what just happened. since you have the masks over your main images, the stamped layered image won’t overlap and goes to the edges of the masked stamped images – so cool.
 step 23: repeat coloring on any additional stamps with distress markers.
 step 24: stamp the new layered image over the masked main images.
 step 25: continue with any images until the layered look you want is achieved.
 step 26: with masks STILL in place, begin inking portions of the background of the tag with distress ink using an ink blending tool. this will create a contrast between the masked image and the background.
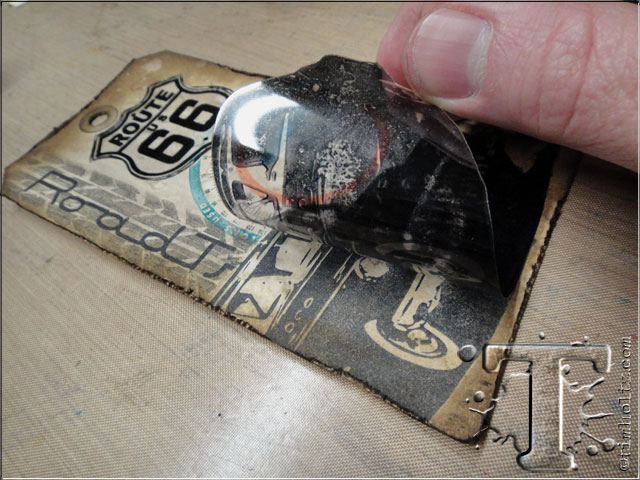 step 27: next carefully remove the mask slowly as we don’t want to rip the paper.
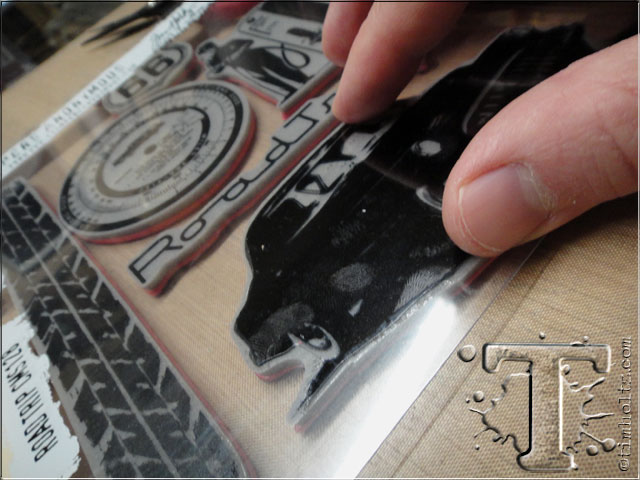 step 28: the clear storage sheets that i mentioned that come with the masks sheets are a great thing to have, but honestly i prefer to store my masks directly on the clear sheets my stamps come on. this way i know what images i have masks for, easily find them, and more importantly can reuse them over and over (much better than creating one from a post-it).
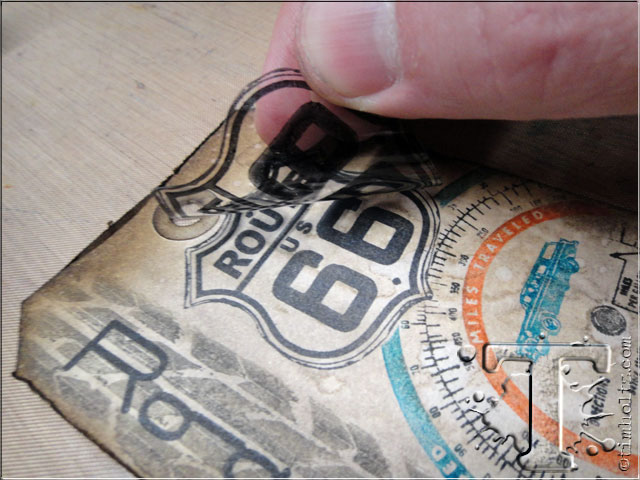 step 29: continue to remove the other masked image.
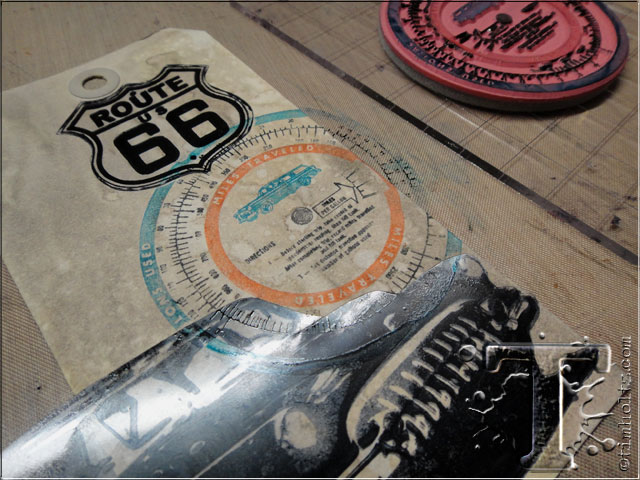
 step 30: check out how dimensional this actually looks. between the over stamping and the inking of the background with the blending tool, this image really pops.
 step 31: drag a paper distresser along the edges of the tag to distress, and ink with the ink blending tool.
 step 32: attach a piece of paper string through the top of the tag to mimic an old travel baggage tag.
 the details: i really love the simplicity and effectiveness of this technique – even more so when people see it and ask “how did you do that” ? they usually try to rub their fingers across the tag expecting to feel additional layers of paper, but we know it’s all smoke and mirrors don’t we?…
since the techniques are all the same as i just shared above, i thought it would still be good to show you photos of the layering process for each one:
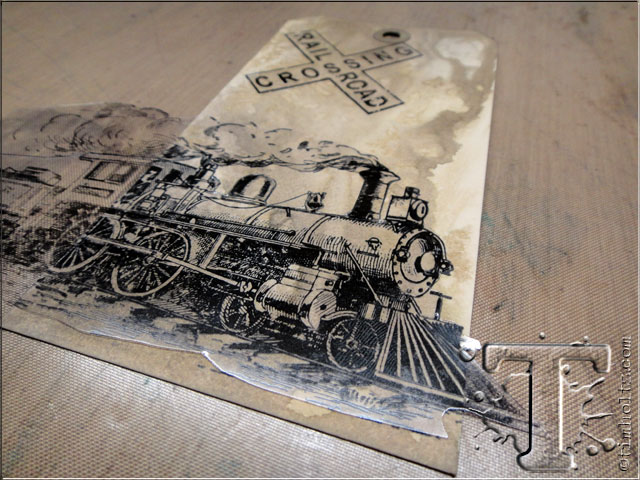
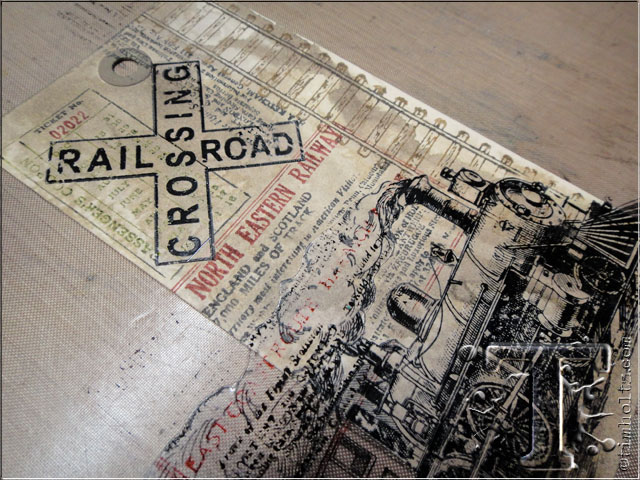
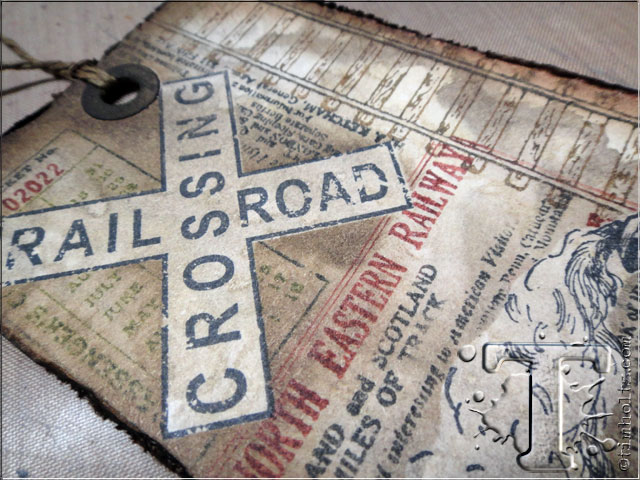
TRAIN TAG:

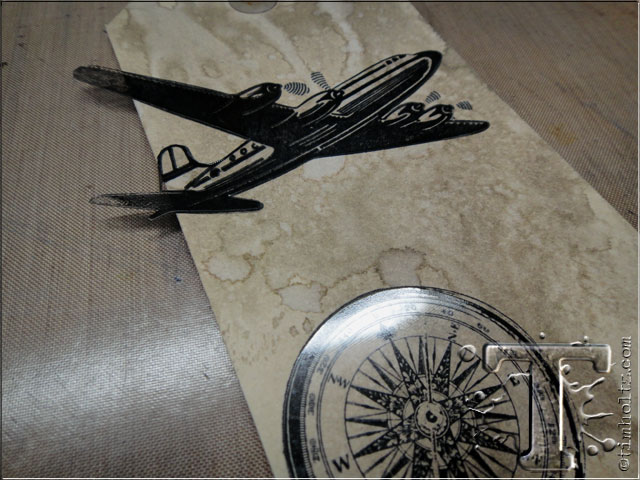
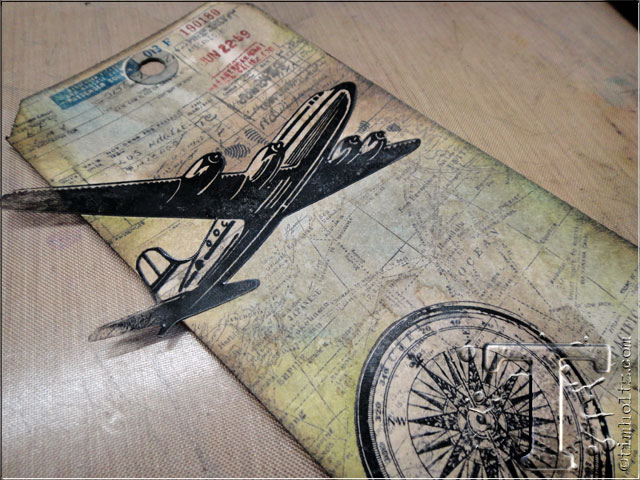
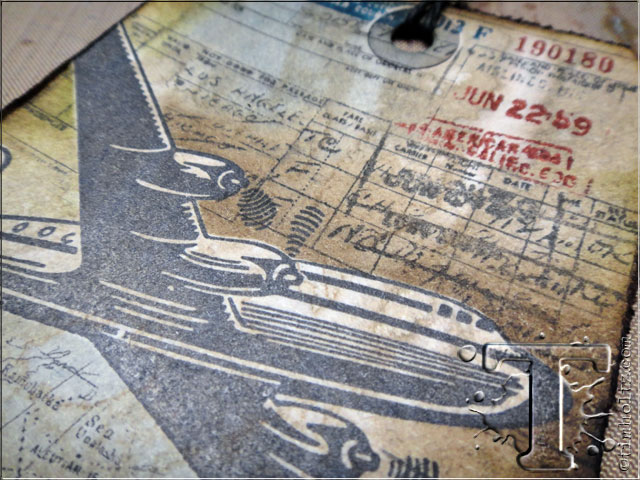
PLANE TAG:

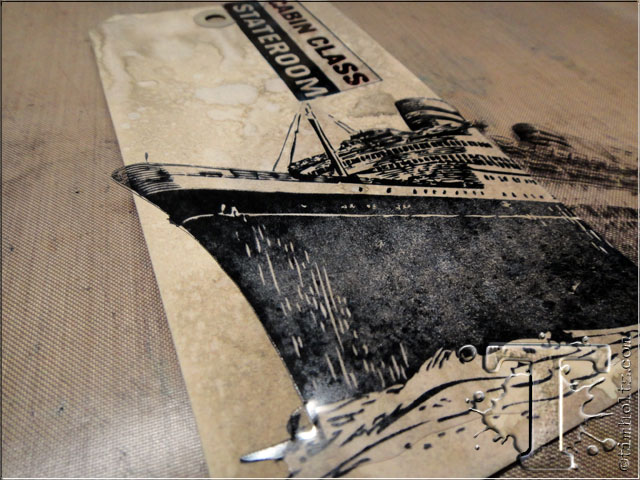
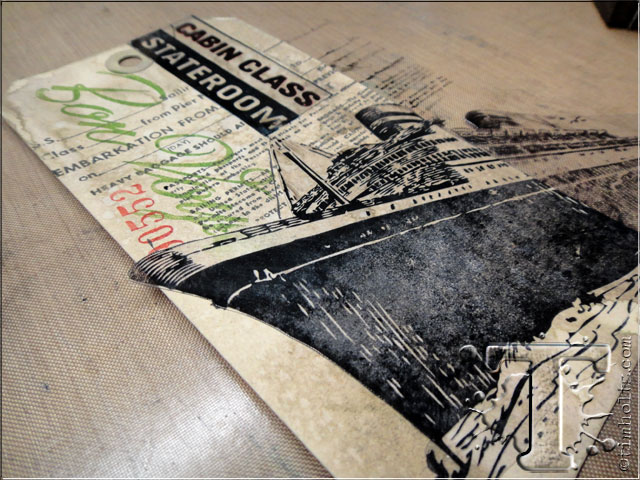
SHIP TAG:

so i hope you give this month’s masking technique a try. in fact i think once you start masking things you won’t be able to stop. you can create masks from any of your stamp images as well as die cut shapes using any steel rule dies or even your electronic cutters. you can ink over them, paint over them, spray over them, just don’t heat over them as they are not heat stable and will melt in a flash (hmmm… how do i know that?). the effects of layering with masks is a fun way to use your various stamps and ink colors you would normally assume wouldn’t all fit together, but with this trick they do. as always, i can’t wait to see what you guys come up with this month – have fun…t!m
congrats to the winners from the july 12 tags of 2013.
if you see your name (and it links to your tag)
please email [email protected] to claim your prize…
1. Maisie Moonshine
2. Alida
3. Shari Trumbull
4. Sarah Engels-Greer
5. Christine Brasacchio
7. Cathy Michaels
8. Katrin
9. Barbara Washington
10. Merete M
11. Silvia
12. Liz B./BfloAnonChick
*be sure to check your local stores for these supplies or you can
click the links below to purchase online…
(SSS=simon says stamp / IE=inspiration emporium)
GREAT NEWS! both of these online stores are offering a discount of 10% off your purchase – use the following codes with your order:
(SSS code: AUGTIM / IE code: timtime)
|
|
|
|
|
|
|
|
|
|
|
|
|
|
|
|
|
|
|


