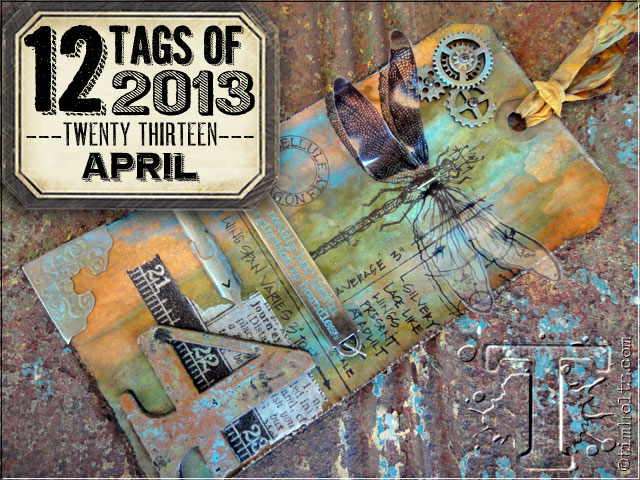
it’s time for the next “12 tags of 2013” and you know each month i have tried to do something a little seasonal with the tag, but this month i decided to take my inspiration from you guys. with the introduction of the new metallic distress paint video i posted, i got numerous comments and requests to learn more about how i created the patina effects. so i thought it was perfect for a 12 tag tutorial on creating the look of patina on a variety of surfaces with distress paint. there are different ways to achieve this look so this tutorial is packed with photos – let’s get going…

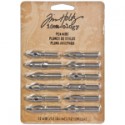
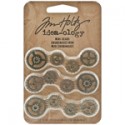
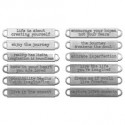
supplies: distress paint/broken china/salty ocean/peeled paint/forest moss/antiqued bronze/tarnished brass, distress ink/walnut stain/rusty hinge/broken china/evergreen bough, distress stain/brushed corduroy, archival ink/jet black, mister, heat tool, craft sheet, multi-medium, #8 manila tag; crinkle ribbon, word bands, pen nibs, metal corners, mini gears, tissue tape/elements, alpha parts/numeric, tiny attacher; paper distresser; clearly for art; scf#001 classic favorites, grid-blocks
 step 1: gather colors of distress paint (including metallics) to create your patina effect.
 step 2: shake distress paint and apply to craft sheet.
 step 3: continue with various colors of distress paint using more metallic than the other colors as shown.
 step 4: mist the paints with water (since distress is reactive with water this will help blend the paints on contact).
 step 5: swipe the tag through the paints.
 step 6: swipe a couple of times until entire surface is covered.
 step 7: mist tag with more water to blend paint colors even more.
 step 8: dry tag using a heat tool – blot any excess paint with a towel.
 *the effect you achieve with distress paint is unlike anything else i’ve ever used before. i love how the colors and metallics marbleize…
 step 9: ink over the entire tag with various colors of distress ink using ink blending tools.
 step 10: flick water on to the inked tag to react the top layer of ink.
 step 11: stand the tag up allowing the water to drip down.
 step 12: dry the wet tag with a heat tool.
 step 13: blot excess water with a towel.
 *now check out what we have. since the distress paint is permanent when dry, the additional layer of ink and water didn’t rewet the base colors creating mud. instead we get this incredible combination of translucent and opaque colors with a realistic patina effect.
 step 14: gather up some metal trinkets. *note: when i’m embellishing a tag i often gather several things i like, but don’t necessarily use them all on the project.
 step 15: apply various colors of distress paint to craft sheet to use as a palette.
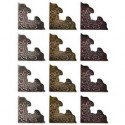
 step 16: using your finger, dab various colors of paint on to the metal surface blending colors.
 step 17: begin drying the paint with a heat tool or allow it to air dry, but don’t dry it completely.
 step 18: while paint is still slightly wet, dab with a dry cloth to remove excess paint and create a worn look.
 step 19: lightly rub over the raised metal areas with your finger to reveal the base metal color.
 *this is the effects you can get on all types of metal embellishments. you don’t always have to create a patina effect, you can also create a colorful or shabby look depending on color choices.
 step 20: remove an alpha part from the matrix using your scissors and snipping it out.
 step 21: trim the excess plastic barbs using your scissors.
 step 22: paint the entire surface with a color of distress paint.
 step 23: paint on additional colors while this layer is wet and shiny.
 step 24: begin drying paint with a heat tool, but do not dry it completely.
 step 25: remove the heat tool frequently when drying the painted plastic to avoid melting the plastic, but to also look at the paint as it dries. the paints become matte so we want to see mostly a matte finish, with a few shiny spots of wet paint before moving to the next step.
 step 26: begin swiping over the surface with a dry cloth. this will remove the paint from the “shiny” areas which is still set, but the rest of the surface where the paint has dried is completely permanent.
 *this effect is so neat looking – it reminds me of worn enameled metals. you could stop at this point, but since we’re going for a patina effect, let’s continue…
 step 27: paint over entire surface with metallic distress paint.
 step 28: dry the surface as before, making sure to leave plenty of “shiny” areas on this layer.
 step 29: wipe over this layer with a dry cloth which will reveal the base colors and partial black areas from the last layer.
 *how cool is this…seriously? this patina technique can be used on a variety of surfaces.
 step 30: drag a paper distresser along the edges of the tag.
 step 31: ink the edges of the tag with distress ink using an ink blending tool.
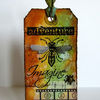
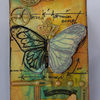
 step 32: stamp image with jet black archival or for a more opaque look stamp with black soot distress paint or even emboss with black embossing powder. (*this is my all time favorite image from the classic stampers anonymous stamps – the artist is michelle ward)
 step 33: dry the image with a heat tool since we’ve stamped over paint.
 step 34: apply a few pieces of tissue tape to the tag.
 step 35: next, stamp the image on a piece of clearly for art using archival ink – this stuff is super neat to work with.
 step 36: chop around the piece, but be careful the ink is still wet.
 step 37: dry the ink with a heat tool. you will notice the clearly for art start to warp, but do not worry, just watch…as it get’s hot is starts to buckle a little, but as you continue to heat, it will become completely flat again – amazing!
 step 38: cut around the wings and the center connection point on the body.
 step 39: secure the wings to the tag using a tiny attacher.
 step 40: now for the magic of clearly for art…heat it again and it will start to soften.
 step 41: immediately shape and lift the wings with your fingers (the material isn’t too hot, but still be careful). allow it to cool which is almost immediately and that’s it! this stuff will stay dimensional even if you try to flatten it. the best part though, if you don’t like it, just reheat it and it will flatten out again, but only with heat.
 step 42: place a word band on the tag and secure it with a tiny attacher through the openings on the ends.
 step 43: swipe distress paint on to craft sheet.
 step 44: drag a piece of crinkle ribbon through the paint applying color in random areas, but do not cover the entire ribbon with paint!
 step 45: immediately swipe over the ribbon with distress stain (the paint acts as a resist).
 step 46: mist the ribbon with water to blend the stain and paint a little.
 step 47: crinkle the ribbon into a ball and dry with a heat tool or let air dry and add to the tag.
 step 48: open up the ribbon to make sure it’s dry completely – great colors.
 the details: check out that patina ribbon – love the colors…
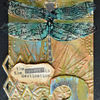
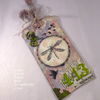
 the details: those clearly for art wings give this tag such dimension. adhere various embellishments to the tag using multi-medium, brads, or other fasteners as needed…
 the details: my favorite, the patina effect on these plastic alpha parts. i’ve actually done this technique to an entire sheet of alphabets at once to use on my projects. so awesome…
i sure hope you give these techniques a try this month. now i know the metallic distress paints just got released, but not to worry you have an entire month to get them and still make something to submit for our monthly 12 tag challenge. i hope you also try experimenting with different color combinations as the effects you can get using the distress paint are simply incredible. also remember to try adding layers of distress ink or distress stain over dry distress paint and then rewet the top layer (can you tell this is one of my new favorite techniques to do?).
have a creative time, i sure did…t!m
congrats to the winners from the march 12 tags of 2013.
if you see your name (and it links to your tag)
please email mario@timholtz.com to claim your prize…
1. Lotte Lustig
2. Cathy Michels
3. Annie G
4. Tracey A. in NH
5. Heidi
6. Sylvia
7. ElenaB
8. Anja
9. Larissa Heskett
10. Karen K
11. Patty
12. Kirstin Crossland
*be sure to check your local stores for these supplies or you can
click the links below to purchase online…
 |  | ||
 |  |  |  |
 |  |  | |
 | |||
 |  | ||
 |  |  | |
 |  |
UPLOAD YOUR PROJECT: here's the place to share your own project
inspired by this month's "12 tags of 2013" right here on my blog!
To Get Started:
1. click on the (add your link) button at the bottom of the post.
2. after you enter your info, click (next step) and you'll be able to
select the photo you wish to display.
*note: you may link from your blog or from a public hosting site.
please only post your project photo relating to this month's tag.
 |  |  |  |
 |  |  |  |
 |  |  |  |
 |  |  |  |
 |  |  |  |
 |  |  |  |
 |  |  |  |
 |  |  |  |
 |  |  |  |
 |  |  |  |
 |  |  |  |
 |  |  |  |
 |  |  |  |
 |  |  |  |
 |  |  |  |
 |  |  |  |
 |  |  |  |
 |  |  |  |
 |  |  |  |
 |  |  |  |
 |  |  |  |
 |  |  |  |
 |  |  |  |
 |  |  |  |
 |  |  |  |
 |  |  |  |
 |  |  |  |
 |  |  |  |
 |  |  |  |
 |  |  |  |
 |  |  |  |
 |  |  |  |
 |  |  |  |
 |  |  |  |
 |  |  |  |
 |  |  |  |
 |  |  |  |
 |  |  |  |
 |  |  |  |
 |  |  |  |
 |  |  |  |
 |  |  |  |
 |  |  |  |
 |  |  |  |
 |  |  |  |
 |  |  |  |
 |  |  |  |
 |  |  |  |
 |  |  |  |
 |  |  |  |
 |  |  |  |
 |  |  |  |
 |  |  |  |
 |  |  |  |
 |  |  |  |
 |  |  |  |
 |  |  |  |
 |  |  |  |
 |  |  |  |
 |  |  |  |
 |  |  |  |
 |  |  |  |
 |  |  |  |
 |  |  |  |
 |  |  |  |
 |  |  |  |
 |  |  |  |


