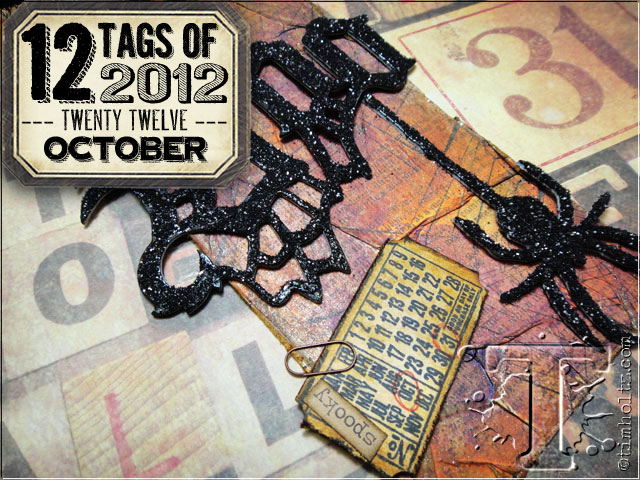
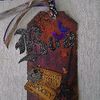
well it’s great to be back in the studio and creating this month’s tag. i’ll be honest though, i enjoyed a little down time at disney in florida this past week so i appreciate your understanding on the blog about the late tag. a good thing though is this tag has some cool techniques that were inspired by a recent workshop i taught at the trade show florida last weekend, so it just goes to show that techniques can be used on just about any type of project whether it’s tags, cards, scrapbook pages, or home decor. also, in addition to the october tag we have some winners of the 12 distress colors as well as the winners for last month’s tag that are listed at the end of today’s blog post. so let’s get right to it…
supplies: craft sheet, distress ink/spiced marmalade/ripe persimmon/black soot, distress stain/spiced marmalade, paint dabbers/sunset orange/purple twilight/pitch black, archival ink/jet black, perfect pearls mist/heirloom gold, glossy accents, ink blending tool, heat tool, alcohol ink/pitch black, rock candy distress stickles dry glitter, #8 manila tag, collage glue stick; grungeboard, crinkle ribbon, tinsel twine, mini clip, tissue wrap, seasonal chit chat stickers; stamps/CMS100/CMS139; dies/candlelight fright/gothic boo/ticket strip; scissors; cup, craft stick, baby wipe
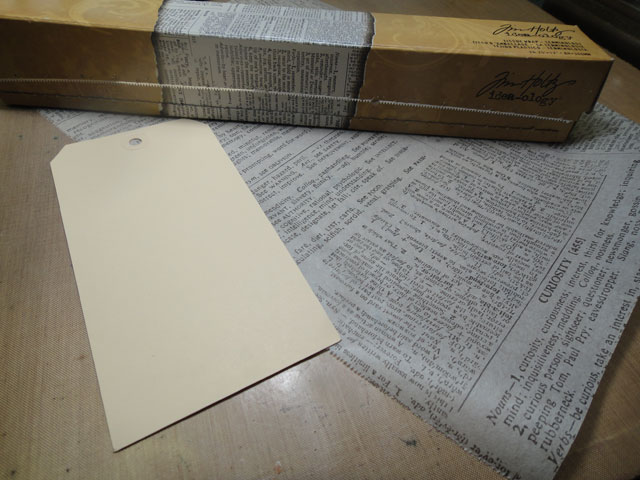 1. begin with a piece of tissue wrap slightly larger than your tag size.
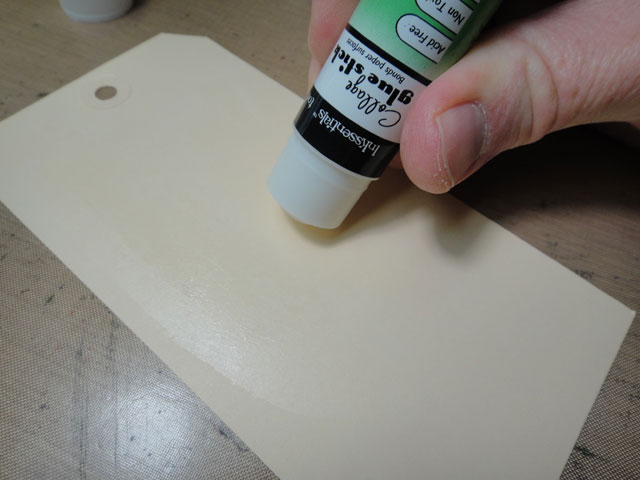 2. apply a generous layer of adhesive to the tag using a collage glue stick being sure to cover the entire area.
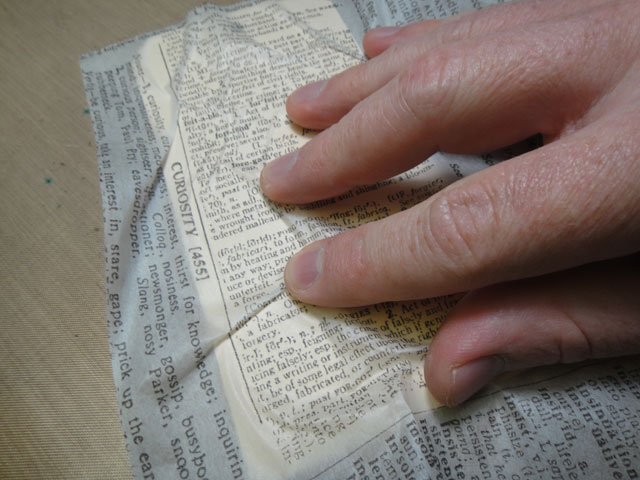 3. place tissue wrap on to adhesive covered tag and immediately begin to gather and wrinkle paper on tag.
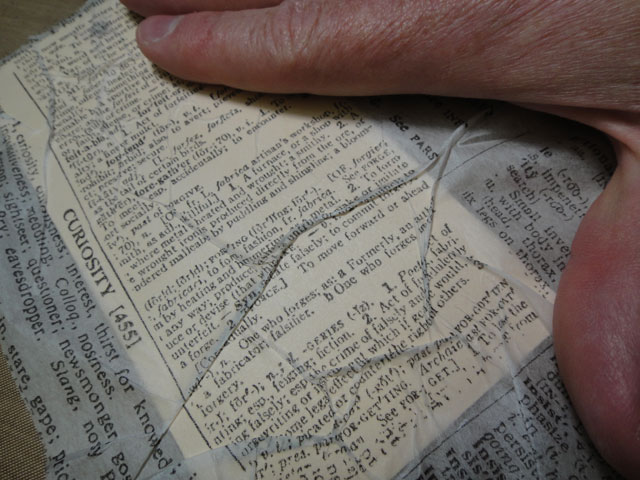 4. press down on tissue wrap until desired look is achieved.
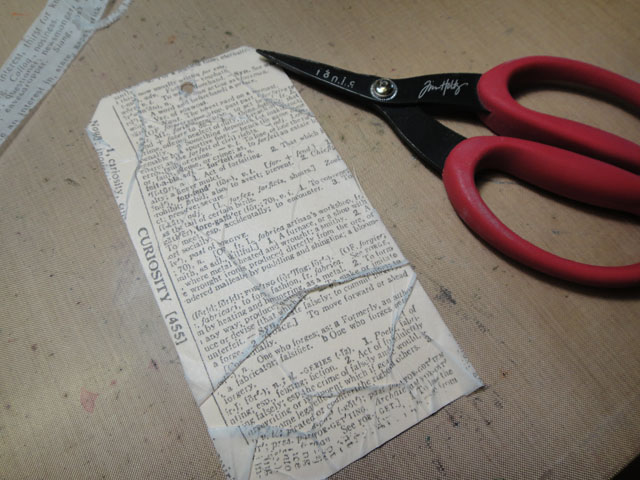 5. trim excess tissue wrap from tag and re-pierce hole in top of tag with point of scissors.
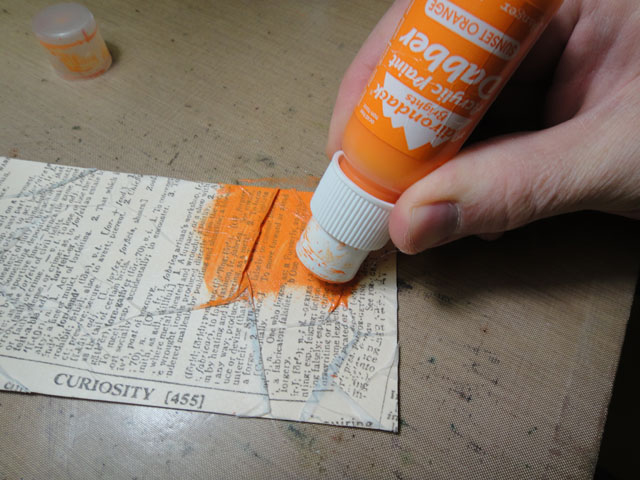 6. apply a single color of paint dabber to one area of the tag.
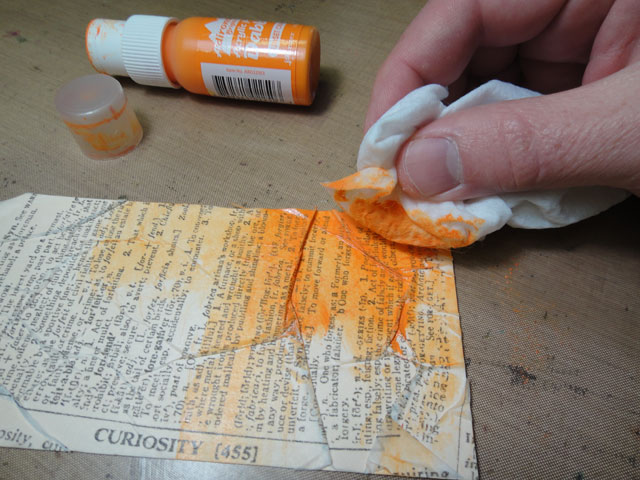 7. using baby wipe, begin to swipe and blend color over tissue wrap.
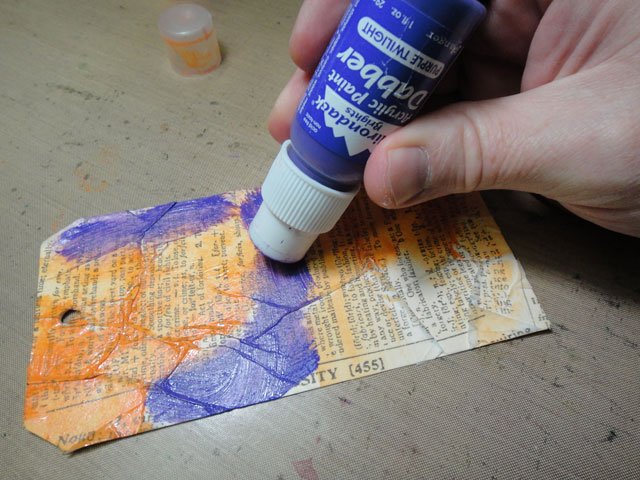 8. repeat with additional color of paint dabber.
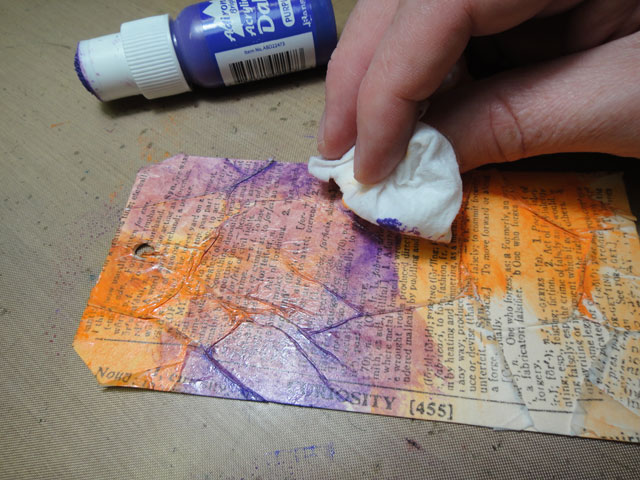 9. continue to blend with clean area of baby wipe.
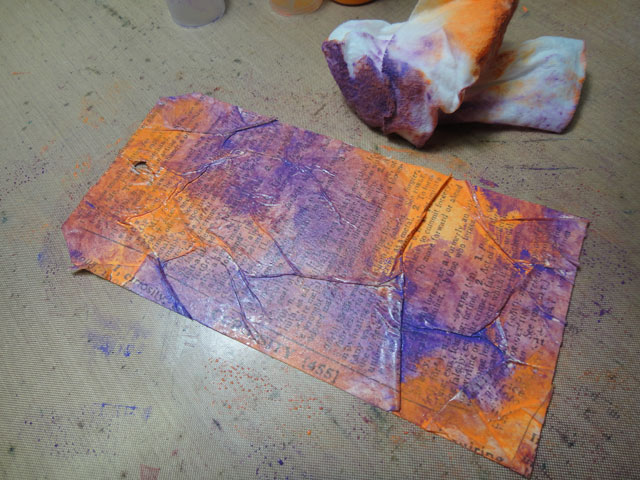 10. repeat previous steps with paint color until desired look is achieved. *note: the tissue wrap works best for this technique as the paper doesn’t fall apart from the wet baby wipe and the colors become translucent. old book pages are often too porous for this technique.
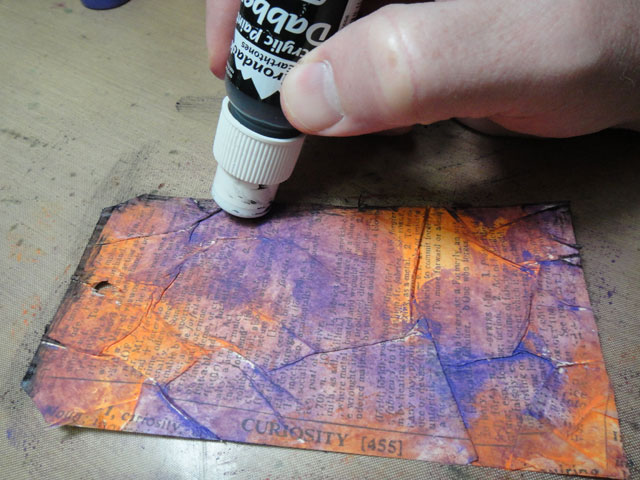 11. lightly swipe black paint dabber along outside edges of tag.
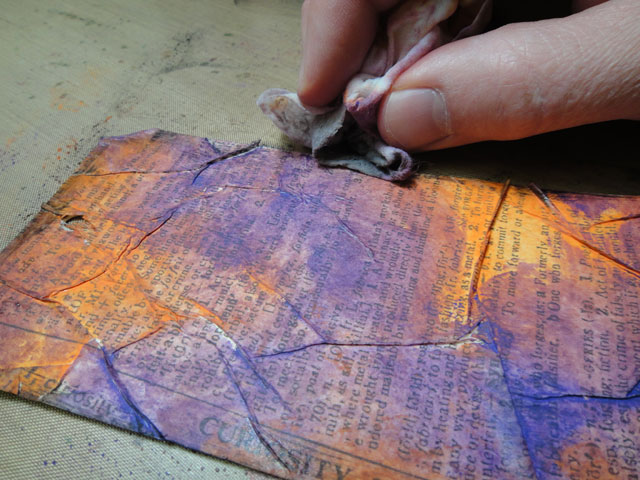 12. swipe edges with baby wipe creating a shadow outline around tag.
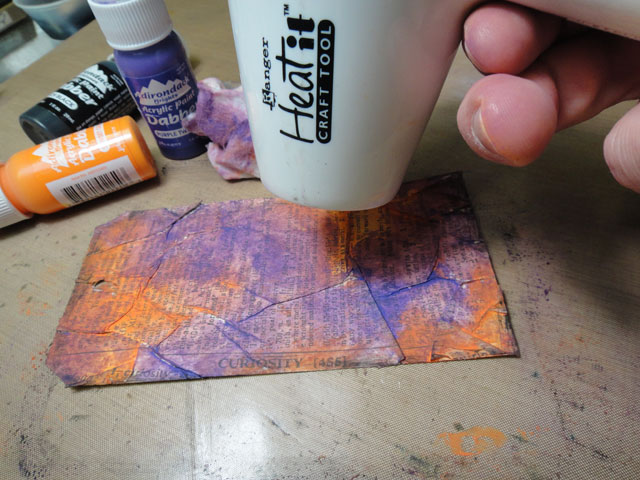 13. completely dry tag with heat tool.
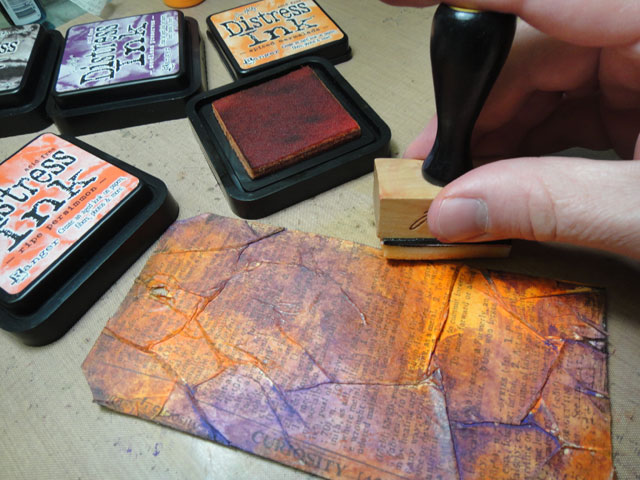 14. ink tag with various colors of distress ink using ink blending tool. notice how the translucent colors of the ink highlight the wrinkles in the tissue wrap.
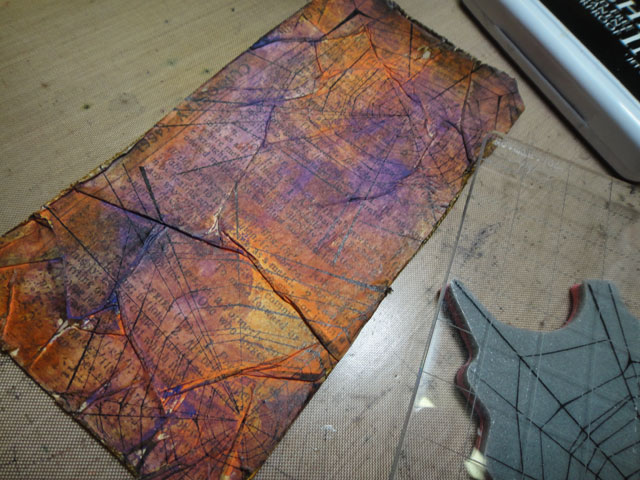 15. stamp the cobwebs over the background using jet black archival ink and let dry.
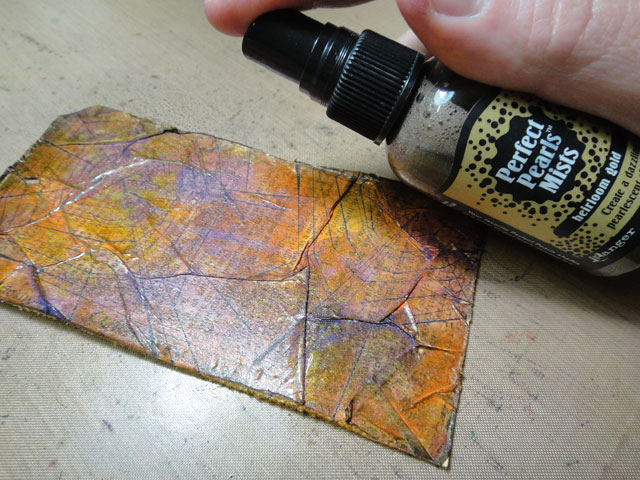 16. lightly mist tag with perfect pearls mist and blot off excess with dry paper towel until tag is dry.
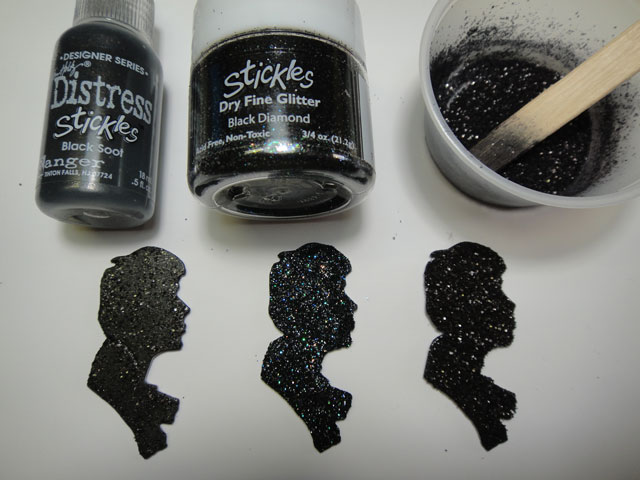 *one of my favorite things to create is custom colored rock candy distress stickles dry glitter since this glitter contains random particle sizes (fine, regular, and chunky). he best part of colorizing my own is unlike traditional colored glitters which are all opaque, coloring rock candy with alcohol inks will create translucent colored glitter giving a more dimensional and sparkly effect. check out the comparison i made using distress stickles in black soot (subtle shimmer), stickles dry glitter (very blingy), and colorized rock candy (chunky vintage sparkle goodness). it’s easy to make your own small batches and here’s how:
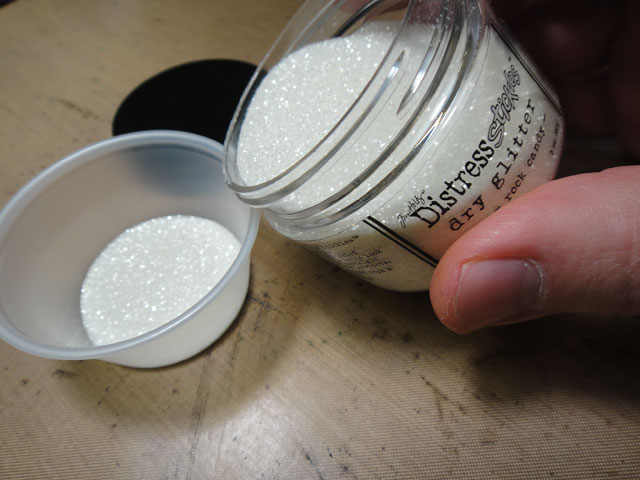 17. to create custom color of rock candy distress stickles, pour a small amount of dry glitter into a disposable cup.
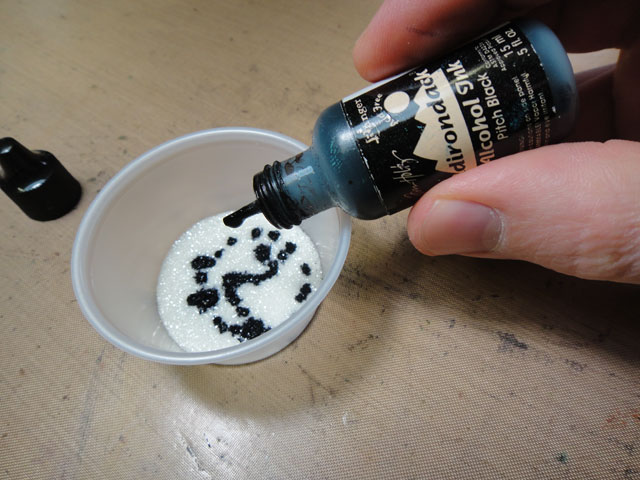 18. apply several droplets of color of alcohol ink into cup.
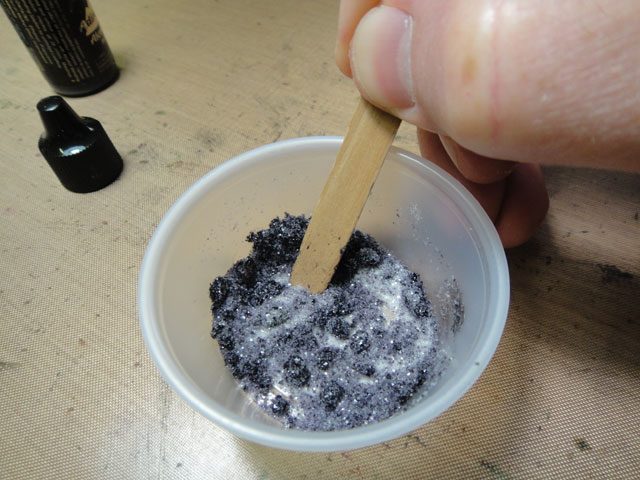 19. using a craft stick, begin to mix the glitter up – don’t panic. the glitter will begin to clump up, but simply keep mixing and add more color if needed.
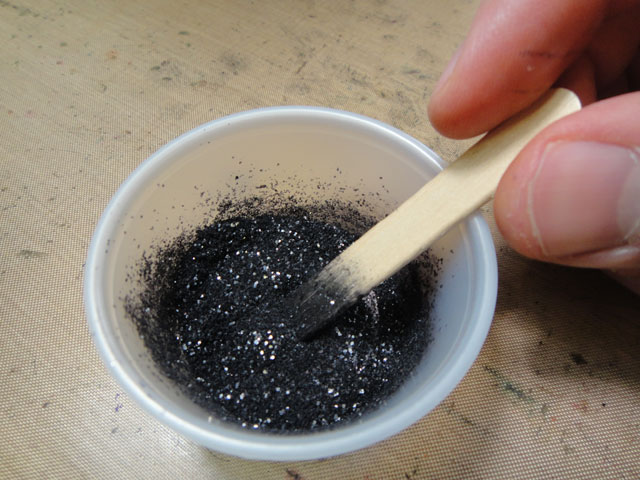 20. once desired tone is achieved, set aside for a few minutes for the alcohol to flash off and then mix one final time to create a perfect colorized dry glitter – amazing!
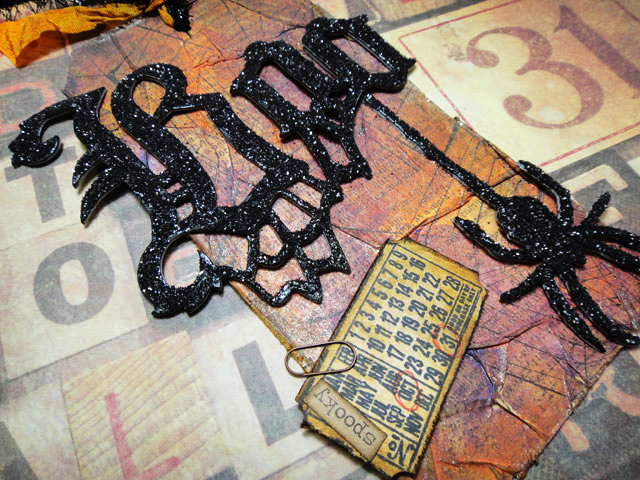
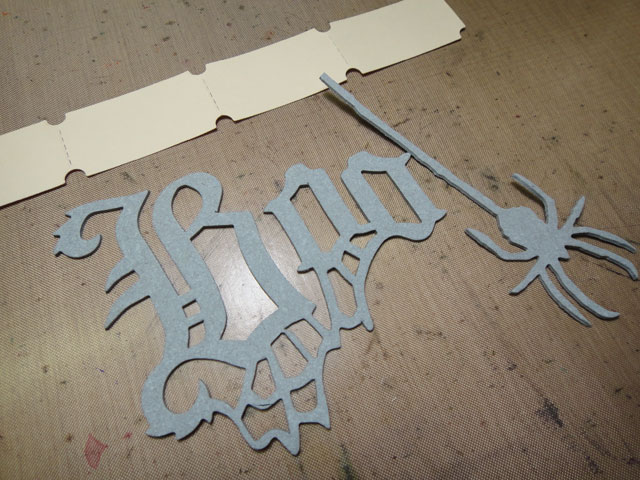 21. die cut boo and spider elements from grungeboard and ticket from manila scrap.
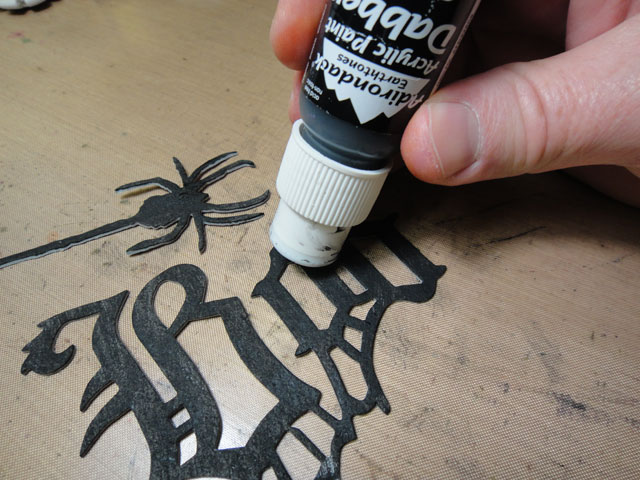 22. paint over one side of grunge piece with a light layer of black paint and let dry.
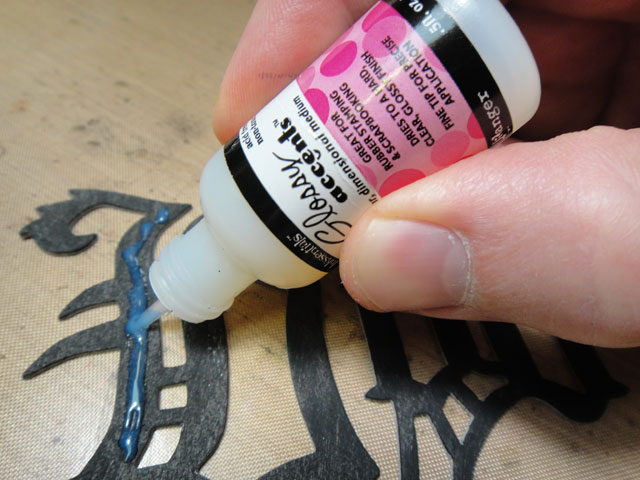 23. apply glossy accents over painted grunge.
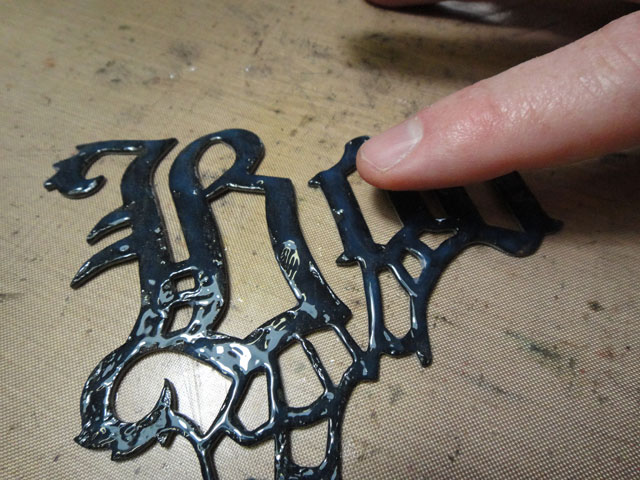 24. spread out a wet layer of glossy accents with your finger until completely covered and most importantly wet.
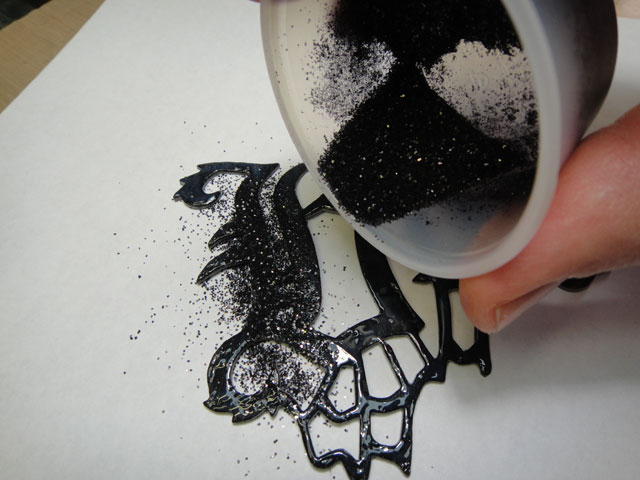 25. place grunge on to scrap paper and pour colorized rock candy over shape.
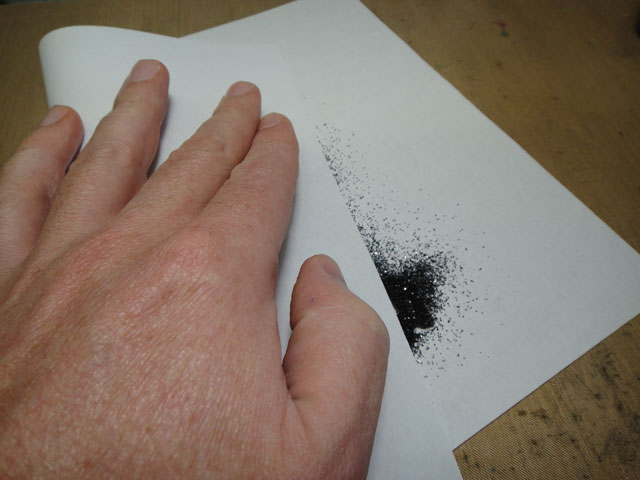 26. fold up scrap paper allowing you to press the glitter into the wet glossy accents without getting glitter all over your hands.
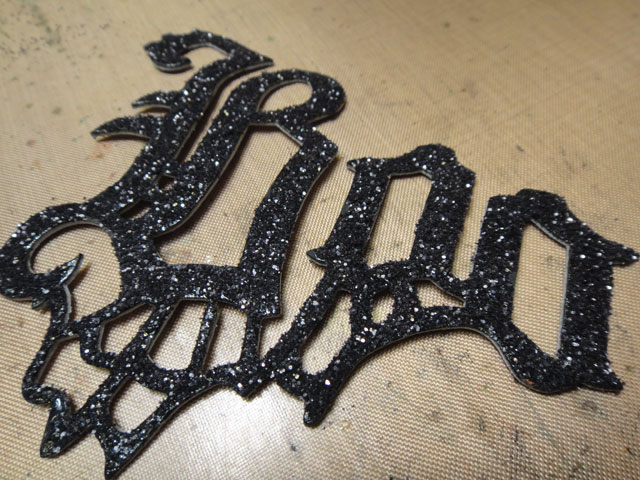 27. open scrap paper and remove glittered grunge lightly tapping off excess. set aside to dry completely for about 5 minutes.
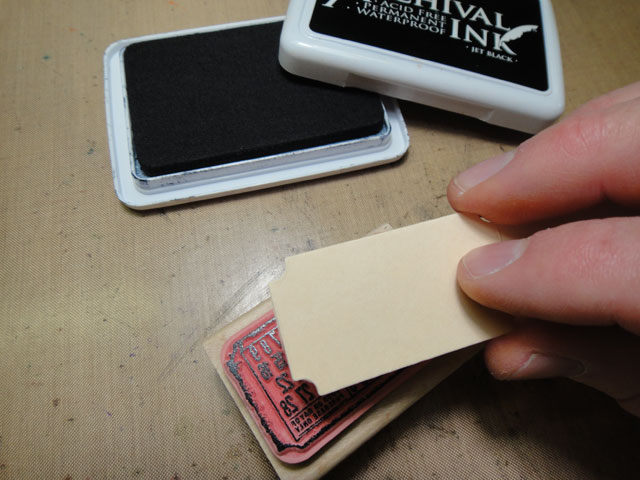 28. stamp die cut ticket on to ticket stamp with archival ink by pressing ticket on to stamp.
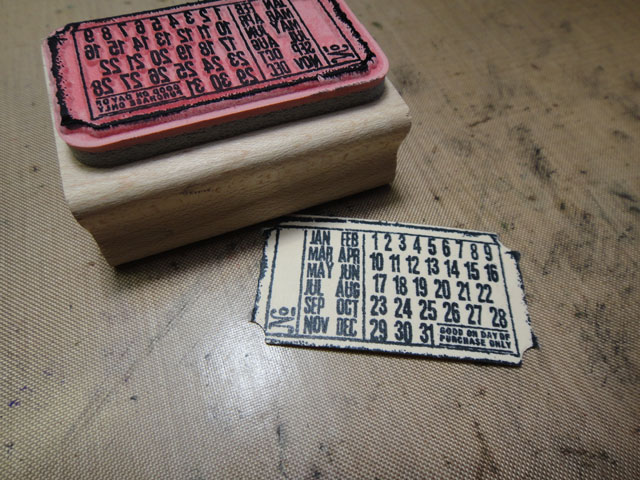 *the ticket die and ticket stamps are designed to work together creating an off-register effect (they are not designed to be a perfect fit, nor are the designed to stamp within the border of the die cut shape – it looks more authentic this way).
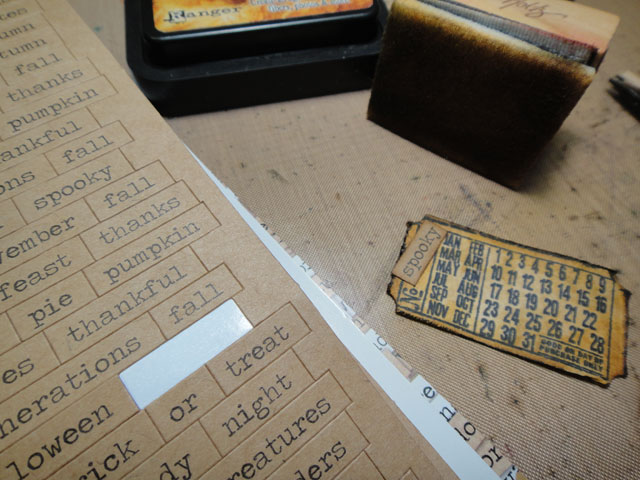 29. ink the ticket with distress ink using ink blending tool, and select a word from the NEW seasonal chit chat stickers and ink the edge and adhere.
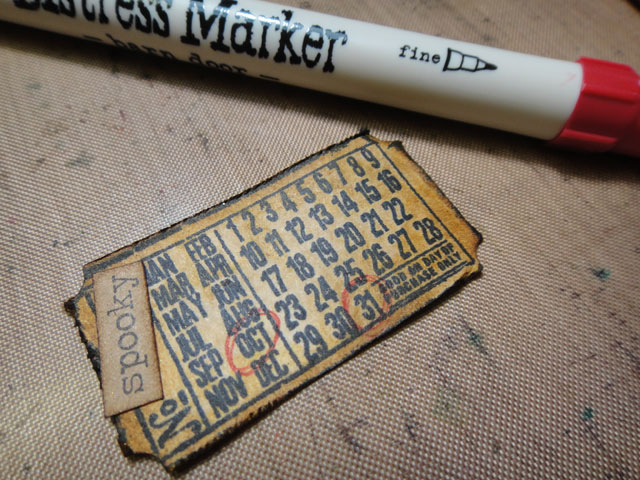 30. circle “oct 31” on the ticket using a marker.
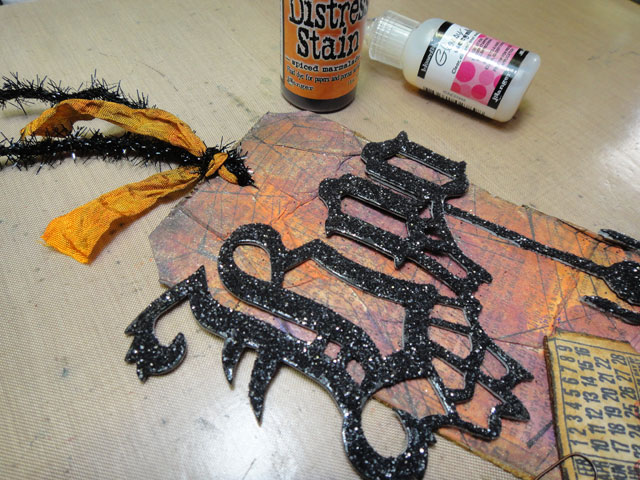 31. adhere all elements to tag with glossy accents and tie on colorized crinkle ribbon and black tinsel twine. clip on ticket and you’re all done.
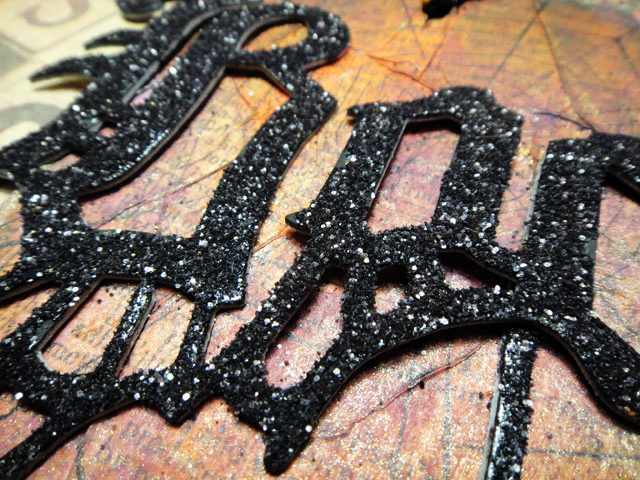 the details: the dimensional and vintage sparkle of custom coloring rock candy distress stickles dry glitter is so cool.
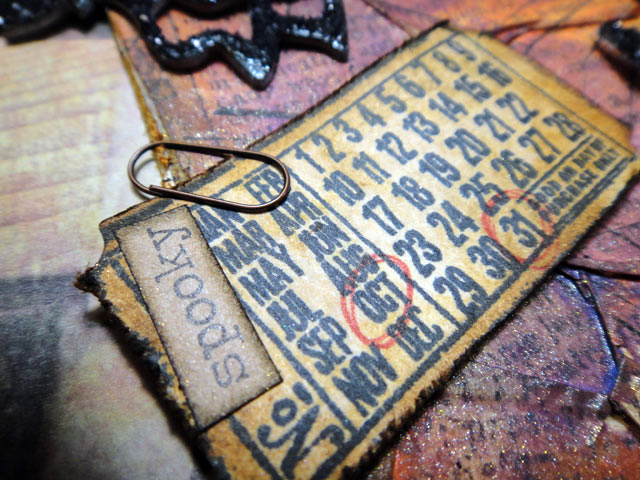 the details: i love using this calendar ticket stamp for all holidays, birthdays, etc. – simple and perfect.
what can i say, i just love halloween time so i have a feeling there will be another project or two appearing on the blog throughout the month. i’m also loving the candy lining the store shelves (i know, i know, it’s bad, but oh so good…). i hope you learned a few ideas from this month’s tag and i can’t wait to see what spooky, frightful, and possibly wicked project ideas you all share here too. happy crafting…t!m
so let’s start with the 3 winners of 12 distress ink pads that are now a permanent part of the distress palette. thanks for sharing in the excitement! if you see your name and comment posted, please email mario@timholtz.com with your shipping info to claim your prize.
1. Creatique Candy says: I’m sooo excited about the news! I missed out on the Autumn ones that were released but have managed to get my hands on the Spring and Summer colors and had so much FUN blending and creating stunning heARTistry with them. Thank you t!m & Ranger for releasing these as apart of the color pallet. I’m in love with Salty Ocean mixed with Peacock just fabulous hues.
2. Patsy says: T!m, I love the hot pink. It’s also my 5 year old niece’s favorite as well. She’s my little craft partner, she loves to blend the colors, and who by the way has the other half of my craft table. Patsy (Anchorage, Alaska)
3. Cyndi Elliott says: Broken China has to be my most favorite color! and then of course there’s Shabby Shutters and Seedless Preserves…. It’s just too hard to pick one.
————————————————–
also congrats to the winners from september 12 tags of 2012 gallery posts. if you see your name below and it links to your tag, please contact mario@timholtz.com to claim your prize!
1. lisa a mares
2. Theresa
3. Nadia
4. Merete M
6. Jane Tate
8. Kate
9. Lucki
10. Barbarayaya
11. monique
12. Anita Houston
*be sure to check your local stores for these supplies or you can
click the links below to purchase online…
(SSS=simon says stamp / IE=inspiration emporium)
GREAT NEWS! both of these online stores are offering a discount of 10% off your purchase – use the following codes with your order:
(SSS code: THOCT10 / IE code: timtime)
|
|
|
|
|
|
|
|
|
|
|
|
|
|
|
|
|
|
|
|
|
|
|
|
|
|
|
UPLOAD YOUR PROJECT: here's the place to share your own project inspired by this month's "12 tags of 2012" right here on my blog!
To Get Started:
1. clock on the (add your link) button at the bottom of the post.
2. after you enter your info, click (next step) and you'll be able to select the photo you wish to display as a thumbnail.
*note: you may link from your blog or from a public hosting site.
please only post your project photo which will appear in random order so be sure to upload it only once - thanks.
| | | | |
| | | | |
| | | | |
| | | | |
| | | | |
| | | | |
| | | | |
| | | | |
| | | | |
| | | | |
| | | | |
| | | | |
| | | | |
| | | | |
| | | | |
| | | | |
| | | | |
| | | | |
| | | | |
| | | | |
| | | | |
| | | | |
| | | | |
| | | | |
| | | | |
| | | | |
| | | | |
| | | | |
| | | | |
| | | | |
| | | | |
| | | | |
| | | | |
| | | | |
| | | | |
| | | | |
| | | | |
| | | | |
| | | | |
| | | | |
| | | | |
| | | | |
| | | | |
| | | | |
| | | | |
| | | | |
| | |
